Showing posts with label Essie. Show all posts

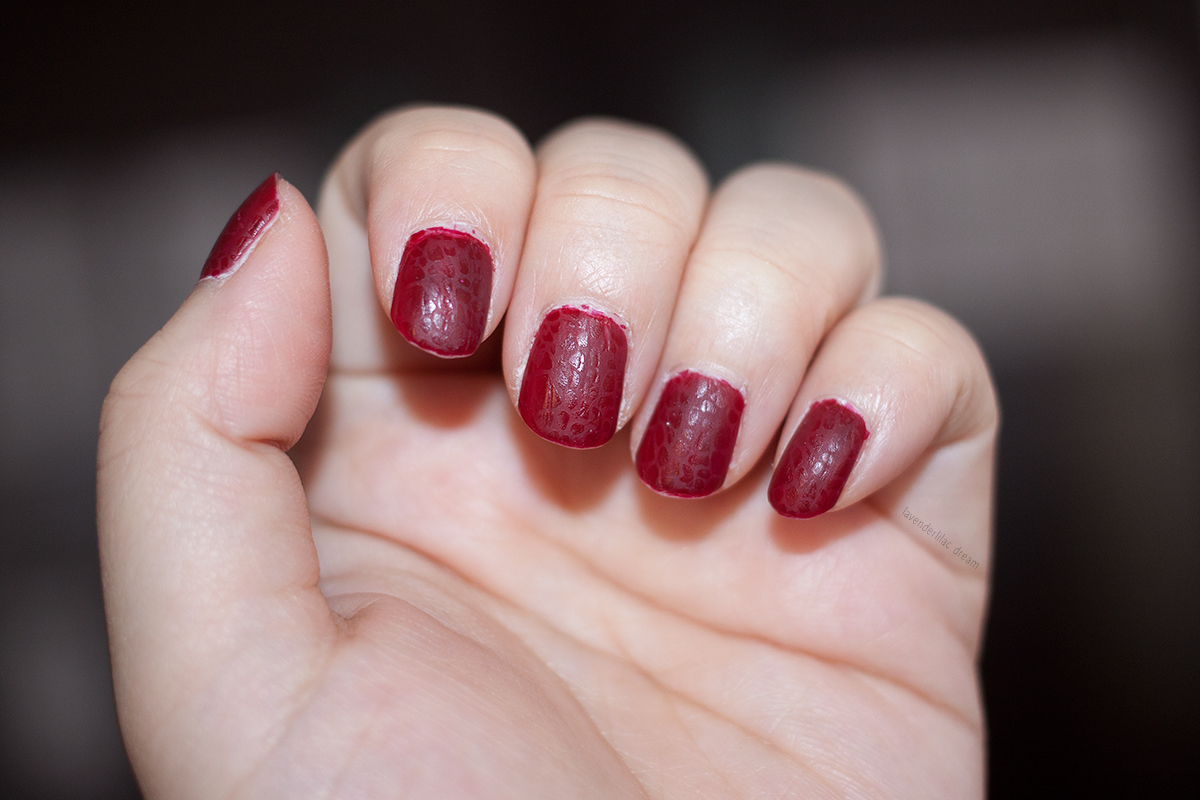
Red Texture Nails - Not the typical matte look

Can't believe it's been almost a year since my last nail post! Truth be told it took my nails this long to heal from all of last year's experiments. Yes, they were that weak for that long (unfortunately).

Now that my nails have shown improvement, I have been a little over excited to try new designs or just have them painted in general. Bad move for the next few months? Probably...
sally hansen 610 red zin essie matte about you shiny stamping plate sh225

I haven't done anything matte in such a long time. I have seen these not-quite-all-matte designs floating around the internet here and there before. It was an easy decision for me to incorporate my nail stamping kit into this experiment since I just didn't feel like cutting up strips of tape at 11PM. (Late-night nails session at it's finest.)

sally hansen 610 red zin essie matte about you shiny stamping plate sh225

I started the process with a layer of OPI's Base Coat, then 2 light coats of Sally Hansen's 610 Red Zin, and 1 coat of Essie's Matte About You.

sally hansen 610 red zin essie matte about you shiny stamping plate sh225

After going through the different image plates on hand and choosing a design, I used the same red polish to stamp the image onto each nail. I am nowhere near perfecting the nail stamping technique but I am much better at it than when I first got them. Definitely something that takes some practicing.

sally hansen 610 red zin essie matte about you shiny stamping plate sh225
Close up of the texturing created

It is difficult to see without really taking a close look but hey it is still atypical. It isn't just all shiny or all matte. The mix of the two makes it a little more interesting, at least I like to think it is. The only negative to this whole matte thing is having to forgo a top coat. The edges of my nails are already starting to lose polish.

Does anyone have any tips for making matte designs last longer or is this something that just can't be avoided?

Dolly Wink Inspired Nails - French Manicure

After a few months of having naked nails, mine finally recovered from their weak and brittle state. I wish having my nails all pretty didn't come at such a cost! Or maybe I just need to take extra care of them if I want to paint them? What do you think? Anyways...! I couldn't wait to play around with nail polishes! I was even able to do swatches and take photos for 3 polishes and try a nail tutorial.


I've done this particular Dolly Wink french mani tutorial a couple of times in the past but that must have been a good year or so ago. Back then I followed the tutorial from I Love Nail Polish and I was kind of successful. The problems I had then were the same I had this time as well.

The most difficult of course was doing the French tip portion. Normally I would have used tape to get a perfect tip but with this particular curvy styled tape is out of the question. But I think that a little bit of practice could help get it perfect!

Here I used Essie Mademoiselle for the base and Essie Marshmallow for the tips.


Marshmallow is a very tricky polish to use. Too light a coat it'll be sheer and streaky like above. I found that putting on a second layer of the white doesn't look very good either.

Mademoiselle on the other hand is a lovely sheer and natural pink shade. It isn't anything special on its own and looks as you have nothing on...probably best for those who work in a more conservative setting but still want something on their nails. But it makes a great base for a french manicure. For these attempts I only put on one coat of Mademoiselle.


Since the first attempt didn't look too hot, I decided to redo it (ahh the perfectionist in me...!). This time I tried to use a thicker coat of white to do the tip and made sure not to touch it again after I applied. This way there is a thicker layer but as the polish dries down it does get flatter and won't have the streaks and patches like before. I used a dotting tool for the dots, but I think that toothpicks may work as well!

Does anyone have any tips to perfect this look even more? Are there any tutorials you've been eyeing to try?

Swatch: OPI Last Friday Night

In an effort to clear my Drafted Posts list...here is another nail polish swatch for everyone!

Remember this swatch?


Since I already shared how OPI's Last Friday Night is over a blue polish, here it is over white.


Please excuse the mishap on my pointer finger!

I used Essie Marshmallow as the white base. I think I used about 2-3 layers to build the white up. I don't really recommend it unless you have a lot of time to wait for the layers to dry. Marshmallow applies rather sheer and streaky. (Works better for a French tip mani though!) I think I used about 2-3 layers to build the white up.

The effect of Last Friday Night and a white polish is much softer and not as bold. I actually prefer this combo over the former one, just personal preference.

I would love to wear Last Friday Night with another white though...the hunt continues!

Any suggestions?

Swatch: Essie Chinchilly

My first nail polish that is out of my comfort zone color (purples..pinks..)!

It’s described on the Essie site as “a sleek granite gray”.

To me it looks a bit like gray, brown, and a little bit of purple mixed together.


Taken with natural light & flash


Taken with natural light & no flash


Taken with artificial light & flash


Taken with artificial light & no flash