Showing posts with label Organization. Show all posts

Customized | Hairpin Desk

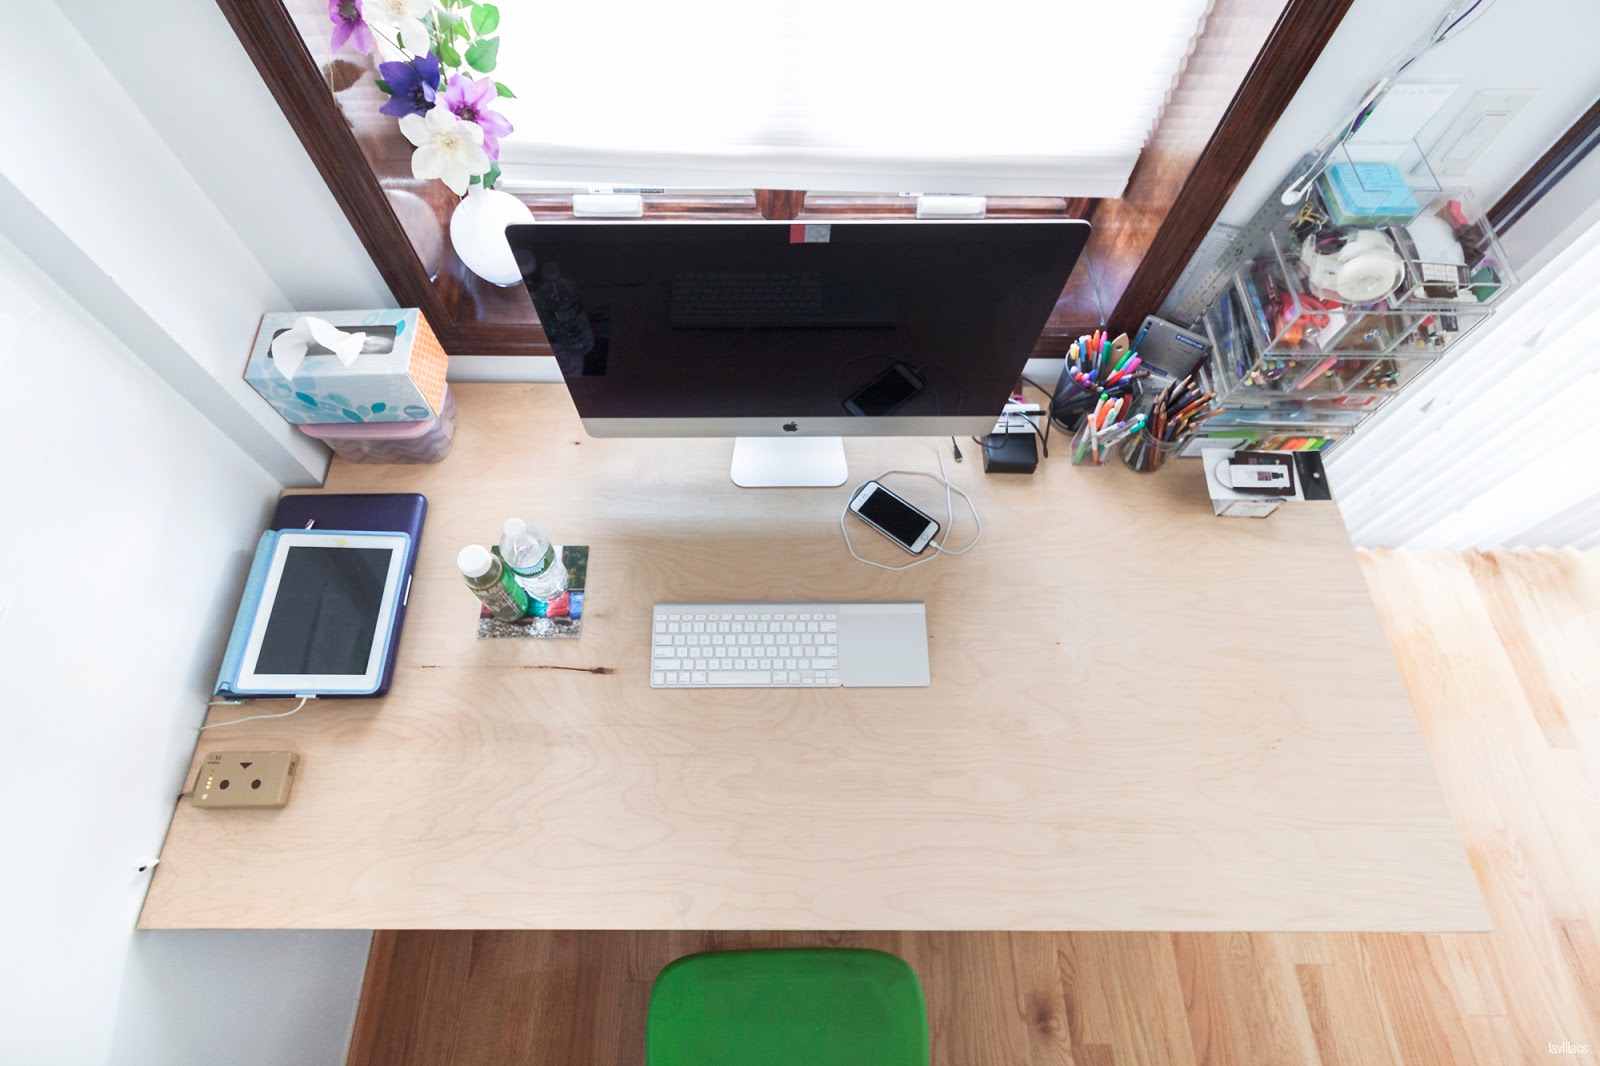
Two years ago, I rearranged my desk to refresh my room. Two years later, I switched it with a custom-made desk instead. Extra? You can say that. Necessary? I would like to think so.

lavlilacs Custom Hairpin Desk

lavlilacs Custom Hairpin Desk 2

I was originally hesitant to have a non-painted, original wood colored, tabletop because every other piece of furniture in my room is pitch dark. The birch wood is also out of place given how yellow my flooring is. This is partly why I went through all the troubles to have white hairpin legs instead of the industrial metallic look, at least then something will tie in with the rest of the room.

It might not be the prettiest desk nor the most refined piece of furniture, but it fits the space and crosses out all the issues I previously had with my old IKEA Malm desk. As far as desks go, it was generously spacious...especially when I had a smaller computer setup (i.e. laptop). As I sat in it for a while, I quickly developed a few small issues. But I generally loved the position the table is in so I set to find a happy medium.

Issues with old setup

1. My iMac monitor was too large for the depth of the desk—headaches and eye strain galore.
2. The corner of my room has a weird protrusion to cover pipes—table can't be pushed against both walls at once leaving large gaps and wasted space.
3. The original desk had support along the backside—hits against the radiator and blocks electrical outlets.
4. The table legs were closed off—difficult to see the trash can (which I leave next to the desk & out in the open).

lavlilacs Ikea Malm Desk abovelavlilacs Custom Hairpin Desk above
lavlilacs Ikea Malm Desk sidelavlilacs Custom Hairpin Desk side
Before
After

Of the problems I had, the only thing I could change was the placement of my computer and the desk itself. I tried to solve the depth issue by:

1. placing the monitor on the window sill and moving the table slightly away from the wall. However, the screen became a little too far and high for my sitting height.
2. placing the monitor on the furthest edge of the desk and moving the table closer to the wall. I would either find my face very close to the screen but my arms were comfortable or I sit so far back that my arms have no table space to rest on.

The perfect solutions seemed to be a combination of both; the iMac should sit as close to the window as possible and the desk should have a deeper tabletop.

Why didn't I just set out to purchase a table the size I needed? Apparently, the standard desk depth is around 25-26 inches. The depth I needed in order to forcibly sit far enough away from the monitor is closer to 32 inches or above. The extra 6 inches makes a huge difference! Solid wood butcher blocks could have been an option if I wasn't trying to keep costs low; plus, I had to cut a corner out which would have been a waste of a beautiful piece of kitchen-grade finished wood.

lavlilacs Custom Hairpin Desk planning

I drew the first sketch in 2016. It was just an unfeasible wish at the time. Every room in the house that needed a desk already had one. If I made one then, it would have been very unnecessary in many people's eyes. When my brother recently switched over from a laptop to a Windows desktop computer with the works (monitor, tower, keyboard, mouse, speakers, mic, etc.) his small desk (about 2/3 the size of the IKEA Malm) became overcrowded. My perfect excuse finally came!

The thought that DIY projects would be affordable is dangerous. It might be in some scenarios, just not quite so in mine. I wanted the most affordable version of a simple desk as I could get. Simple in the sense that it is minimalistic and easy to put together. Even still, a huge chunk of the cost went into the hairpin legs, then the plywood, then the paints & clear coat for the table legs, and other miscellaneous materials. Since my uncle generously helped me out, I saved money on a good deal on screws, clear coating for the tabletop, and machinery & equipment rentals.

What I Bought; $213.68 (including NY sales tax)

Set of 4, 3-Rod 28" High 1/2" Thick Raw Steel Hairpin Legs $98.30
1 sheet of 3/4" 4'x8' Birch Plywood $54.41
3 cans of Rustoleum Painter's Touch 2x Ultra Cover Paint + Primer in Flat White $12.99
2 cans of Minwax Water-Based Polycrylic Protected Finish in Clear Satin $29.98
Vinegar ~$4
Paintbrush ~$1-4
Paint tray ~$1
Set of 4, The Hairpin Leg Co. Hairpin Leg Protector Feet in White $10.00

What Uncle Spared Me; unquantifiable

3M Paint Sanding Respirator Mask $7.97/pack of 2
3M Blue tape ~$7-9
Lots of 1-1/4" screws ~$7-10/box of 100
Wood glue ~$5-7/bottle
1 Quart of Benjamin Moore Benwood Stays Clear Acrylic Polyurethane in Low Lustre ~$21.79

Table saw
Jigsaw
Miter saw
Clamps
T-square
Sander + sandpaper
Electric screwdriver
Vacuum with blower (for sand dust)

lavlilacs Custom Hairpin Desk process

In order to have the table length I had in mind, bowing (sagging) could have been a potential issue. It could have been exacerbated because the radiator would have sat right in the middle as well. The two possibilities were to have a thick tabletop by gluing two 3/4" boards together OR having a fake 2-layer top by creating framing around the edges and adding support in the middle. I chose the latter to keep costs low—an extra plywood would have been another $54.41!

Home Depot can cut boards. The one I went to did not make cuts less than 12". We needed our 48"x96" board to be cut into one 68.5"x34" (table size), three 68.5"x3.5"(4 edges), one 68.5"x3" (middle support), and scrap 27.5"x48" (leg support & extra). Since the store couldn't do make the smaller cuts, we left with 3 pieces (68.5"x34", 68.5"x14", and 27.5"x48") and my uncle made the rest of the cuts himself.

The worst part about Home Depot cutting a lower-quality plywood board is the chances of the cut edge splintering is very high, especially when going against the grain. Their machine is powerful and mainly used for rough cuts. It isn't ideal for furniture but what can ya do? The best we did was place the severely damaged sides where it couldn't be seen or felt.

My uncle chose to cut 45-degree triangles off the corners of the support beams to improve the aesthetics. He attached it with a light layer of wood glue and many many screws. This isn't a foolproof method, not all edges were completely stuck together...as long as the gaps aren't terribly large.

Sanding wasn't the most time-consuming since he had a mechanical sander. With that being said, there is still a lot of sanding to be done. Straight back from the store, sand. After anything else is cut a little bit, sand. Before anything is attached together, sand. After it is attached together, sand it again. After every layer of primer/paint/clear coat, sand sand sand!

The step that took the most time was unsurprisingly painting. I chose to forgo sanding in-between coats for this project. Even still, I found myself applying clear coats for multiple days because I had to cover both the top and bottom of the tabletop and giving sufficient time for one side to dry before flipping it over. The quart of clear coat gave me 2-3 very light coats on the underside and 6-7 very light coats on the top surface. Each coat needed 30 minutes of drying time before the next one could be applied and ~24 hours before it dried through.

While I waited for the clear coating to cure, I ordered feet protectors off Amazon since I did not plan on using a rug to protect the hardwood floor. The week wait was long yet completely worth it. The feet protectors I found were from a UK brand called The Hairpin Leg Co. and they luckily offered a white version. It isn't a true white, more like a creamy off-white. Once on and the table is right-side-up, the shadows help mask the color difference.

lavlilacs Custom Hairpin Desk underside

A better view of the table situation. How the top was framed. How the edges can finally reach the walls. How open the hairpin legs make the area feel. How all the outlets are fully accessible and with extras to spare.

lavlilacs Custom Hairpin Desk detailslavlilacs Custom Hairpin Desk details 2

My desktop monitor is now finally the perfect distance away. I no longer have to zoom in 2x, 3x times to look at websites. I do not have to arch my neck way back to look at the screen. I also don't have to go blind because the monitor is only a foot away from my eyes. My elbows get plenty of resting space while all my other junk can be sprawled all over. Glorious!

I will admit though, reaching for things across the table is much harder now unless I physically move my butt out of my seat. I guess this is a good thing for my body in the long run?

lavlilacs Custom Hairpin Desk cable organizationlavlilacs Custom Hairpin Desk details 2

Another nice perk to come out of the custom desk. No matter how accurately things are measured, it is probably impossible for tables to stick to walls without any gaps whatsoever. The benefit from the tiny gaps I have are the natural cable organizers. I did not have to cut a hole for the computer cable to pass through nor did I have to buy cord management systems to stick onto the desk. Huzzah!

And so that is the story of how my custom hairpin desk came to be. Hopefully, it will last a while without too much paint wearing down or splinters catching into my skin. That is the only fear I have with wooden furniture.

Bag storage evolution

lavlilacs bags reorganizing

For me, perfect is a word that is usually never put in the same sentence with organized. Things may seem like they were placed well at the moment. But maybe a year or so later I can completely rethink everything and find an even better place for it.

My bag collection has moved around quite a lot since I first moved into this house. Everything used to be& sprawled across a shelf inside the closet. Then I got a couple new bags and the shelf became an eyesore to look at and dig through whenever I was pressed for time to leave.

lavlilacs bags reorganizing

I upgraded to an accessory hook as I bought more clothes and needed the shelf space. The Container Store is a treasure trove for organization enthusiasts. Although the Classico Accessory Hook was described to be for scarves, belts, or ties, it was a great solution to help consolidate the space my handbags and book bags were taking in my closet. Plus for $2.99 it was a quick and inexpensive solution, at the time.

Little did I know, I was solving a space problem but creating a practicality problem. Getting to other bags was a pain in the butt. If a bag was hung a long time ago, it required me to take out every bag that was hung after that to get to it. The exception was for cross-body bags; those have long straps and I could easily loop through the bundle in one fell swoop.

lavlilacs bags reorganizing

lavlilacs bags reorganizing

A good long stare at my closet as a whole gave me an idea to the storage problem: doors. All that free space that was going unused! If only I could somehow hang all the bags up without damaging the doors in any way. I toyed with the idea of getting Command hooks. But decided against it in case they weren't strong enough and they definitely weren't the most affordable option.

Luckily, The Container Store was having a sale at the time and I was able to find 2 different over-the-door organization contraptions that fit what I was looking for. Both made use of a space that previously was unused and made it ridiculously easy to see and grab the bag I needed. The Chain Purse Organizer was perfect for my handbags, while the Door Hook was perfect for my book bags.

Set up for both organizers were quick and simple. All that was needed were my hands, a stool/ladder, and the contraption itself. The only thing I wish I had double-checked on was the width of my closet doors. I lucked out with the Door Hook organizer because it came with 2 sets of different sized hooking mechanisms. However, I had to push my luck a little, literally, with the Chain Purse Organizer as the included hooks were just a tad small for my doors' thickness. Nothing a bit of force and slightly indented door edges couldn't fix.

So far I have ben really loving the current setup. It is perfect, for now.

Finally Feels Like Spring

What beautiful sunlight we have.
What nice breezy weather there is.
What pretty flowers are a bloom right now.
How nice to meet you again, Spring.

Daily makeup skincare products on top of bedside table

I am alive! If anyone here follows me on Instagram, there were a few more updates there than here in the past half a year or so. This seems to happen a lot doesn't it? But inspiration comes and goes with me I guess.

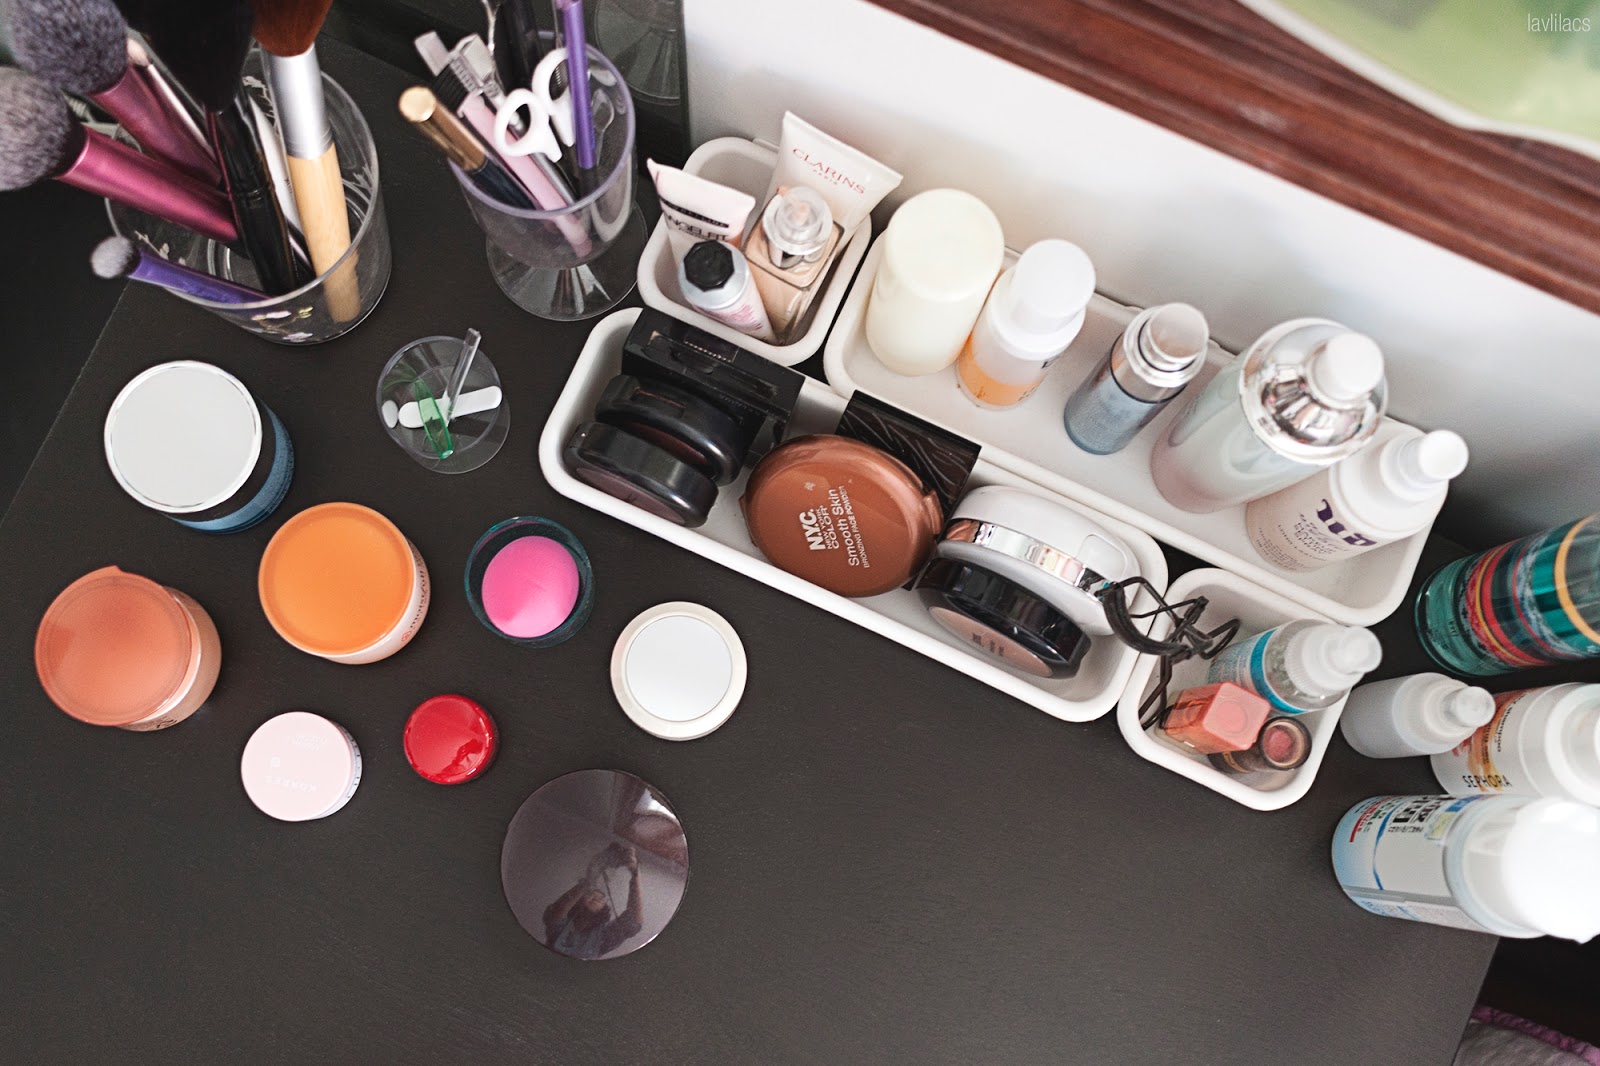
Daily makeup skincare products on top of bedside table aerial view

With the nice weather and bright sunlight around more often now, I felt like my room needed a little clean up. Hey, it isn't called Spring cleaning for nothing! Sunlight definitely makes all the dust specks more noticeable.

I also realized that I haven't shared how I stored my beauty goodies since 2012...that's a whopping 4 years time lapse! To be honest though my storage setup didn't change much in that time period. (If anyone is interested in the before situation, here's a link to my makeup and skincare storage in 2012.)

Daily makeup skincare products on top of bedside table portrait view
Daily jarred skincare products and makeup brushes on top of bedside table Daily makeup and bottled skincare products on top of bedside table

This bedside table I have has come a long way. Back in 2012, when I first moved in, it was my computer desk. After I finally found an actual table, it became a typical beside table..."Knick-knacks and Other Junk" drawer. As of now this single drawer system is the home to a good part of my beauty stash.

All my daily (or try to be daily) makeup and skincare goodies have a permanent home on top of the table. Everything is plain to see and easy to grab. I have found that I am super inconsistent with skincare, let alone makeup. If things are hidden or difficult to get to, it is more than likely that I will not even bother to reach for it. This way I set myself up to use these products. So far, so good!

Makeup storage in bedside table drawer

Other than the repurposing of the bedside table, my makeup organization situation really had not changed much over the years. However, last year, I had the sudden urge to go through everything in my makeup collection. This was in the midst of the whole "simplify your life" and "downsize now" trend. Plus, I knew in the back of my head that there were just some things that I was holding on to for way too long. So it herald the "Great Beauty Purge of 2015 for Mandy"!

I tossed away many many tubes of old BB Creams, powder products, and lip products during the purge. It felt so nice afterwards to be left with a somewhat reasonable collection. The process knocked some sense into me: don't buy so much since you can't use it up fast enough! (Hence the lack of haul posts. But don't be fooled, I have bought beauty goodies here and there. The purchases are just so sparse that I forget to take record of it.)

Now all the makeup items that used to sit in 4 separate drawers (1 for foundations and concealers, 1 for powders and blushes, 1 for eye and lips, and 1 for brushes) sit perfectly in 1 giant drawer. The location of it also helps since I do my day and night routines right to the left of this bedside table.

New makeup storage in Ikea Expedit drawers Facial masks storage in Ikea Expedit drawers New skincare and miscellaneous beauty products in Ikea Expedit drawers

Now the IKEA Expedit drawers that used to house my opened makeup stash has been filled with the new and unopened items in my collection. All the cushion refills I hoarded in Korea, eyeliners and mascaras, masks, etc. everything separated to, again, be more easy to see. I used to keep everything in one basket but it is really hard to tell just how much of what I was hoarding when things are piling on top of everything else.

*Imagine another image with a drawer of nail polishes and nail decorating things. I forgot to take a photo of that and am too excited to post to make up the shot now.

Daily cleansing skincare products on top bathroom counter

The other part of my skincare routine of course are the very important cleansers. Ever since I started using makeup and sunscreen, cleansing oils have been my one and only remover friends. (Okay, I strayed once or twice with cleansing waters but I figured out oils were the ones for me.) As the trend of my storage goes, these guys sit out in the open as well on the bathroom counter. No excuses! Must take off everything before bed!

*Again, please imagine inside the bathroom cabinets there are other new cleansing, exfoliating, and hair products waiting to be used.


Ahh, there! My first post of 2016. My new and tidied beauty collection and storage.
Hope you enjoyed if anyone is still following my little blog!
How has your makeup collection changed, if it has?

Room rearranging

Sometimes it just takes a little rearranging for a place to feel completely new again.
After - Room rearranging

It was a really random idea I had one day while feeling a little trapped by my old setup. What if...my table faced that direction instead?

Before - Room rearranging After - Room rearranging
Before
After

My room has been in the same configuration for the last 3 (almost 4) years since we moved in. Bed and side drawers on one side, table and bookcase on the other. Even though the Ikea desk that I chose has a handy extension, the space left over between the bed and table is just enough for my swivel chair. Both the extension and chair in that particular spot created a "no-man's area" on one side of the bedroom. Plus, I have also been accumulating some MUJI Acrylic drawers that have been taking up a little too much desk space.

After some careful measurements and getting my dad to help with the lifting, the ignored space was finally getting some love. The extension can't fully extend but it is enough to still act as a small side table. My swivel chair couldn't fit in the new space but I think the new chair will help with my poor sitting posture.

After - Room rearranging
The chair may be even more stuck in this spot than before, but I still have the option to shimmy myself backwards to sit on my bed. This is especially beneficial whenever I am watching a long video at fullscreen. My eyes don't feel as strained by sitting so close to the monitor and my butt can get some cushioning.

Camera lenses & notebook display

One of the most favorite things to come out of this room rearranging kick was cleaning up this window area and getting a place to display my camera items. I used to have them stuffed into my camera bag and it would be such a hassle whenever I needed to use different lenses. I always toyed with the idea of getting one of those floating shelves to do essentially the same task but not anymore. Win-win, yay!

Inspiration & Notes wall, Muji acrylic drawers for organizing stationary

I couldn't believe how nicely my MUJI drawers fit along the short edge of my desk. This means more workspace for me (that is when my table isn't full of papers, receipts, and other knick-knacks). My notes and inspiration wall also found a new home on the opposite side of my bedroom. While some people have cork boards to tack their important papers and ideas onto, I just use good old Scotch tape to stick things to my wall. Cheap and effective!

Purple floral decorations from Ikea

These fake flowers have been with me since we moved into the house. Purple flowers that will last forever? Perfect! (I don't have a very green thumb...even succulents and cactus plants have died in my house.) Over the last few years this floral arrangement has become an after thought, getting lost amongst the many other things in my room. Now that it is sitting in front of me, it is always peeking through the corner of my eye.

Hat display wall

Hats have been on my mind lately. But with what I think is a big head, finding any that I like is difficult. Since taking these photos a few weeks ago, my hat collection has grown a little. This has become my hat display wall with 3 already hung up. I am not sure what I would do if I add more to the collection because room on this wall is very limited.

What is your room organization like? When's the last time you've done a major rearranging in your house?

New Nail Polish Storage & Revlon Buys

I wanted to get this after seeing xteener's nail polish storage video. This storage system is one of those things that I don't really need but it is definitely nice to have. I got it from The Container Store for $13.99. If you subscribe to their E-Mail service I think they still offer a 10% off coupon to use for your first purchase.

Modular Flip-Out Bins from The Container Store

My current polish collection fits inside just perfectly. Very perfectly, with no extra space at all. My base and top coats actually have no room inside this storage but that's alright. They have a new home on my tabletop. Each bin holds about 6 or 7 nail polishes depending on the shape of the bottle. It isn't ideal for those with a polish collection that's bigger than say...40ish polishes. Unless you don't mind having more than 1 of these. The good thing is it's stackable. There are grooves on all four sides that lets you connect other pieces to it.

Inside look at my polish collection!


I joked on Instagram that this either meant I should stop buying more polishes because I have no room for it or...I have more space than ever because I now have my old nail polish container to fill with newly acquired polishes. I wasn't expecting to buy any new polishes so quickly but a stop to Walgreens with Bestie C the other day and I came out with 2 bottles of Revlon Nail Enamel. It didn't help that there was a BOGO 50% on Revlon polishes, it only made me want to get these even more.

L to R: Revlon Girly & Revlon Gray Suede
L to R: Revlon Gray Suede & Revlon Girly
Top to Bottom: Revlon Girly & Revlon Gray Suede
I'm not sure if Deborah Lippman has a polish like Girly but it looks very Deborah Lippman-esque doesn't it?

Do you have a big nail polish collection? How do you store your polishes?

New Home, New Year, & New Storage

Happy Lunar New Year Everyone!!!

So exciting! This year is the first year I do not have school/class on Lunar New Year. No more being stuck in school when a majority of the people celebrating are home!

新年快樂 & 恭喜發財 ^___^
Sun nin faai lok/Xin nian kuai le & Gung hei faat choi/Gong xi fa cai

Hope everyone, who still gets red envelopes, get lots of them :P

--------------------

I thought that this topic seems appropriate for a new year, don't you think?

Fresh start. Everything is cleaned and organized and ready for the new year :] Let's just hope everything stays this neat and tidy for a long time!

I'm sorry there aren't any celebration related photos today! I didn't want to repost any old photos I've taken during previous lunar new years or use ones from Google image. So here are some pictures of my new storage system.

If I am able to get any photos tomorrow (well this morning to be exact), I will definitely share them with everyone :]


I am being very picky about my furniture. Even after moving in for over a month now I still haven't had the time to find a computer table that suits what I wanted =.=

Therefore, my nightstand has to serve a different purpose for now hehe

If anyone is interested the night stand is from West Elm (Narrow-Leg End Table) and this bookcase/storage unit is from Ikea (Expedit Shelving Unit).

I actually really like the Ikea Shelving Unit. I didn't even know they even made these drawers! When I saw this on the website I thought I'd just use it as a bookcase or buy the fabric lined or plastic containers. Although the material isn't very sturdy it can hold light stuff pretty well. I hope/plan to buy a few more of the drawers in the future to store other stuff :D


Top drawer of the 2 smaller ones - Face

Holds my pressed powders, loose powders, blushers, bronzers, concealers, highlighters, a couple lip/cheek tints, and an eye palette/trio or two.


Bottom drawer of the two smaller ones - Eyes & Lips
Holds my eye makeup and lip products and a few N.Y.C. creme sticks.

Those dividers are from The Container Store. I first saw them in one of fuzkittie's makeup collection/storage video and thought they were very cool. I think that these work pretty well to divide products without having to buy different sectional containers (which usually cost more). However, you must remember to buy a minimum of 2 packages of these because even for such a small drawer I didn't have enough to section off everything. Hence, trying to be frugal and cheap, I had to use make-shift dividers using the leftover short pieces.

Bigger drawer - Misc.

Has all the new products that I haven't used, masks, tubes/bottles of product that I do not want to leave on top to collect dust. Since I took this picture, this drawer has been completely filled :X


My side of the bathroom :P ... Never thought I'd be able to say that yet!

I finally have enough space on the counter top to place all/most of my skincare items! Now I can put all the good stuff I buy on my face right after I wash. A big problem I had before I moved was my face being dried out by the time I walked from the bathroom to my bedroom. I've heard bloggers/YouTubers said that it is best to put serum/moisturizer/etc. on when your face is still bit moist or damp.


First drawer by the sink
Some bits and bobs of skincare that didn't fit on the countertop basket.


Second drawer by the sink
All my bases, primers, foundations, BB Creams, some highlighters, and my NAKED palette.
I have a big base makeup problem! I think I need to go on a base makeup ban =.=
A lot of my BB Creams are getting old :X


My ever-growing box of samples. I should really get to using these! :O< Compared to my last makeup collection from 2010(!), it has grown quite a lot. I have to admit my problem now that I'm looking at one set of photos next to the other >___< Maybe for the first few months of this year, I should just focus on using these products only and buy a few products (best would be no products) as possible!

Anyone else feels the same way? Why do things have to be always easier said than done :(

**Just in case the gov't people are still being strict about these things...Items shown were either bought by me or by my parents for me. I am not sponsored or affiliated by any of these companies. Although it would be nice if I was LOL...I do not get anything from the links available in the post, they are just posted to make it easier for readers and to help readers who are interested in the product.**