Showing posts with label Sally Hansen. Show all posts

Red Texture Nails - Not the typical matte look

Can't believe it's been almost a year since my last nail post! Truth be told it took my nails this long to heal from all of last year's experiments. Yes, they were that weak for that long (unfortunately).

Now that my nails have shown improvement, I have been a little over excited to try new designs or just have them painted in general. Bad move for the next few months? Probably...

sally hansen 610 red zin essie matte about you shiny stamping plate sh225

I haven't done anything matte in such a long time. I have seen these not-quite-all-matte designs floating around the internet here and there before. It was an easy decision for me to incorporate my nail stamping kit into this experiment since I just didn't feel like cutting up strips of tape at 11PM. (Late-night nails session at it's finest.)

sally hansen 610 red zin essie matte about you shiny stamping plate sh225

I started the process with a layer of OPI's Base Coat, then 2 light coats of Sally Hansen's 610 Red Zin, and 1 coat of Essie's Matte About You.

sally hansen 610 red zin essie matte about you shiny stamping plate sh225

After going through the different image plates on hand and choosing a design, I used the same red polish to stamp the image onto each nail. I am nowhere near perfecting the nail stamping technique but I am much better at it than when I first got them. Definitely something that takes some practicing.

sally hansen 610 red zin essie matte about you shiny stamping plate sh225
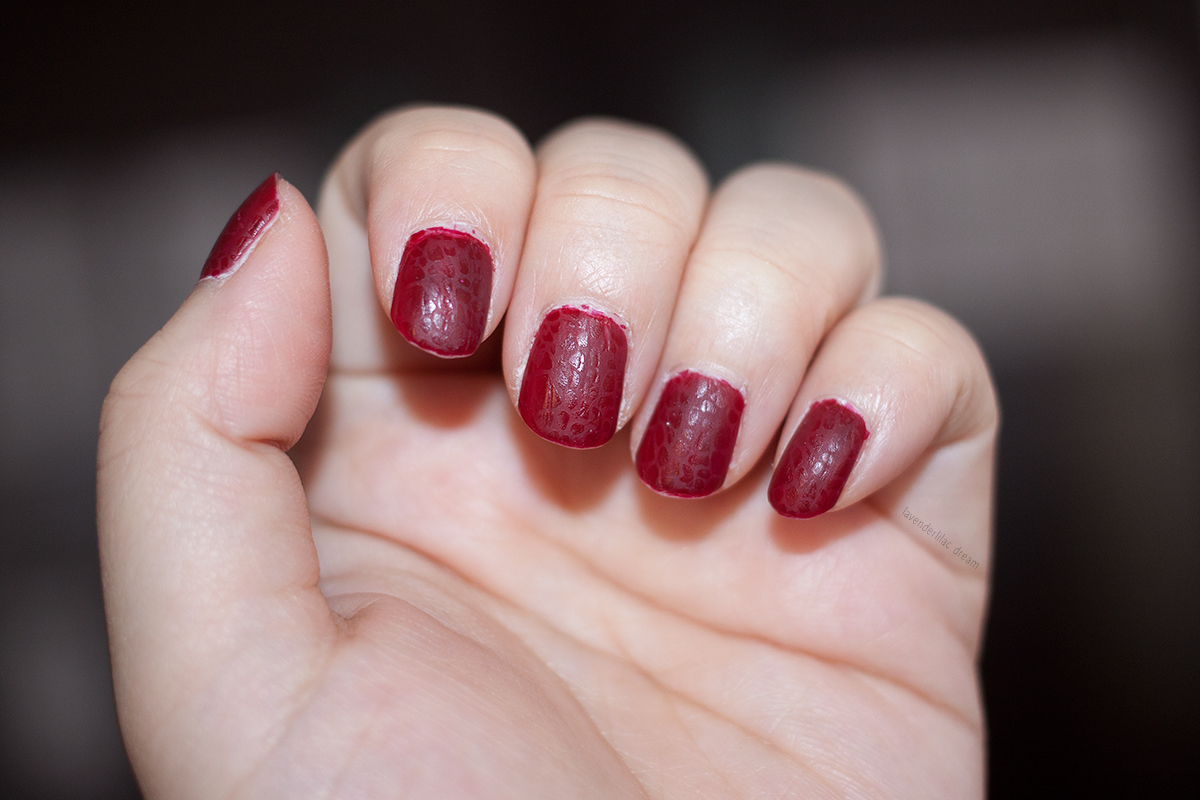
Close up of the texturing created

It is difficult to see without really taking a close look but hey it is still atypical. It isn't just all shiny or all matte. The mix of the two makes it a little more interesting, at least I like to think it is. The only negative to this whole matte thing is having to forgo a top coat. The edges of my nails are already starting to lose polish.

Does anyone have any tips for making matte designs last longer or is this something that just can't be avoided?

Gold & Navy Nails

My first attempt at the whole nail stamping thing. Definitely not perfect & all about trial and error!
The pinky and ring finger were redone a couple of times since I started off from left to right.
I was about to give up because things just weren't turning out well. But then I finally got the hang of it. (I think...)
After I've used these a few more times, I will share all my tips in a later post. Don't want to be too hasty with my opinions yet.

L to R:
Seche Clear (1 layer)
Sally Hansen Complete Salon Manicure - Petrol (1 layer)
Sally Hansen Complete Salon Manicure - 110 Wedding Glitters (2 thin layers)
Revlon Extra Life No Chip Top Coat (2 layers)

Shany Cosmetics Stamping Nail Art Image Plate - 25 piece set
Plate: SH211

I can't wait to use the stamping kit for holiday-ish nails!
Going to get right to that after my last final on Monday.

Have you tried nail stamping designs before? Any tips & tricks?

Pastel Rainbow Nails

L to R:
Seche Clear ... Milani 3D Holographic Nail Lacquer ~ 509-HD,
American Apparel Rose Bowl (pink) ... OPI Rumples Wiggin (purple),
OPI What's with the Cattitude? (blue) ... Revlon Buttercup (yellow),
American Apparel Office (green) ... Sally Hansen Insta-Dry Anti-Chip Top Coat
My nails are finally strong enough for polish! I felt like I haven't done my nails for yearrrss (it's probably only been half a year lol). I had such a hard time deciding what color to choose. So I ended up using 5 colors instead to make the decision easier. Who ever said we can only use one polish color at a time? :P Would you do the same or was I just a little bit too excited?

Lunar/Chinese New Year Mani

The New Year was actually last week, but festivities usually last for longer than that! & Before this look would become irrelevant...Here's the mani I did for the holiday.


Gold base: Milani 3D Holographic Nail Lacquer ~ 510-3D
Red polish: Complete Salon Manicure ~ Right Said Red

Sally Hansen Complete Salon Manicure - Red Zin


If it wasn't already obvious enough already after the last few holiday mani designs I have done, I want to say Red Zin has really become my favorite polish color of the 2012 (and favorite polish line too). It wasn't even because the dark red color has been really popular. I have wanted a red polish for quite some time now. But let's face it, red is a more mature nail color and it can be intimidating. Now that I have found one that (I think) looks good on me, I can't seem to stop myself from wearing it all the time.

Left side: 1 layer ... Right side: 2 layers
Pinky & Ring: 1 layer ... Middle & Index: 2 layers
Notice the difference a second coat of the polish makes!


I am not very good at describing colors. To the best of my ability, I would say Red Zin is a blood red shade. I love that it is a jelly formula because it allows a little room for mistakes. If you can apply polish well, I'd say even one layer is doable. If you are looking for a darker red just go ahead with layer number 2. This polish dries fairly quickly and can last for a good week if I apply a generous layer of top coat on. Be careful when you take this color off though! The red polish can stain your skin a bit. But don't worry! It's nothing a shower and couple of hand washes can't fix. I'm not sure if the newly formulated Complete Salon Manicure line still has this particular shade. If you can find it in a store, I do recommend grabbing one if you're looking for a red polish!

Do you have a favorite red polish shade? What is it?

Happy New Year!

Happy New Year everyone!! Hope you all will have a great 2013! :]

Here's a mani I did a few days ago. Nothing too fancy here though because glittery nails are pretty on but it is such a pain to take off.


Gold Base: Milani 3D Holographic Nail Lacquer ~ 510-3D
Black Polish: Sally Hansen ~ Midnight in NY (a very appropriate New Year's polish don't you think?)
Excuse the bubbles! I was too liberal while applying my top coat and those showed up.

If you don't mind sharing, what are some of your resolutions?

Happy Holidays!!

Happy Holidays everyone! Wish you have a wonderful Christmas/Hannukah/Kwanza! Hope you're all having a great time with your family, friends, and loved ones :]

Here's a quick mani I did for the holidays!


Red Base: Sally Hansen ~ Red Zin
Gold & Silver 'Trees': Milani 3D Holographic Nail Lacquer ~ 510-3D & 509-HD
Silver Shimmers 'Snow': China Glaze Fairy Dust

It is supposed to look like gold & silver Christmas trees and snow. In retrospect, I probably should have thought more about the base color since this is actually my second attempt at this look. I just wanted to use holiday colors. But now as my brother said it looks like "Christmas trees with a blood sky"... *sigh*.

Ornaments at my fingertips

Hi everyone! I just wanted to update with this quick post before I have my temporary hiatus to focus on my finals. YAY, finals...! Good luck to anyone else who's also facing finals week! :]

I did my nails last Friday in anticipation for a party my mom's work was throwing for the employees' children. Of course, I'm not a kid anymore but I had to take my little brother. So I tried to be more festive than I usually am for the occasion. I hadn't exactly planned what particular design I wanted to do, yet I knew I didn't want to do a solid color. After I bought the Milani 3D Holographic polishes earlier that day, I came up with these results after a bit of experimenting.


Silver base layer: Milani 3D Holographic Nail Lacquer ~ 509-HD
Red stripes: Sally Hansen Complete Salon Manicure Nail Polish ~ Red Zin
Gold dots: Milani 3D Holographic Nail Lacquer ~ 510-3D
Sans top coat for the photos. Afterwards I ended up putting 2 coats of Sally Hansen Insta-Dri Anti-Chip Top Coat

What do you think? I'm usually not a big holiday person but a girl can change (even if it is just a little bit for now)! ^__^ It is so hard to try and keep the edges clean when I am putting on the top coat layer. I still need to practice that step a lot to keep the tape design looking nice.

More Sally Hansen Polishes!

Ever since I tried Petrol, I've kind of been a little obsessed with this particular Sally Hansen line. When I saw that CVS was having a BOGO FREE for this line I made sure I went to check out what colors (if any) were left at CVS. I read the reason why these are being cleared from drugstore shelves is that the company is reformulating the line. I hope the new formula is at least going to be on par with the old formula. But I'll probably wait for a sale before I try the new formula version...heh!

Surprisingly, the selection at the CVS I usually go to was almost untouched (a big contrast to Walgreens). I guess compared to the Walgreens prices ($1.99) the CVS "sale" didn't look as appealing? Nonetheless, I was excited to see all the choices available! In the end I decided to choose the colors below. (The fourth one I picked up is going toward the giveaway!)

I've been wanting to try a red polish and a black polish for a while now but never got it because those are colors I feel I wouldn't wear too often. Especially since I have always associated red polish as a more mature shade. But since these were on sale and I liked their formula enough, I didn't mind making the purchase.


Sally Hansen Complete Salon Manicure in Right Said Red, Red Zin, & Midnight in NY

However, I was not very happy with the tricky sales method CVS had though...(well at least the CVS I went to). I went into the store having read that this particular polish selection was BOGO FREE. After I chose the polishes I wanted to get, I went to their price scanner to just to make sure they were on sale. Lo and behold, the Midnight in NYC (the black polish) was the only one to come out as BOGO FREE...while the two red polishes were BOGO 50%.

I asked someone (who I'm assuming was the store manager) and was told in an annoyed tone that only certain colors were BOGO FREE and I'd have to check all the polish prices if I wanted that promotion. Afterward I even checked their in-store circular to make sure what the actual sale was in case I read something wrong or the store had different terms than what was posted online...but that was not the case. The ad clearly said BOGO FREE for the Sally Hansen Complete Salon Manicure polish line and BOGO 50% for every other Sally Hansen line (excluding the Complete Salon Manicure polishes). In the end, I bought the polishes anyways because one of the red polishes only had one bottle left (impulse much? hah).

I don't know about others but in a way, I feel a little cheated...Or am I just overreacting and should just be happy that there was a sale in the first place?

Anyway!! Back to the polishes.


One layer of each polish.
Since they're all a jelly like formula they can be a bit on the translucent side if applied a certain way (like how the black color shown above is a bit patchy). I'd recommend not to fix the first layer when wet. Just to wait for it to dry and then touch up with a light second coat instead.

I'm still warming up to Right Said Red, the fire-engine red on my pinky, but it is a really pretty color!

Red Zin is a gorgeous blood red shade. Especially because of its jelly consistency it looks as close as nail polish can get to real blood, don't you agree? I never thought I'd ever buy this color because it seems difficult to pull off...but I ended up liking this shade the most of the three.

Midnight in NY looked like a really nice black with micro shimmers which kind of emulated stars in the sky (hence the name), but sadly it didn't translate very well onto my nails. Instead, it was ended up looking like a normal jelly black polish. In certain angles, you can see the micro shimmers but is close to being microscopic. I guess in a way it is an accurate depiction of the sky in NY since it is pretty difficult to see stars in the city. Maybe I'll grow to like this polish the more I wear it?


Two layers of each polish
Sorry for the blurry photo! I'm not use to taking photos with my left hand. It was surpisingly much harder to handle a DSLR and control focus with my left hand than I thought...

Since I didn't feel like taking off the polish I just decided to practice the tape nail art method on my pointer and thumb. These came out much better than the last attempt! (Yes I do have different designs and colors on my left and right hand. I didn't think I'd be able to wear these out comfortably and confidently but I've been sporting these for 2 days already!)


Fail Attempt at Nail Art

I really should be studying and writing a paper that is due on Monday...but I was so distracted with the idea of trying a nail art technique I saw on Pinterest with the polishes I just bought. Of course the logical option was to just get rid of this itch and be able to concentrate better at what I needed to get done, don't you agree?

The basic idea of the technique is to cut strips of tape and place them however you want on your nails, paint a layer of polish over it, and slowly peel off the pieces of tape.

In addition to a base and top coat, I used 2 layers of Revlon Calla Lily & 1 layer of Sally Hansen Petrol.


Obviously...I didn't get very good results on my very first attempt. There are lines that look pretty good, but for some reason (I have yet to figure out why) certain lines just didn't come out as clean as others. Maybe the culprit was putting too much nailpolish? Or perhaps I didn't let it dry enough...or was it too dry? Anyone have any ideas?


A definite tip I can share so far for this tape design method: Be careful when you apply your top coat!
Especially if you have one that tends to pick up/move around the nailpolish. Use a thicker coat and don't skimp! Or else the top coat will move the top most layer of polish around and cause bleeding/smearing of colors and you won't have nice define lines anymore. (But of course this could just be the OCD perfectionist in me talking...hah)

When I have a little more time I will definitely try this again though. It takes more time, patience, and effort than just applying a single polish color but I love the way it turns out! Maybe after a couple of tries I'll be able to master it and share more tips of how to do this design.

Drugstore Hauling

I haven't share one of these hauls in a while! Mostly because I've been spending a lot more on clothes the last couple of months and not as much on beauty items. But! I think I got pretty good deals at the drugstores this time. Well...much better results than from my normal couponing efforts.
After seeing that CVS had a BOGO50% for their Olay products and getting a couple of ExtraBucks to use, I decided to repurchase this moisturizer for the upcoming cooler weather. I was hesitant about getting two bottles of lotion but I definitely couldn't give this deal up when I scanned my CVS card and got even more ExtraBucks to use ($5 to be exact). In the end, I bought two and paid just the price of one!

Nouveau Cheap had posted about an awesome clearance of the Sally Hansen Complete Salon Manicure nailpolishes at Walgreens so I wanted to see if I would have some luck at my local branch. Needless to say...those displays were stripped bare!


Revlon in Buttercup, Revlon in Calla Lily, Sally Hansen Complete Salon Manicure in Petrol
I perused the store and found these in the clearance bins, which I don't normally pay much attention to (more like I don't ever see them). Each of these were $3. Then with the 15% off I received in the email for their Friends&Family sale...they ended up being only $2.55 each! There weren't that many choices in the clearance bins but these really stood out to me. I think I'm very lucky to have found the Sally Hansen polish in there! After googling this particular shade, I found out that it's apparently from the Sally Hansen & Alexander Wang collab collection. How cool is that!


One layer of the polishes: Calla Lily, Buttercup, Petrol

I was quite surprised by all three. Some good feelings, others bad.
The left two didn't quite meet my polish wants. Both are pretty sheer (on my defense I thought that Calla Lily would be more polish-like and less a shimmery topper). Buttercup was exceptionally streaky. I think it is because of how thin the polish consistency is. Definitely a 2+ coater. It doesn't look too bad in the photo but in reality it looked much worse.
Sally Hansen was the complete opposite. Opaque. One coater. Thick but not too gloppy (as of now). Dries fast. One word...UHHmmazing! Now I'm sad I didn't find out about this line earlier (before the big Walgreens markdown). I guess I could either track other Walgreens stores or wait for it to go on sale at other drugstore chains...


Two layers

Buttercup looks much better in this shot but I did make sure to put a thicker coat of it on the second time around. The problem then was the two layers took forever for to dry...*sigh*
Petrol didn't need a second coat at all but just for the heck of it I applied it anyways. With one layer it was already a pretty dark navy. The additional layer makes it looks almost black.

Are the polishes in the Revlon Colorstay polish line all similar to this particular shade?
& Was anyone able to get some of the Sally Hansen polishes?