Dreaming of Sunny Days at Marina Bay

5:38:00 PM mandy 0 Comments

Oh, Mister Sun. Sun. Mister Golden Sun. Please shine down on me. If I didn't know any better, I would think that Spring came a little early this year. I should just be glad that winter has only blessed us with a handful of chilly weather so far. Snow drifted by once or twice during the last two weeks or so. Otherwise, the Northeast seems to have been clouded with nothing but consistent gloom and rain.

This weather has left me thinking about Singapore more than ever. Because there has been a lack of sunshine lately, I have been missing the sunny tropical days spent there. Okay...maybe not so much the humidity. But after so many days of gray skies, I don't think I would mind it if we could get some sun in return. All the rainstorms reminded me of the giant downpours in Singapore. It was tolerable only because the wet weather never lasted all day. There was at least hope for a brighter day after the showers.

December being Singapore's rainiest month was news to me. Then again, I didn't know much about Singapore before visiting, let alone know what the country's weather would be like. I was just glad that the precipitation never stuck around. Escaping a cold home city to visit someplace warm would have been a let down if a big yellow ball of light wasn't peeking through clouds at the very least. All the colorful aspects of Singapore would have been washed out: traditional homes, foods, architecture, nature, etc.

lavlilacs Singapore Gardens by the Bay

Gardens by the Bay looks like something out of a science fiction movie from afar. The tall metal structure that flares and branches at the top, reaching towards the sky, while nestled amongst a dense cluster of trees. Maybe something that could be used as an observation/command tower or a glorified luxurious home of some tech mogul?

lavlilacs Singapore Gardens by the Bay Supertree Grove

In reality, the Supertrees are actually quite scientific and environmental. They aren't nearly big enough to be people's homes. But it is a residence of sorts for a lot of flora that grows up and around its metal trunks. It even has solar power and rainwater collection abilities working behind the scenes. The view from afar, up close, or up above are all equally as breathtaking.

lavlilacs Singapore Gardens by the Bay Cloud Forest architecture

lavlilacs Singapore Marina Bay Sands daytime

lavlilacs Singapore Marina Bay Sands Helix Bridge walkway

I loved visiting Marina Bay. The main reason is being able to see the different sides of metropolis Singapore in a relatively small area. The second reason is how walkable and connected all corners of Marina Bay is despite being separated by the bay. Gardens and greenery in one direction. Unique architectural feats in another; Marina Bay Sands looking ship like and the ArtScience Museum reminiscent of a lotus flower. Then little ways away are a cluster of tall branded skyscrapers indicating a financial hub. Theaters, arts, and entertainment venues are seemingly footsteps away in another direction.

lavlilacs Singapore Marina Bay Sands nighttime lights show

Even after the sun sets and the sky becomes pitch black, Marina Bay still is surprisingly lively.

0 comments:

Skunk Vine Rice Cake Balls 烏芹藤圓 | Taishan Eats

6:20:00 PM mandy 0 Comments

lavlilacs | Taishan Eats 台山美食 | Skunk Vine Rice Cake Balls - Foo Keen Haang Yuan - 烏芹藤圓

Skunk vine. Stink vine. Chinese fever vine. Paederia foetida. All those names refer to one type of plant. Yet not one sound remotely appetizing. Before I decided to make a record of this recipe, I hadn't a clue what the name of this ingredients was in English or Chinese. It was just something that was a part of a food Grandma used to make occasionally and something that I liked.

Good thing for the internet! It seems like this plant originated from eastern and southern Asia and grows mainly in tropical, hot and humid, climates. Some sources classify the skunk vine as a type of weed due to its fast growing and invasive tendencies. In Taishan, it is sun-dried and ground into a powder to be used in various foods.

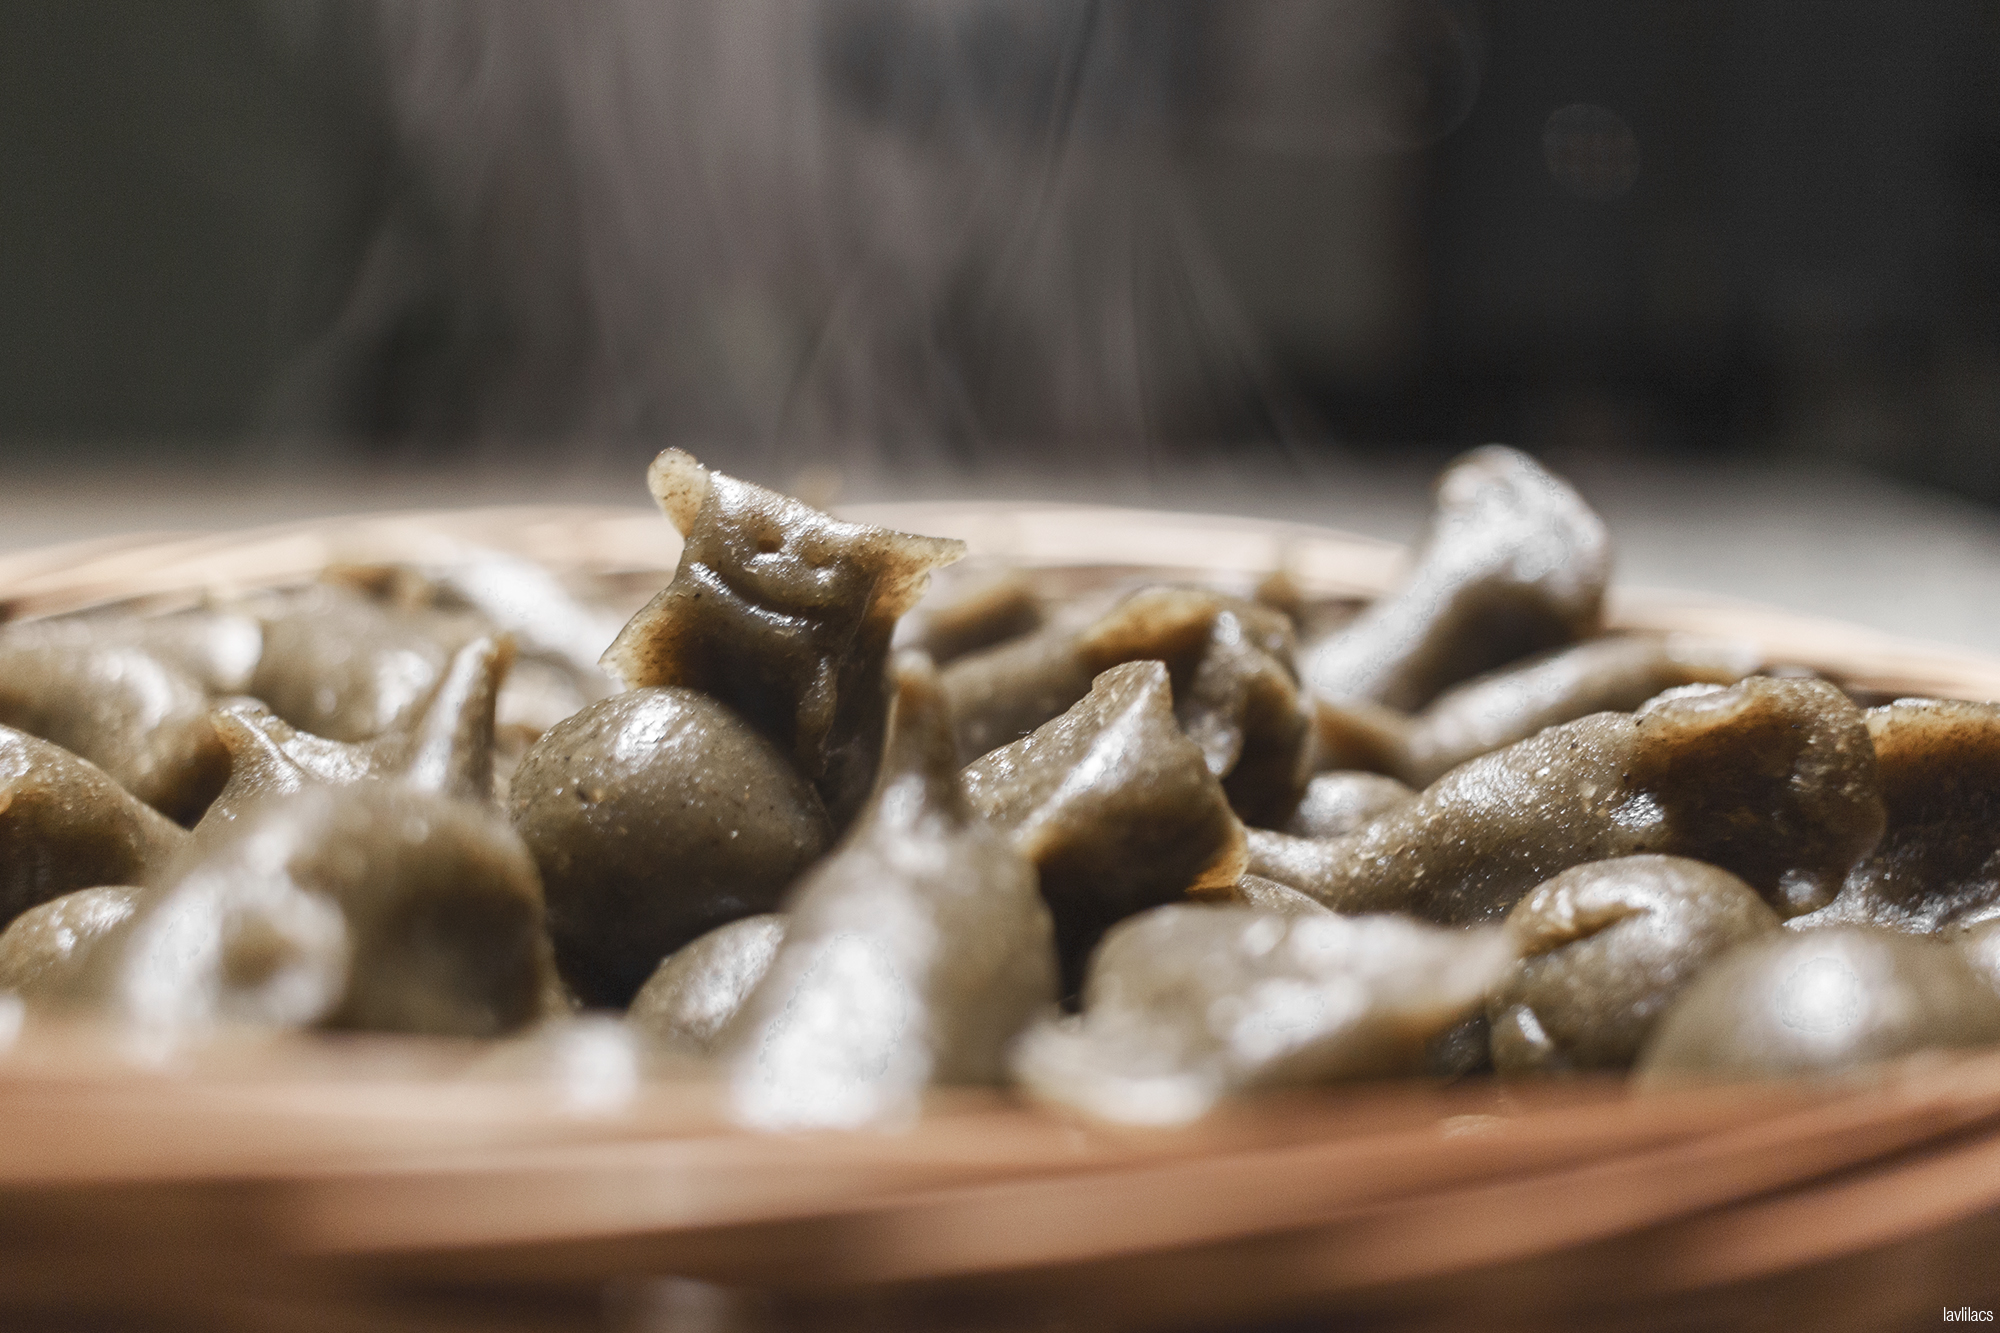
Foo keen haang yuan 烏芹藤圓 is what Grandma calls the dark green, almost black, chewy spheres in Taishanese. I took it upon myself to, quite literally, translate it into skunk vine rice cake balls. There are also a couple of other Chinese names for this as well, cow poop ball 牛屎圓 and chicken poop vine ball 雞屎藤圓. Again, neither are redeeming in any way, shape, or form. But they really don't taste as bad as the name would suggest. Honestly!

I am a huge sucker for nostalgia. Despite my curiosity to try new things, I can't help but also yearn to revisit old favorites I have fond memories of. Recounting all those memories I made in Asia the last few months got me thinking about these unfortunately named treats that I remember Grandma made. But let's face it, my popo isn't getting any younger and the amount of traditional homestyle foods she's made in the recent years have greatly diminished. If I were to crave these in the future and knock on wood Grandma cannot make these unique foods anymore, it would become a lost art of sorts. I thought it would be an interesting way to not only keep a record of Grandma's recipes and learn about some Chinese traditions but also to spend more time with my popo.

Even if no one else finds this interesting, this will be my digital library of personal recipes.


lavlilacs | Taishan Eats 台山美食 | Skunk Vine Rice Cake Balls - Foo Keen Haang Yuan - 烏芹藤圓 | Ingredients

Skunk Vine Rice Cake Balls - Foo Keen Haang Yuan - 烏芹藤圓

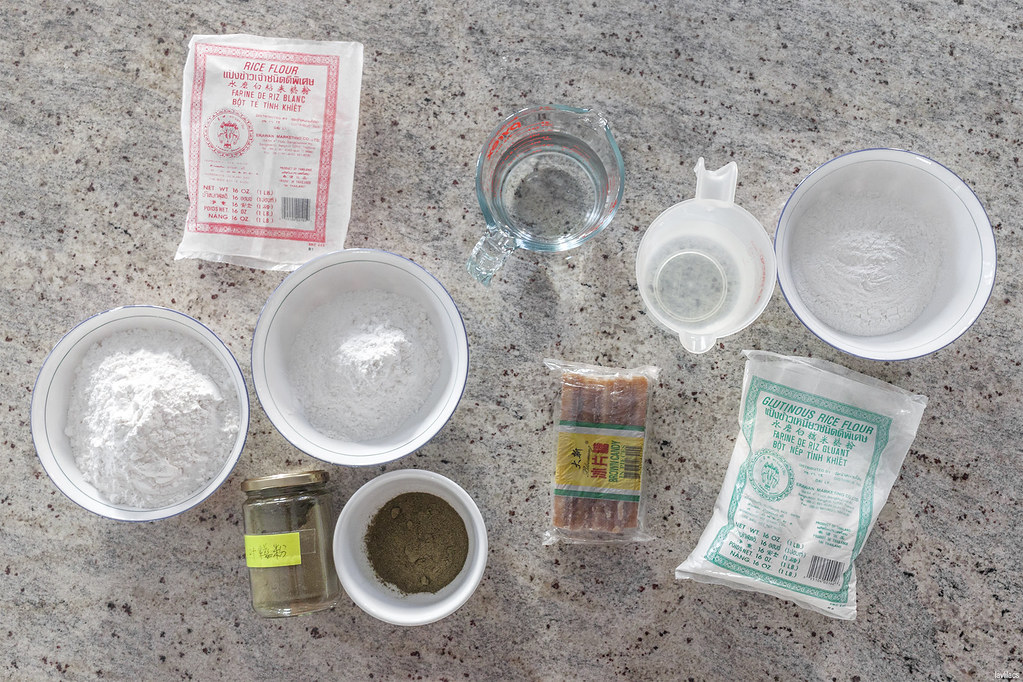
Dry ingredients mixture
3 cups rice flour 米粉
1 cup glutinous rice flour 糯米粉
1-3 tbsp of skunk vine powder 烏芹藤粉*

Sugar paste
1 package of Chinese brown sugar 冰片糖 (or 1.5 cups cane sugar)
1 cup rice flour 米粉
3 cups water 水

* The amount of skunk vine powder is totally up to personal taste. Skunk vine is supposed to have a very strong sulphuric taste. The very traditional foods made with it, I think, uses a lot of powder to achieve a really pitch black final product. But I find the taste is too strong for my liking if I put too much (the most I've tried is 4 tbsp). Sourcing skunk vine powder outside of China might be a little difficult even in densely Chinese populated areas.

Directions
1. Mix the dry ingredients together. (I prefer sheet pan or anything wide and shallow. But a big bowl works too.)
2. Place the sugar and half of the water into a pot and bring it to a boil.
3. Reduce flame to a low-medium heat after all the sugar has melted.
4. Mix 1 cup of rice flour and the remaining half of the water together. Mix well!
5. Pour the rice flour + water into the sugar syrup when after all the sugar is melted.
6. Keep stirring the simple syrup and rice flour mixture until it starts to bubble and thicken. Before careful to not to burn the bottom.
7. Add the piping hot sugar paste to the dry ingredients mixture a little at a time to form a dough. Not all of the sugar paste will be used! Add just enough for everything to come together and not be sticky. A little paste goes a long way.

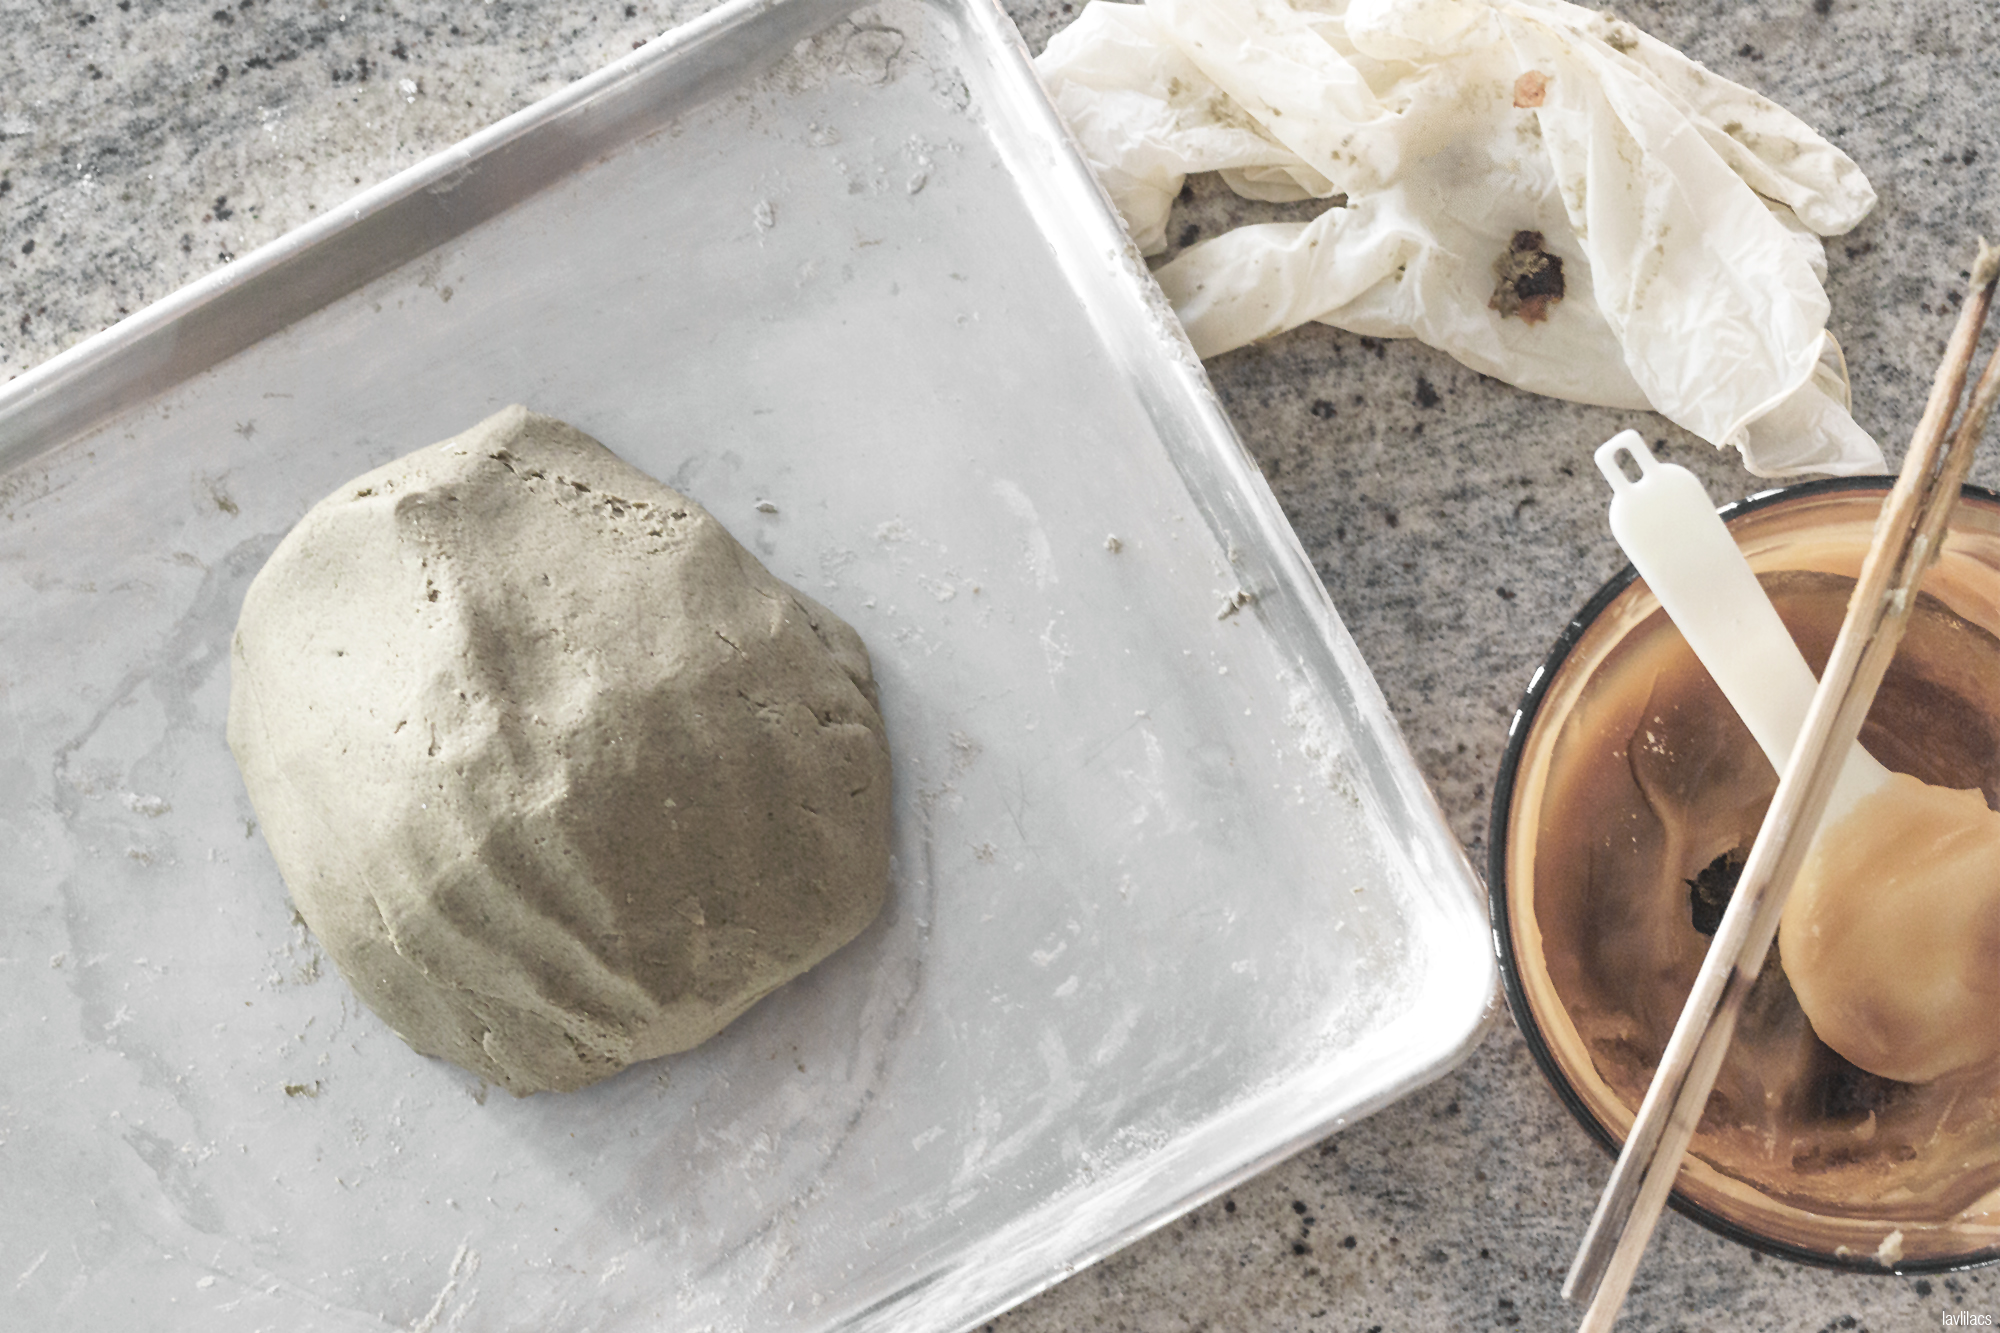
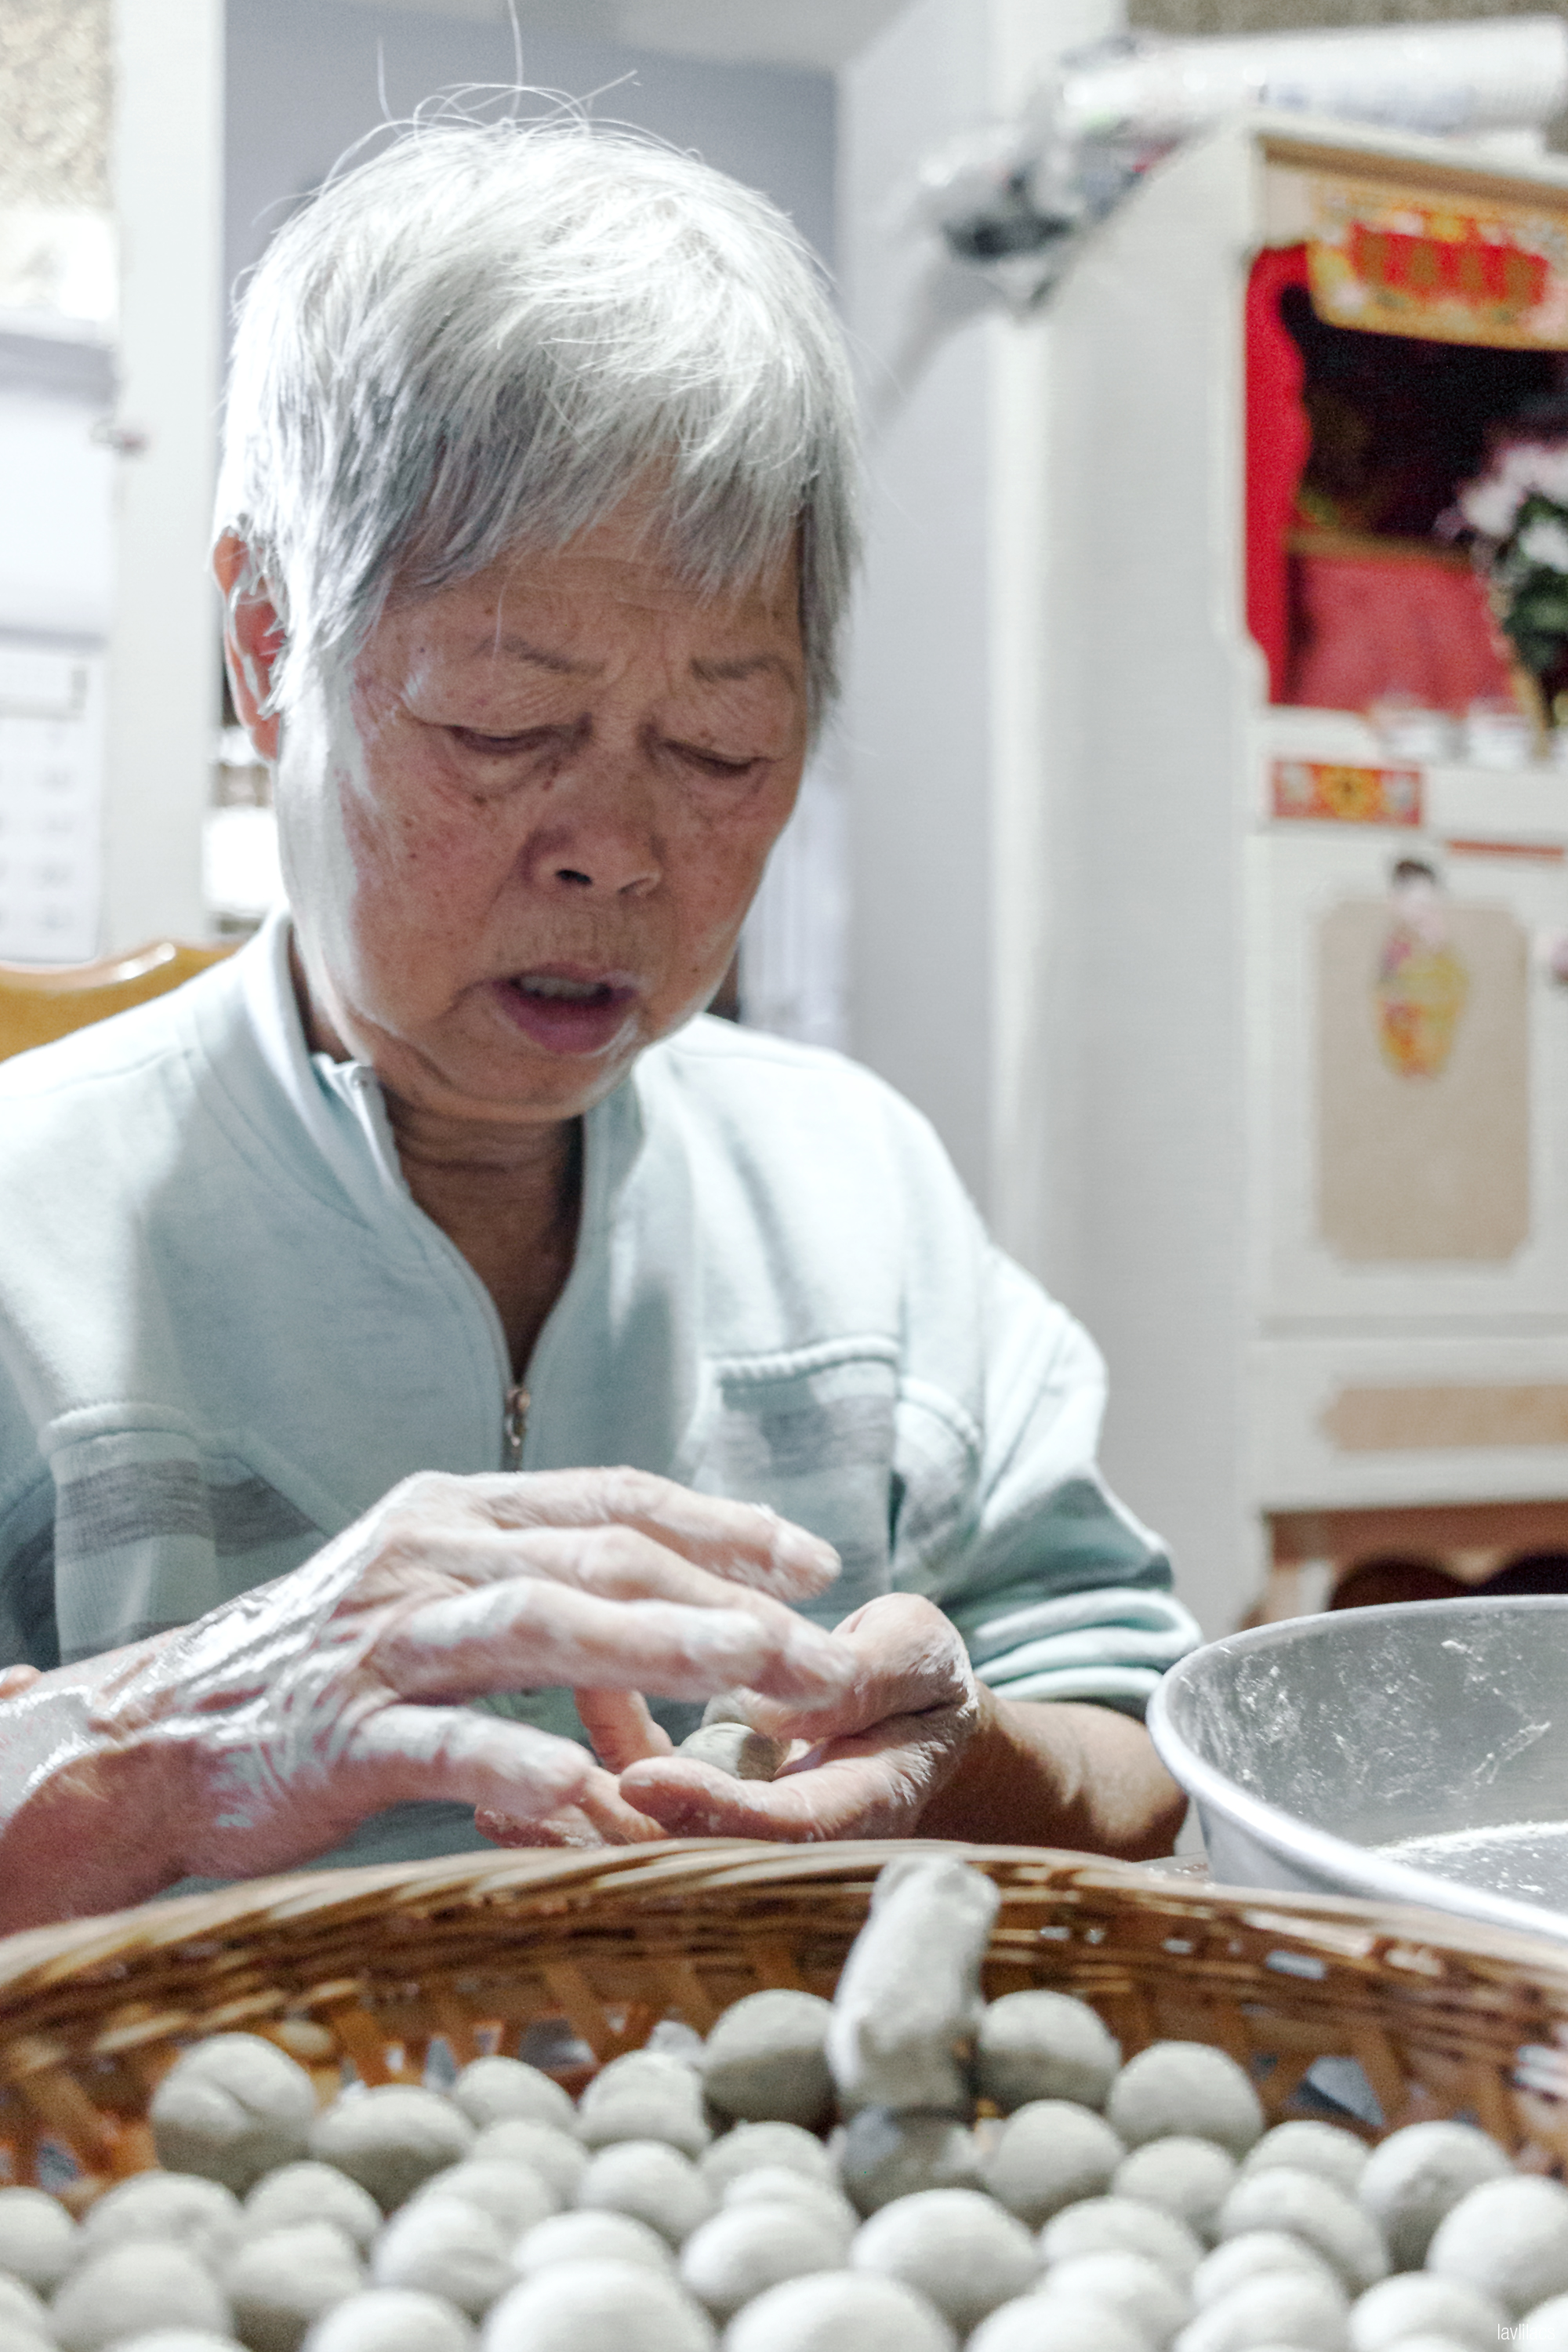
I recommend using chopsticks at first to stir the paste and the flours quickly. As the flour starts to make little clumps of dough, put on powder-free plastic gloves and start kneading by hand. If you can tolerate insane heat, then feel free to go barehanded.

8. Knead for about 10-15 minutes or until whenever all the flour and paste fully incorporates to form a dough ball. The dough should be soft, pliable, not sticky, and won't crumble when squished. A texture similar to fresh Play-doh. Even having a drier dough is okay. As long as it can be rolled into balls and still holds its shape relatively well.
9. Wet a bamboo steamer or place a steamer cloth on a pan.
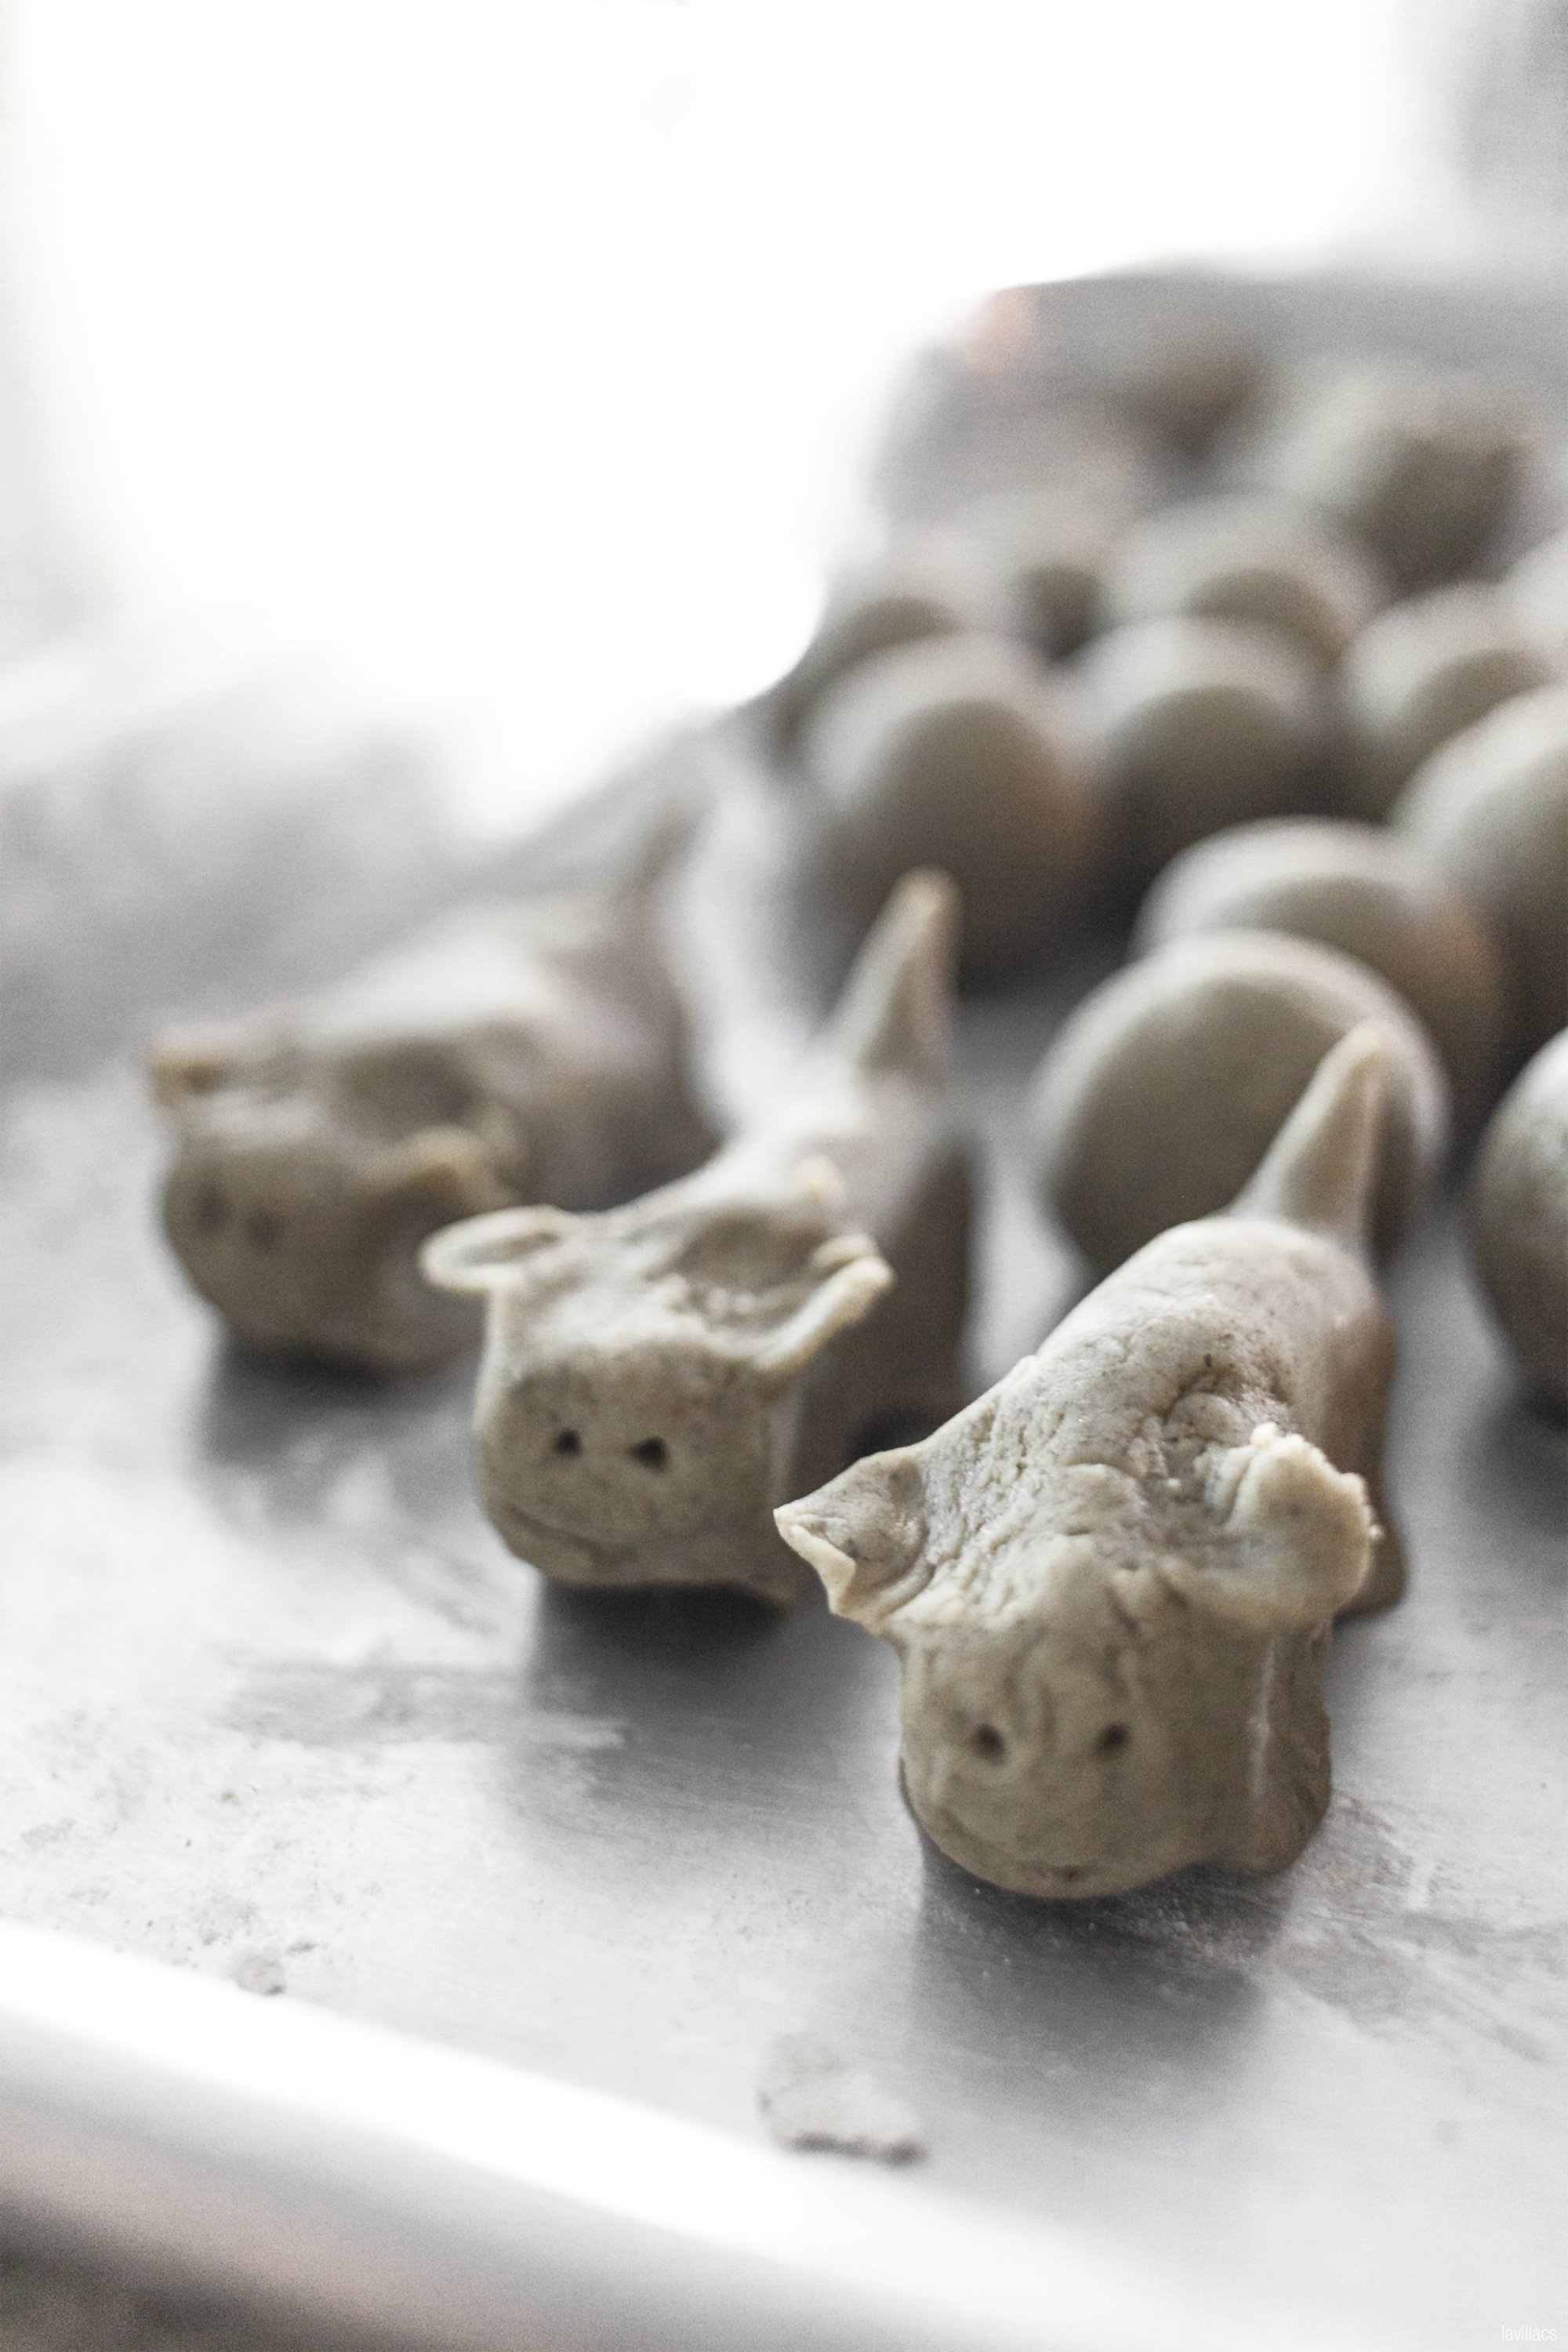
10. Shape the dough into small grape-sized balls. Dog shapes are optional.
11. Boil water in a wok or pot.
12. Reduce flame to a medium and place the steamer full of rice cakes inside.
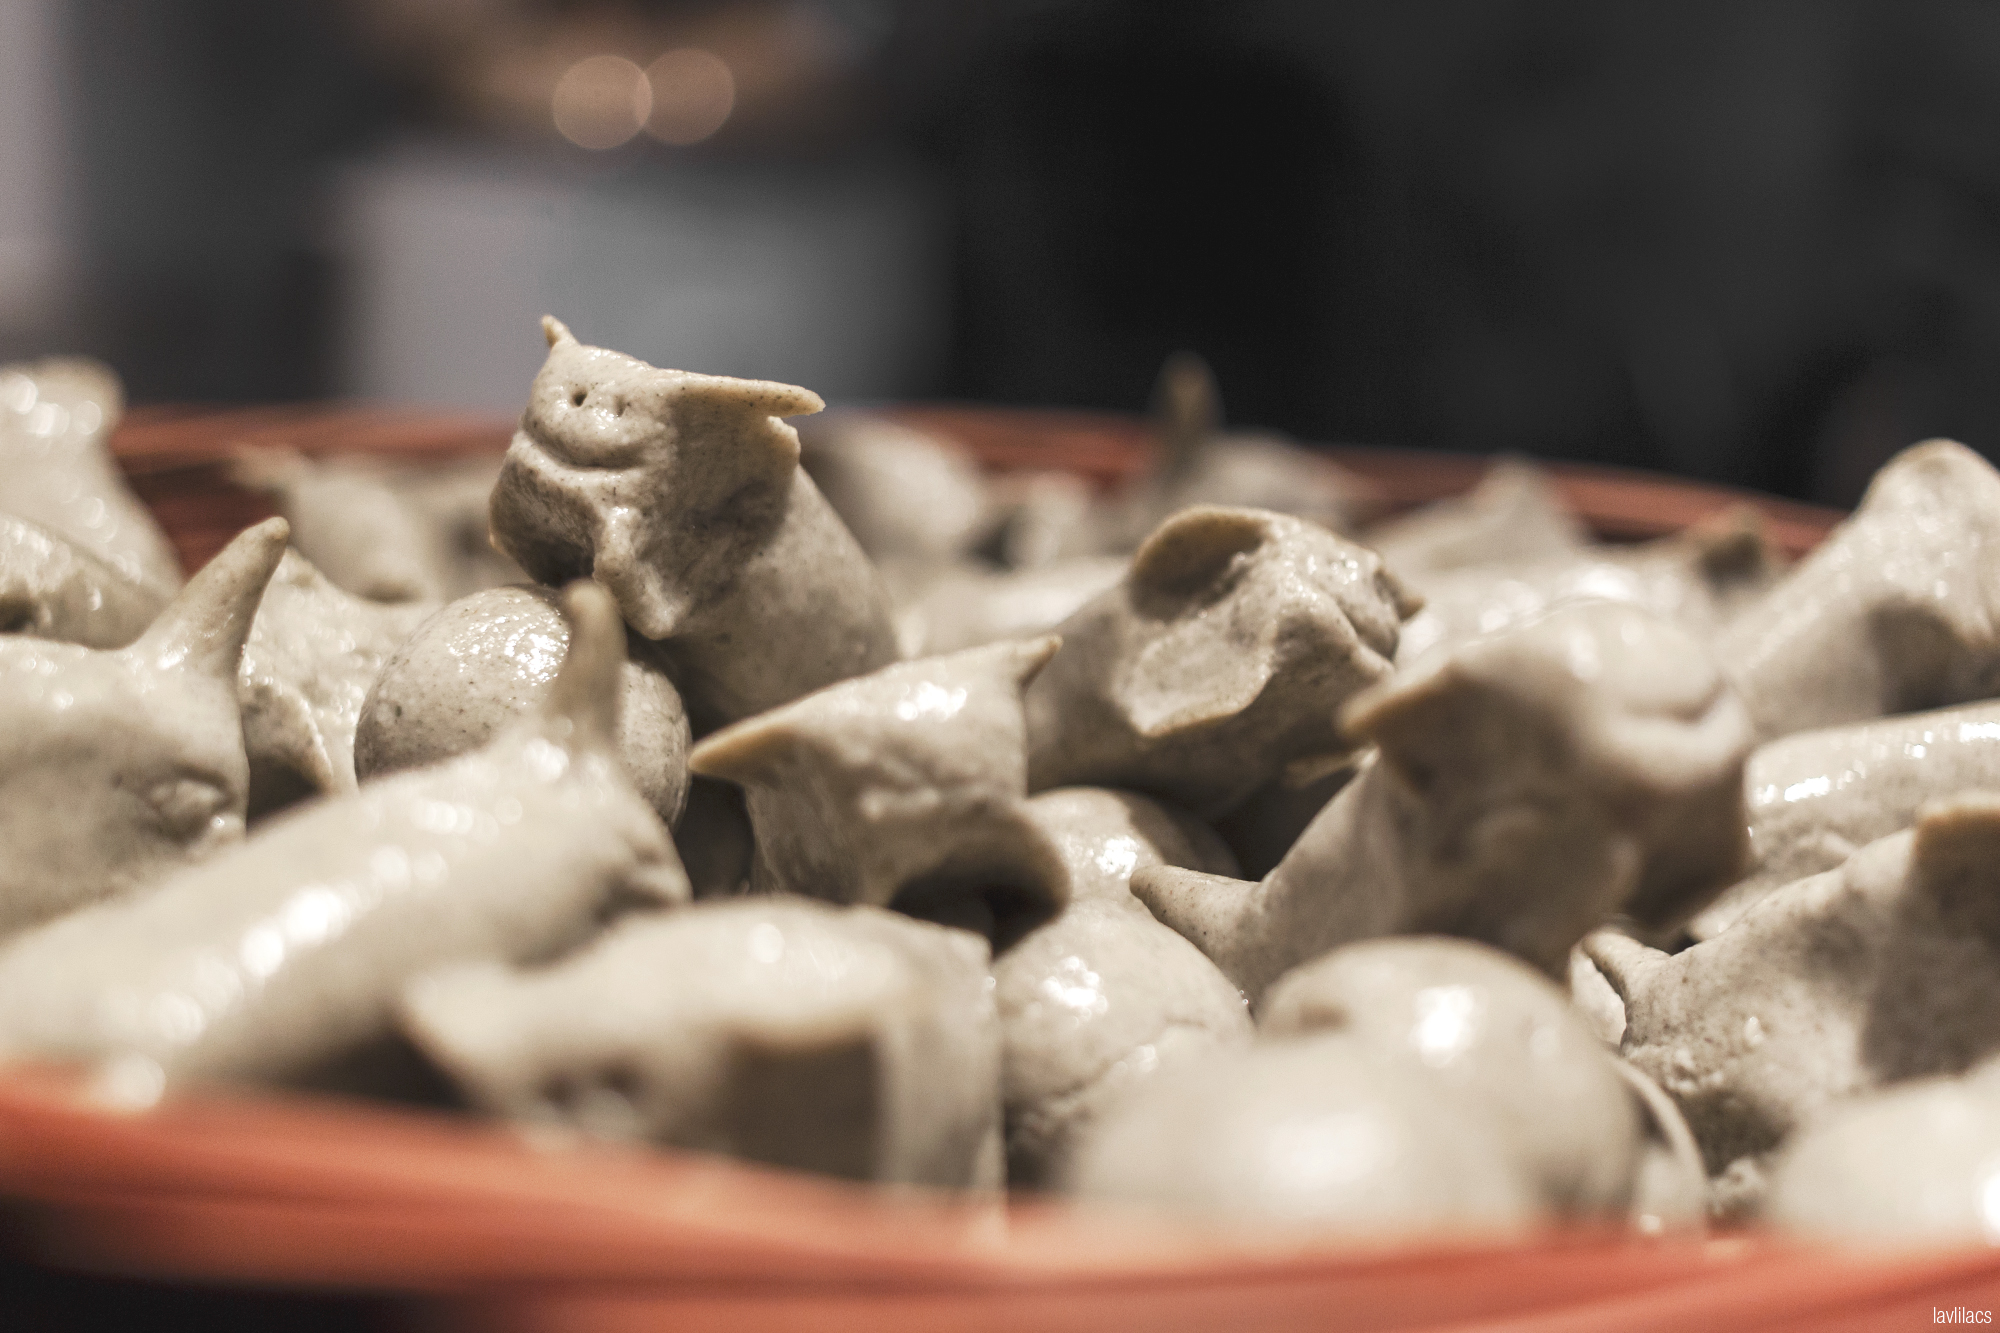
13. Before covering it with the lid, generously sprinkle water all over the rice cakes to prevent too much sticking and give it a nice sheen.
14. Steam on a medium flame for 30 minutes or until the rice cakes are cooked through.
15. Eat and enjoy!

lavlilacs | Taishan Eats 台山美食 | Skunk Vine Rice Cake Balls - Foo Keen Haang Yuan - 烏芹藤圓 | Sugar paste

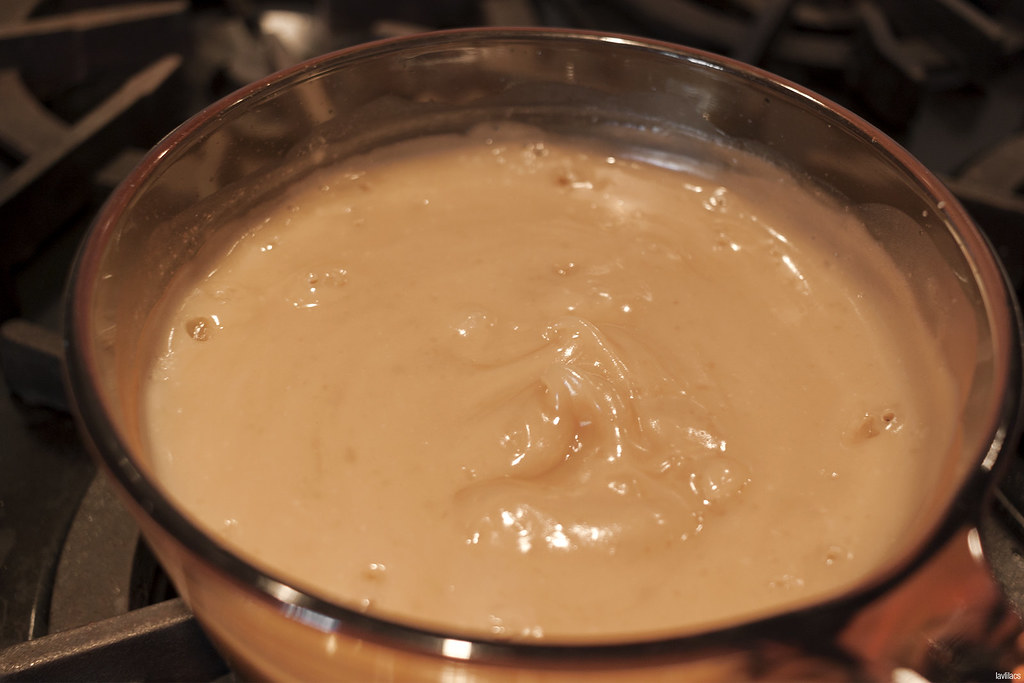
The sugar paste should ultimately look similar to the above photo. It won't bubble a ton but it will make small spurts and be a little bubbly. This is also completely edible as is.

lavlilacs | Taishan Eats 台山美食 | Skunk Vine Rice Cake Balls - Foo Keen Haang Yuan - 烏芹藤圓 | Dough ball lavlilacs | Taishan Eats 台山美食 | Skunk Vine Rice Cake Balls - Foo Keen Haang Yuan - 烏芹藤圓 | Dough portions

The key to forming the dough is to work fast while the sugar paste is hot. Grandma says that the sugar paste is what helps to make the final product a bit soft. The glutinous rice flour also gives a slight chewiness. But overall, it should be quite firm with some chew.

If too much sugar paste is added and the dough is too sticky, add a little more rice flour or glutinous rice flour to the dough. If the dough is too dry, add a little more paste. If there is no more paste, add a bit of water. There isn't an exact science to this. Grandma just did everything by feel and approximation. She called me foolish for wanting to know exact measurements.

lavlilacs | Taishan Eats 台山美食 | Skunk Vine Rice Cake Balls - Foo Keen Haang Yuan - 烏芹藤圓 | Dogs

One of my fondest memories with these rice cake balls are the dog-shaped treats. I remember loving to pick those out whenever Grandma made them when I was a kid. The reasons for making them were never clear to me. They were just cute and unique amongst a basket full of boring spheres.

I only just learned from Grandma that these skunk vine rice cake balls are actually made for a specific Lunar calendar holiday, March 3rd 三月三節. When questioned, popo said she didn't know the specific reason for making such a food and it was just a tradition she kept by. Foo keen haang yuan were made to be eaten. The dogs were made to be hung by the outermost door as a home protector from bad luck and evil spirits.

Besides the skunk vine balls, she said bao kok (or ham sui kok) and something called wah hoi are also made in celebration of the March 3rd holiday.

Grandma's dog making method:
Pinch out a tail. Followed by ears. Then four legs. Get a toothpick and poke up the eyes, nose, and mouth. Her highlight was, of course, including a butthole for accuracy.

lavlilacs | Taishan Eats 台山美食 | Skunk Vine Rice Cake Balls - Foo Keen Haang Yuan - 烏芹藤圓 | Sprinkle with water before steaming

Grandma uses bamboo baskets to hold the rice cakes. The hole-y nature of it helped to let any of the extra water through. If not the rice cakes at the very bottom of a pan would be too soggy. She also suggested to only have 2-3 layers of rice cakes in order to avoid having any uncooked ones at the center of the pile. Keeping the dog-shaped ones on top will help to dodge any accidental severings of its delicate body parts.

lavlilacs | Taishan Eats 台山美食 | Skunk Vine Rice Cake Balls - Foo Keen Haang Yuan - 烏芹藤圓 | Grandma's homestyle foods

lavlilacs | Taishan Eats 台山美食 | Skunk Vine Rice Cake Balls - Foo Keen Haang Yuan - 烏芹藤圓 | my dog versus Grandma's

Like I mentioned earlier, Grandma hasn't made these in a while. I had forgotten how her "dogs" looked. Would you agree and think her version (on the right) looks owl-esque?

0 comments:

Project Make a Dent No. 2 | End Results

7:06:00 PM mandy 0 Comments

Project Make A Dent 2016

The biggest appeal of doing Project Make a Dent is surely seeing the progress made, or sometimes lack thereof. I can really get a sense of what textures and types of products I like with repeated use, as well as know what steps I can cut out of my routine if need be.

Being committed to a set of products did get a little boring as the months went by. But knowing that the end result would be to see empty pans or bottles made it much easier. Plus, I could always choose to go lighter- or heavier-handed with base products, skip eyes, or do lips. Even with a limited selection, there was still room for variety.

Project Make A Dent 2016 Liquid and Cream base products - Before results Project Make A Dent 2016 Liquid and Cream base products - Half year results
Project Make A Dent 2016 Liquid and Cream base products - End results

L to R: Clarins Instant Smooth Perfecting Touch, Clarins Beauty Flash Balm, Maybelline Angelfit Pore zero Base SPF 25 PA++, and Lancome Teint Miracle in 6W Buff

I guess there was no surprise to see that both Clarins' primers remained untouched in 2016. Many occasions, I preferred not to apply a separate layer of primer before foundation. Other times I did not want to dip my fingers into a potted product. But I think it was ultimately just my bad choice of having two too many primer options in this round of PMAD. I had a tendency to only grab for the Maybelline Angelfit base since it was already used some and I liked to mix it in with foundations.

Anywho, the end results of the base products for Project Make a Dent No. 2 are: Maybelline base has about 1/3 of the product remaining in the tube and the Lancome Teint Miracle has been completely cleared out.

Project Make A Dent 2016 Clarins Lisse Minute Instant Smooth - Before results Project Make A Dent 2016 Clarins Lisse Minute Instant Smooth - Half year results
Project Make A Dent 2016 Clarins Lisse Minute Instant Smooth - End results

Clarins Instant Smooth Perfecting Touch

See, no progress made with the Clarins Instant Smooth. None at all.

Project Make A Dent 2016 Powder makeup products - Before results Project Make A Dent 2016 Powder makeup products - Half year results
Project Make A Dent 2016 Powder makeup products - End results

L to R: MAC Mineralize Blush in Pet Me, jane Shimmering Blush in 01 Natural Blush, MAC Mineralize Blush in Utterly game, Visee Glam Nude Eyeshadow Palette in N-1, and N.Y.C. Smooth Skin Bronzing Face Powder in 720 Sunny

The group of products I look forward to seeing at the end of every PMAD, powders! These are the easiest and quickest to apply. But are also the biggest teases since seeing pan doesn't mean emptying the entire thing is near.

Project Make A Dent 2016 MAC Mineralize Blush Pet Me  - Before results Project Make A Dent 2016 MAC Mineralize Blush Utterly Game  - Before results
Project Make A Dent 2016 MAC Mineralize Blush Pet Me  - Half year results Project Make A Dent 2016 MAC Mineralize Blush Utterly Game  - Half year results
Project Make A Dent 2016 MAC Mineralize Blush Pet Me  - End results Project Make A Dent 2016 MAC Mineralize Blush Utterly Game  - End results
MAC Mineralize Blush in Pet Me
MAC Mineralize Blush in Utterly Game

I thought I hadn't made any progress with these MAC Mineralized Blushes at the halfway mark. Now that I can compare the photos from start to finish, it is anything but. The dome of powder has definitely gotten more flat throughout the year. Utterly Game has even gone concave and some rings of the pan are peeking through now.

To the completely honest, I noticed that the dome in Utterly game was smaller than Pet Me after the half-year update and decided to use it solely to see how far I could pan the product out by 2017. Pet Me didn't receive nearly as much attention after that.

Project Make A Dent 2016 NYC Smooth Skin Bronzing Face Powder 720 Sunny - Before results Project Make A Dent 2016 NYC Smooth Skin Bronzing Face Powder 720 Sunny - Half year results
Project Make A Dent 2016 NYC Smooth Skin Bronzing Face Powder 720 Sunny - End results

N.Y.C. Smooth Skin Bronzing Face Powder in 720 Sunny

Like with many pressed powders that I have panned out before, the NYC Bronzing Powder crumbled into pieces from brush swirling after the hole got bigger. But I guess it still counts as having made a dent, yeah? I had finished this a few months before the year ended and can say I did not miss not having it in my routine. Rather than using a bronzing powder to balance lighter foundations and/or powders, I found slightly darker foundations to be very handy.

Project Make A Dent 2016 jane Shimmering Blush 01 Natural Blush - Before results Project Make A Dent 2016 jane Shimmering Blush 01 Natural Blush - Half year results
Project Make A Dent 2016 jane Shimmering Blush 01 Natural Blush - End results

jane Shimmering Blush in 01 Natural Blush

Oh, jane Shimmering Blush...how I am glad the year with you is now over. It was super difficult trying to get color from pan to brush to face. The mixing of colors and metallic-y swirly mess in the pan made my inner neat freak grow exponentially. Ultimately, I didn't quite like you as a blush nor as a highlighter.

Project Make A Dent 2016 Kose Visee Glam Nude Eyeshadow Palette N-1 - Before results Project Make A Dent 2016 Kose Visee Glam Nude Eyeshadow Palette N-1 - Half year results
Project Make A Dent 2016 Kose Visee Glam Nude Eyeshadow Palette N-1 - End results

Visee Glam Nude Eye Shadow Palette in N-1

If there was one surprise from this PMAD, it would be the progression in this eyeshadow palette. It is hardly noticeable in the photo. But I have really tried my hardest to incorporate eye makeup, other than eyeliner, into my routine. My looks aren't anything dramatic. It is just enough for me. Maybe I'll keep at this with the Visse Glam Nude in 2017 and see how much I can dent it now that I am more inclined than last year to use eyeshadows.

Project Make A Dent 2016 Lip products - Before results Project Make A Dent 2016 Lip products - Half year results
Project Make A Dent 2016 Lip products - End results

L to R (clockwise): Revlon Super Lustrous Lipstick in 680 Temptress, L'Oreal Colour Riche Balm in 418 Caring Coral, and Korres Lip Butter in Jasmine

As with the bases, there was no surprise with how I did in the lip products department. Lip balms are staples in my nighttime regime, so the Korres Lip Butter surely would have been emptied once I made it routinely. It was slightly more difficult to get myself to remember to use the L'Oreal Colour Riche but have found it to be quite nice as a MLBB/sheer coral lip balm. As someone who usually hates to have things on her lips throughout the day, even lip balm, the Colour Riche balm is a good compromise for when I want a bit of color and protection. As for the Revlon Super Lustrous Lipstick...I have no excuses. It just never became a part of my routine and was forgotten.


Project Make a Dent No. 2 seems to have been pretty successful. Most of what I expected to completely finish was indeed used up. It would have been even better if I was able to get through a blush and a lipstick as well. Perhaps next time?

I am not 100% if I will be doing a full year's worth of PMAD in 2017. I have a stash of makeup sachet samples that I would like to use up. I might also stick to using the same products that were in PMAD No. 2 for a while to try to pan those out. If that's the case, then PMAD No. 3 might not be very interesting and/or repetitive. We'll see!

0 comments:

tria Hair Removal Laser 4X & SmoothStart Calming Gel - 1 Month

6:41:00 PM mandy 0 Comments

Here we are, a month into my at-home laser hair removal journey! It is still too premature to say whether or not the tria Hair Removal Laser system works. But that is not of anyone's fault. The company even said it takes at least 3 months before results are very apparent. This series is mainly to keep everyone updated and so I too can look back and see if there was any progress or not. I am committing myself to a monthly update.

tria Hair Removal Laser Facial Hair 2 Weeks

tria Hair Removal Laser Facial Hair 4 Weeks, 1 month

Now that I am looking at it, I guess my wispy moustache hairs aren't that big of an issue in full face, medium scale photos. Sometimes it does feel like the hairs add a dark-ish shadow to the corners of my mouth though. Does it?

Since the first introductory post I made, I have used the laser on 2 additional occasions. Just as a recap: the very first session was conducted at the level 3 setting with no calming gel, the second at level 4 with calming gel, and the third at level 5 with calming gel.

I was surprised by how ineffective the SmoothStart Calming Gel was at stopping the pain sensation. When that laser hits a hair follicle, you can definitely feel the zap. The gel did help a little with the warm feeling which comes with the laser zapping. Having too thick a layer of the gel product doesn't give any extra protection, unfortunately. Doing this actually hinders the laser from being able to sense the skin properly.

I was equally shocked to find that level 5 doesn't really hurt that much more compared to level 3 or 4. Since I have the gel, it won't go to waste. It will most definitely be used up. As for whether I would repurchase it or deem it necessary with the laser, my current answer is no. Then again...I haven't tried level 5 without the gel. Perhaps I'll try it and update next month.

tria Hair Removal Laser Facial Hair 2 Weeks Closeup

tria Hair Removal Laser Facial Hair 4 Weeks, 1 month Closeup

Upper lips.

There was probably no progression in hair loss or less hair growth 2 weeks after the first treatment. By the next bi-weekly session, I did notice slower hair growth. It didn't feel like there were any bald spots per say. Just that the hairs seemed like it was coming back at a slower pace. It is difficult to get a clear shot of what I mean with the upper lips.

tria Hair Removal Laser Armpits Hair 2 Weeks

tria Hair Removal Laser Armpits Hair 4 Weeks, 1 month

Armpits.

The results are surely more noticeable with my armpits hairs. Some hairs grew back just as long but there are also equally as many, if not more, follicles that are thinner and shorter. I am also keeping my fingers crossed that the hair laser will help fix the ingrown hairs somehow.

tria Hair Removal Laser Knuckle Hair 2 Weeks

tria Hair Removal Laser Knuckle Hair 4 Weeks, 1 month

Knuckle hairs.

This area was the most difficult to treat. Since the laser nozzle is flat and my knuckles are anything but, getting the laser to sensor my skin was challenging. There is a high possibility that I missed some hair follicles. But there does seem like something happening to the knuckle hairs; certain fingers' also experienced the same slower and finer hair regrowth like on my upper lips and armpits.


It hasn't been 3 months yet, but I think I can safely say there are some results even after 1 month. The photos seem promising enough to continue on with the process. 'Til next time!

0 comments: