December Hauls

12:22:00 AM mandy 0 Comments

lavlilacs December 2017 haul

In attempts at a fresh start for the new year, I thought I would share my December haulings today instead of the first Sunday of the next month as I normally do. It just feels right to end 2017, beauty-wise, with an accumulation of the little things I got and with a hopeful spending goal for 2018—scale it down unless "absolutely necessary" and even then I have to share my detailed reasoning for the hoarding.

(This post will be a practice of sorts since I have been pretty inconsistent with how detailed I get in hauls as of late.)

lavlilacs December 2017 haul - Sephora

I know, I know. I stocked up on enough skincare to last me most of 2018 in the last few months. But everyone has been raving about Sunday Riley and Drunk Elephant and curiosity has been slowing eating at me on the inside. The only thing that held me back was their price tag. C'mon!! One bottle of product from either brand is at least USD $50+ (usually edging towards the $80+ mark for the more popular stuff). I have been most afraid of trying anything and actually liking it...all my monies.

When Sephora sent out their emails for the $20 off $50 VIB Rewards at the beginning of the month, I immediately thought of the mini-sized Drunk Elephants duos. Luckily for me, Sunday Riley offered a mini-set at a seemingly reasonable price as well.

Both the Sunday Riley Flash Fix Kit (USD $28) and Drunk Elephant Rise + Glow Duo (USD $23) totaled to USD $51 which was just enough to make the best use of the VIB Rewards. Plus the good thing about Sephora is the Free Shipping minimum of USD $50 is accounted for pre-promo codes. I also had a $25 gift card to spend and ultimately paid $8.75 out of pocket (NY tax included).

I was genuinely surprised when my Sephora orders arrived. Yes, that is right orders with an -s. For two items that could fit into both palms of my hands, Sephora packed and shipped them to me in two separate boxes that were large enough to fit a school textbook inside. Extra much? I was also somewhat expecting the bottles to be larger for some reason. I guess I was comparing the ~$20 price mark to K-Beauty price and sizing.

lavlilacs December 2017 haul - CVS

2017 is the year that I rediscovered coupons and CVS. All the items in the above photo were purchase for USD $5 or less each after ExtraBucks, CVS promotions, CVS brand specific coupons, and of course tax.

Maybelline Super Stay Matte Ink in 15 Lover (orig. $9.79) is one of the two unexpected purchases I made at the drugstores. The other being Lumene. To be honest, I really wanted to try the Maybelline Master Camo Color Correcting Pen in 10 Green (orig. $9.99) and saw that there was a "Buy 2 Maybelline and get $5 ExtraBucks" weekly promo. Since I already had a $2 off 2 Maybelline coupon and $10 ExtraBucks already on hand to spend, why not? I have been feeling a little experimental and also been more into matte lip colors recently. The total turned out to be USD $9.54 for both lip and face items.

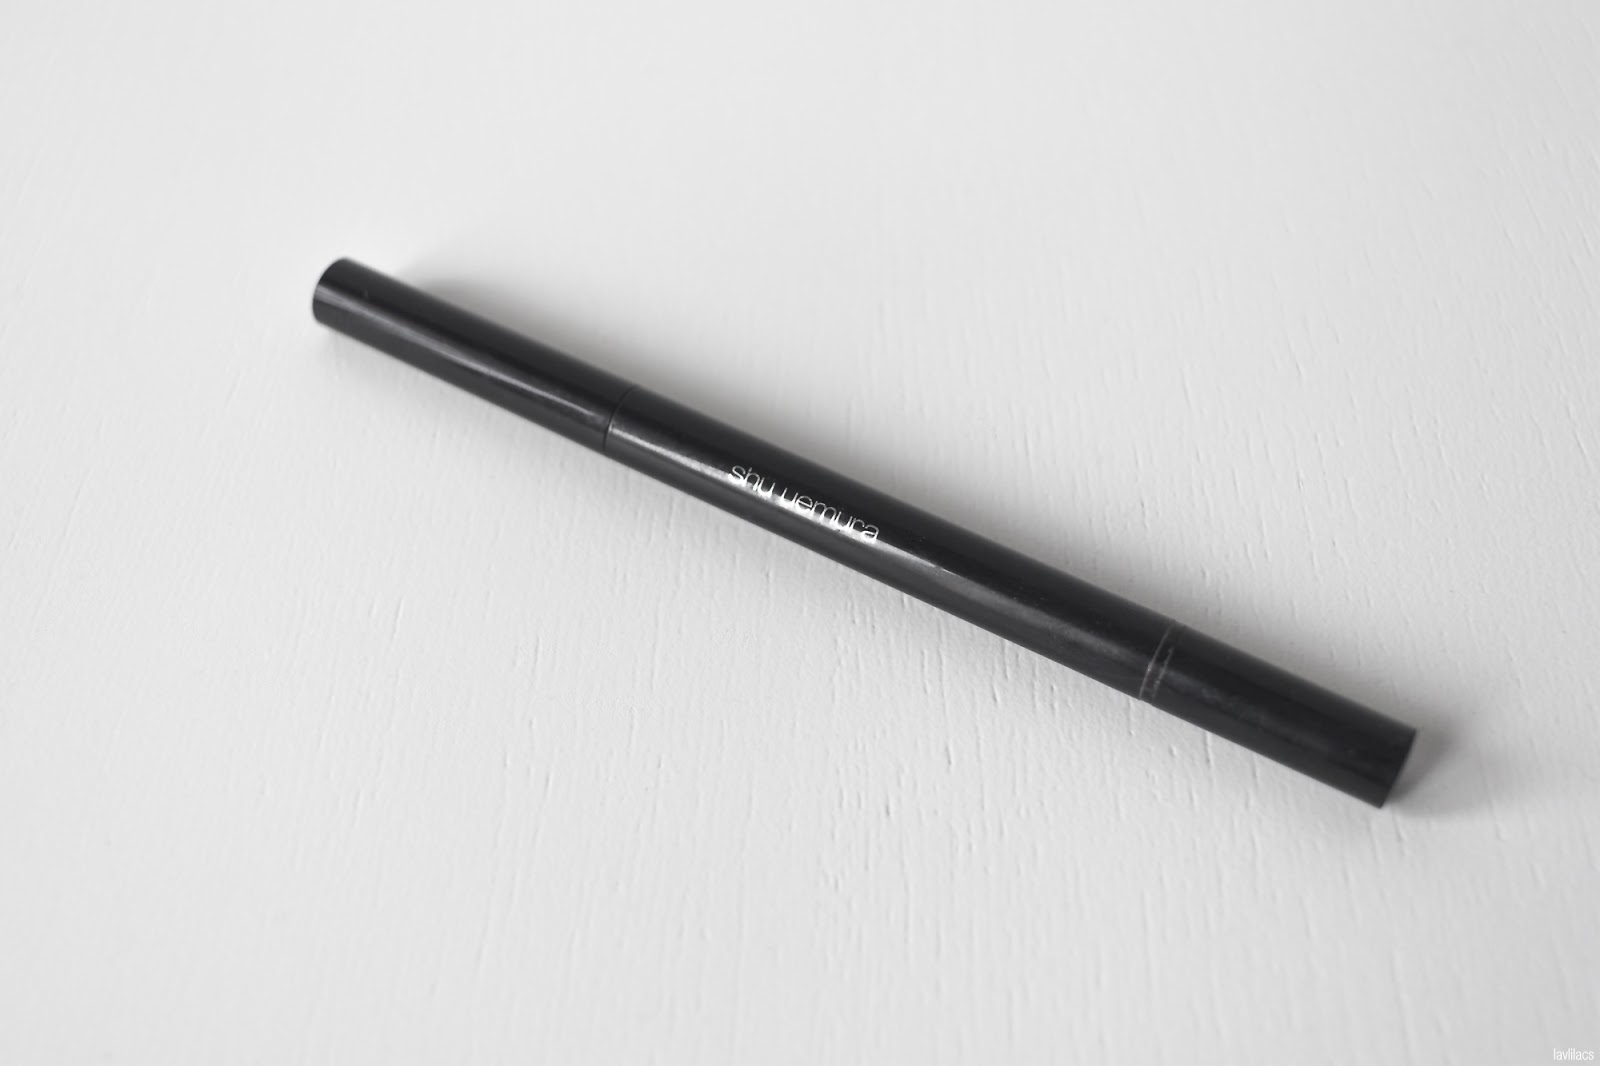
With the new $5 ExtraBucks to spend, a $3 off L'Oreal coupon, and a $2 off deodorant purchase coupon, I immediately got both the L'Oreal Infallible Matte-Matic Mechanical Eyeliner in 513 Deep Brown (orig. $9.79) and Crystal essence Chamomile & Green Tea (orig. $5.29) for USD $6.24. I have been in search of a new eyeliner since using up the last of my Korea-trip stock. Deodorant is just a necessity that needs no explanations.

On a separate trip to CVS, the coupon machine spat out another $6 ExtraBucks with an expiration date and a 30% off 1 item coupon so the only natural thing to do was to head towards the beauty aisles. I tried my best not to be lured in by sales (like that BOGO Free Ardell lashes) or more lip products that looked nice but would highly likely be a drawer filler. The most practical decision was eyeliner since that is something I wear on the daily. Revlon's Colorstay Eyeliner (orig. $8.99) seemed to have better reviews compared to the liquid variety under the same Colorstay line so I grabbed Black Brown to try. The CVS location I visited also happened to be clearing out their Lumene stock at 75% off so I added the Lumene Sisu [Urban Antidotes] Defend & Replenish Antioxidant Mist (orig. $25.49) to my bag. That visit's total was $8.39.

lavlilacs December 2017 haul - Deciem

And to the end the post with the only beauty item I bought on a whim and not with any kind of deal, Deciem The Chemistry Brand's Heel Chemistry (USD $15). I chanced upon the newly established New York store location in SoHo when Bestie C and I were waiting in line for Prince Street Pizza. I have been meaning to try more of Deciem's products but with the recent splurges I couldn't justify stocking up on even more products because I want to meet that Free Shipping minimum when making an online order. Having a physical location means I can stop by and just pick up any supplements I may need as skin issues come up, knock on wood.

Which is exactly why I walked out with Heel Chemistry. It felt like a "necessary" supplemental purchase since my feet were getting pretty ashy and callouses were quickly hardening even after having only finished peeling from the foot mask one week prior. The box also promised results after 2 weeks of usage. Even though I don't typically lotion my feet, that Before and After photo on the back of the box got me good. Maybe this can, at the very least, help me start the habit of lotioning my soles?

0 comments:

Daily Look & End Results of Unofficial Project Make a Dent No. 3

12:15:00 AM mandy 0 Comments

lavlilacs 2017 daily makeup look

In the nearly 9 years since I dove head first into all things beauty, it took me a good 5 years before I somewhat comfortably wore base makeup on the daily. It took me another year or two for eyeshadows and another two to three for lipsticks. Yes, that's right...despite being mostly a "beauty blog" here on the interwebs it took me that long to gain that confidence. Even still my look of choice is barely-there, natural-ish makeup.

I amassed a ton of BB Creams and blush when BB Creams had yet to hit it big on the Western side of the world. Texture, consistency, and shading left most of those tubes to just sit in my drawers. Drugstore foundations were intimidating because there wasn't, still isn't, an opportunity to test pre-purchase and I am also not a fan of buying & returning. Higher-end varieties were just that, too expensive to justify for someone not yet committed to the makeup everyday routine. I thought wearing eyeshadows and lipsticks were typically attention grabbers and was never quite ready for it all if any.

Going through a cleaning phase knocked some sense into how unrealistic my makeup stash was compared to how much makeup I applied—at the time maybe a couple times a week...every so often. I tossed out bottles and bottles of the liquid stuff and was still staring at one too many powders, blushes, eyeshadow palettes, and lip products. That was basically the start of the first Project Make a Dent for me, way back in 2015.

Besides actually going through some makeup products, doing the PMAD's finally got makeup application to be a normal routine for me. Now it is just as natural as brushing my teeth and changing clothes in the mornings. I know how much time it will take me from start to finish and generally what techniques and products I have that work best. Even though there is still loads to learn, it isn't something that causes me stress anymore. Of all things to in the world to be stressed of, the fear of looking weird in makeup was foolishly one of mine.

lavlilacs 2017 daily makeup look - products used flat lay

That may look like a lot of steps but from the start of skincare to the end of makeup it only takes about 20 minutes tops if I don't suddenly try anything new in the mornings. If I used a cushion type base, I even shave off around 5 minutes of application time. My goal isn't to look perfectly flawless. I think the key to getting out the door is accepting that not every imperfect has to be painstakingly covered. Having all the products out in plain sight is also a game changer.

lavlilacs 2017 daily makeup look eyes

lavlilacs 2017 daily makeup look - products used details

My daily routine is usually, more or less, the above photo. I work my way from left to right product-wise. Step one and two are to color correct with the JUNGSAEMMOOL Artist Concealer Palette in Blend and the Clio Kill Cover Pro Artist Liquid Concealer in Green, whichever I grab first. Then I mix the Etude House Nymph Aura Volumer with the VDL MULE Ultimate Cover Palette in A03 and apply it lightly all over with a damp beautyblender sponge (the MULE cream foundation is very dry and thick). I follow with a light dusting of the bronzer shade in the MAC Cosmetics Mineralize Skinfinish in Pink Power and also highlight with either shimmery shades in the compact. Afterwards, I brush the MAC Cosmetics Mineralize Blush in Pet Me over top my cheeks; sometimes on the apples, other times right up to my temples.

I have recently started to "contour" my nose bridge with the Urban Decay eyeshadows in Naked and Buck shades. I use quotes because it is barely visible. I am practically incorporating this step for the sake of trying to use some of the shadow up. Since I lay some base color with the "contour" shades as well, I lightly dust either Half Baked or Toasted on my eyelids for some textural difference. I also bring some of that along the lower lashline to balance the look, it is especially helpful when dealing with a very smudgy eyeliner. If I use a liquid liner or more smudge-resistant liner, I would apply eyeliner as the last step in my eye makeup routine. When using the Marc Jacobs Beauty Highliner Gel Crayon in Blacquer, I have to use a darker shadow, Urban Decay in Darkhorse or Hustle, to set it because the formula is way too soft. The only way I can use that specific eyeliner is via a light-handed half-eyelid line that is smudged out the rest of the way with a thin eyeliner brush. Otherwise, I end up looking like a crying panda within minutes!

When I am satisfied with everything else, I fill my brows with the JUNGSAEMMOOL Refining Color Bony Brow in Smoky Bony and lightly dab (or swipe on with a brush) the JUNGSAEMMOOL High Color Lipstick in High Matte Burgundy onto the inner area of my lips for a gradient look.

lavlilacs 2017 Project Make A Dent No.3 end results

Even though I didn't make the Project Make a Dent official this year by sharing it on the blog, I was still trying my hardest to pan out things in my collection. I continued to work on the Visee Glam Nude Eye Shadow Palette in N-1 from PMAD No. 2 for a good portion of 2017. I upgraded to the Urban Decay Naked palette (circa 2011?) because I was honestly getting a little bored with the limited color selection. I hardly touched the Naked palette since purchasing it ages ago. While it doesn't look like much, most of the pans were filled to the brim when I first started. Now, look at those tiny tiny dips especially in Sidecar, Half Baked, and Toasted!

The other makeup item I stuck with from last year was the Pet Me Mineralized Blush from MAC. I was determined to see it to the end it after witnessing the progress from the last MAC blush I panned. It took daily makeup usage and an extremely excessive amount of brush swirling to see that much pan. I think it is safe to call it quits with this one once the new year hits, right?

Since I finished the bronzing/contour powder during the last Make a Dent journey, I quickly switched over to the limited edition MAC Wonder Woman Mineralized Skinfinish in Pink Power. It may be LE but I have also had it for years. This can't sit in my stash forever... I overfilled with joy when I saw the two highlighting colors diminish throughout the year. Contrastingly, the actual bronzer section looked to not have budge at all. But given how nicely domed it once was I can confidently say it has come a long way since January. I just hope it won't take me another full year to see the rest of the rings. The packaging is something I might keep around for the sake of it having been limited but at least the product inside wouldn't have gone to waste.

Otherwise, I finished a handful of eyeliners and cushion compacts throughout 2017 as well. They aren't as interesting to show in Project Make a Dents since I go through those kinds of items fairly regularly. They haven't been featured in any of my reviews of late either since the products themselves are on the older side (as in I've had them unopened for 1-2 years) and in the time period many of the products have been discontinued or upgraded. It is a shame though...I did find a few favorites amongst them and may never be able to find a better replacement. Well at least here is to another year of attempting to clear out my stash, rediscovering and trying out new things!

Merry Christmas & Happy Holidays everyone~

0 comments:

It'S SKIN Self Care Foot Peeling

12:21:00 AM mandy 0 Comments

lavlilacs It'S SKIN Self Care Foot Peeling Review

Sandal season might be over but foot care is a reoccurring "To do" task for me. Even though I love the ease and convenience of my sock-less shoes, I have long traded them in for sneakers and boots now that the colder temperatures have set in. I would love to forget about foot peels, as I do with shaving in the winter, but memories of painfully deep cracked heels say otherwise. Prevention is my motto this season!

Since it would be an extremely boring and redundant to do the same routine I've done for previous foot peels again, I chose not to do any extra feet soaks to help speed up the peeling process. Unsurprisingly, It's SKIN Self Care Foot Peeling worked just as well as the SAEM'sThe Face Shop's and Etude House's versions—it was just a much slower shedding this time around.

lavlilacs It'S SKIN Self Care Foot Peeling packaging - Korean and English ingredients, description, and directions

It'S SKIN's description:

Herbal extracts help soften and peel away dead skin for smoother feet.

Directions
1. Wear the self care foot peeling socks on both feet.
2. Put liquid from each pouch into the socks.
3. Soak feet for 1.5 hours and remove.
4. Wash feet gently with water.

Cautions
- Do a patch test if you have skkin allergy or sensitive skin. Put a small amount of liquid from the pouch onto the soft part of feet and leave it for 20-30 minutes.
- Do not use if you have a wound, swelling, or eczema.
- Do not use if you are diabetic or bleeding.
- Stop using if there is any redness, swelling, or itchiness.
- Do not scratch feet after using the product.
- Old skin with fall off naturally in one to two weeks.
- Do not forcibly remove dead skin when peeling begins.
- Foot baths in warm water helps the peeling process.
- Recommended frequency of use is once every 2-3 months. For more extreme cases it may require a second application at intervals of 28 days.
- Do not drink.

Ingredients
WATER, ALCOHOL, LACTIC ACID, SODIUM LACTATE, GLYCOLIC ACID, GLYCERIN, ARGININE, PHENOXYETHANOL, PEG-60 HYDROGENATED CASTOR OIL, SALICYLIC ACID, FRAGRANCE, DISODIUM EDTA, VITIS VINIFERA (GRAPE) FRUIT EXTRACT, CITRUS AURANTIUM DULCIS (ORANGE) FRUIT EXTRACT, PYRUS MALUS (APPLE) FRUIT EXTRACT, CITRUS MEDICA LIMONUM (LEMON) FRUIT EXTRACT, CITRUS AURANTIFOLIA (LIME) FRUIT EXTRACT, UREA, CAMELLIA SINENSIS LEAF EXTRACT, GINKGO BILOBA LEAF EXTRACT, BUTYROSPERMUM PARKII (SHEA BUTTER), ROSMARINUS OFFICINALIS (ROSEMARY) EXTRACT, LAVENDULA ANGUSTIFOLIA (LAVENDER) EXTRACT, THYMUS VULGARIS (THYME) FLOWER/LEAF EXTRACT, PELARGONIUM GRAVEOLENS EXTRACT, MELISSA OFFICINALIS LEAF EXTRACT, MELALEUCA ALTEMIFOLIA (TEA TREE) LEAF EXTRACT, MENTHA PIPERITA (PEPPERMINT) LEAF EXTRACT, EUCALYPTUS GLOBULUS LEAF EXTRACT, MENTHA SPICATA FLOWER/LEAF/STEAM EXTRACT

It'S SKIN (Korean retail): ₩7,000
RoseRoseShop: ₩7,000
*Availability and price of this on K-Beauty online shops vary.

lavlilacs It'S SKIN Self Care Foot Peeling - Before and After

The skin on my soles felt very thick and rough since the last peel was a good 3+ months ago. My heels, in particular, got so scaly that no amount of pumice stone scrubbing could get through the surface. These kind of masks are the only things I have found so far that works painlessly and almost effortlessly (I would much rather soak my feet in liquids once a month than rigorously scrub at it every night). The results this time weren't as clean but keep in mind the weather is much drier and my skin, as gross as it sounds, has been accumulating layer by layer for a long time.

lavlilacs It'S SKIN Self Care Foot Peeling box contents

Packaging

It'S SKIN Self Care Foot Peeling looks exactly like the previous road shop brands I've tried. The foot-shaped pouches come with ready-to-use serum and the plastic booties are double-layered and need to be secured via tying (versus a sticker).

lavlilacs It'S SKIN Self Care Foot Peeling socks

Ingredients

The list of ingredients seem longer compared to the previous ones I've used but has the same general components: AHA's + BHA's + a bunch of essential oils.

Color & Scent

The serum is colorless and relatively odorless despite containing essential oils and fragrance. Again, I did not experience any sensitivity to the acids this time around either.

lavlilacs It'S SKIN Self Care Foot Peeling progression of peeling

Before

Soaked my feet for 30 minutes in water prior to soaking it for 90 minutes in the peeling serum.

Day 1-5...even 6

Saw no changes. Didn't do any extra soaking.

Day 7-8

Feet finally started to see glimmers of the peeling process beginning: skin felt tighter and looked even ashier. No extra feet-soaks.

Day 9-12

Dead skin started to flake off; first where the skin was thinnest (between the toes) and then the arches and balls of my feet. The calluses were struggling but it slowly came apart as well over those few days. Still no extra soaks.

Day 13-14

80-85% of the skin completely shed off. The remaining 15-20% was all the heel calluses—that area had the most trouble and just didn't want to budge. After 2 weeks of patiently waiting, I accepted the fact that the acids didn't reach the remaining bits. A tried to pumice the stubborn skin off and finished the process with maybe 5-10% of dead skin remaining?

Thoughts & Recommendations

When the skin on my feet is thick enough to be clipped off like fingernails, these heavy-duty chemical peels are the only trustworthy products I can rely on. I am glad to know that all 4 of the different Korean road shop brands I have tried, It'S SKIN included, have in fact worked well...enough. It seems impossible to get every last bit of crusty skin with the rate calluses form on me. Heck, it has only been a week since the skin finished peeing and it's already starting to get ashy and scaly. Maybe I need to find something else to help maintain the baby soft skin post-peeling without the labor-intensive work that pumice stones require?

0 comments:

JUNGSAEMMOOL Artist Concealer Palette - Blend

12:12:00 AM mandy 0 Comments

lavlilacs Review JUNGSAEMMOOL Artist Concealer Palette - Blend

Typically when I spend too much time mulling over a product, I ultimately tend to find it to be just average overall. The time spent is usually to try and find more ways to justify the money spent despite knowing it didn't work out well. But the longer I used the JUNGSAEMMOOL Artist Concealer Palette in Blend the more I liked and reached for the palette. It is rare for something to first fell into the unsure bunch, then moved into the regrets pile, before discovering the specific conditions to finally graduate it to the love group. It's been a whirlwind relationship with this one.

lavlilacs Review JUNGSAEMMOOL Artist Concealer Palette - Blend packaging box

JUNGSAEMMOOL's Description:

Exclusive concealer palette for professional makeup artists that allows to cover any type of skin imperfection.

Professional Color Shade
Broad spectrum for various skin colors suggested by professional makeup artists.

Full Coverage with One-Stroke
Provides full-coveraged infused with One-Touch Covering Powders.

One-Touch Covering Powder
Infused with plate powders that have high-adhesion to skin, it provides full coverage with only a single stroke. It also has perfectly buildable texture that allows to adjust the level of coverage by layering.

Customizable Blending
Customizable colors of concealer enable to create variety of skin imperfection by blending in together.

Long-lasting
Skin Barrier Paste System protects the skin from getting dried while Marsh Mallow Powders absorb the oil and make the skin stay clean and smooth for a long time.

Skin Barrier Paste System
It creates a skin barrier after using to protect the moisture inside skin from getting evaporated.

Marsh Mallow Powder
Soft and bouncy powders selectively and quickly absorb the oil from skin and provide refreshing feeling without dryness.

Directions
Stroke with a brush or fingertip and lightly tap around it for blending.

Ingredients
Blend White
TRIMETHYLOLPROPANE TRIETHYLHEXANOATE, POLYBUTENE, TITANIUM DIOXIDE (CI 77891), MICA (CI 77019), ETHYLHEXYL PALMITATE, CERESIN, BIS-DIGLYCERYL POLYACYLADIPATE-2, TALC, POLYETHYLENE, METHYL METHACRYLATE CROSSPOLYMER, SILICA, CETYL PEG/PPG-10/1 DIMETHICONE, MICROCRYSTALLINE WAX, SORBITAN ISOSTEARATE, VP/HEXADECENE COPOLYMER, ADANSONIA DIGITATA FRUIT EXTRACT, POLYGLYCERYL-2 TRIISOSTEARATE, SILICA SILYLATE, METHICONE, TRIETHOXYCAPRYLYLSILANE, CAPRYLYL GLYCOL, DIISOSTEARYL MALATE, WATER, HDI/TRIMETHYLOL HEXYLLACTONE CROSSPOLYMER, POLYMETHYL METHACRYLATE, BUTYLENE GLYCOL, ETHYLHEXYLGLYCERIN, TIN OXIDE (CI 77861), PHENOXYETHANOL, IRON OXIDES (CI 77492), IRON OXIDES (CI 77491), IRON OXIDES (CI 77499)

Blend Orange
TRIMETHYLOLPROPANE TRIETHYLHEXANOATE, POLYBUTENE, TITANIUM DIOXIDE (CI 77891), MICA (CI 77019), ETHYLHEXYL PALMITATE, CERESIN, BIS-DIGLYCERYL POLYACYLADIPATE-2, TALC, POLYETHYLENE, METHYL METHACRYLATE CROSSPOLYMER, POLYGLYCERYL-2 TRIISOSTEARATE, SILICA, CETYL PEG/PPG-10/1 DIMETHICONE, MICROCRYSTALLINE WAX, SORBITAN ISOSTEARATE, VP/HEXADECENE COPOLYMER, YELLOW 6 LAKE (CI 15985), IRON OXIDES (CI 77492), ADANSONIA DIGITATA FRUIT EXTRACT, SILICA SILYLATE, METHICONE, TRIETHOXYCAPRYLYLSILANE, CAPRYLYL GLYCOL, WATER, HDI/TRIMETHYLOL HEXYLLACTONE CROSSPOLYMER, POLYMETHYL METHACRYLATE, BUTYLENE GLYCOL, ETHYLHEXYLGLYCERIN, TIN OXIDE (CI 77861), PHENOXYETHANOL, IRON OXIDES (CI 77491), IRON OXIDES (CI 77499)

Blend Pink
POLYBUTENE, TRIMETHYLOLPROPANE TRIETHYLHEXANOATE, TITANIUM DIOXIDE (CI 77891), MICA (CI 77019), ETHYLHEXYL PALMITATE, CERESIN, BIS-DIGLYCERYL POLYACYLADIPATE-2, TALC, POLYETHYLENE, POLYGLYCERYL-2 TRIISOSTEARATE, IRON OXIDES (CI 77492), METHYL METHACRYLATE CROSSPOLYMER, IRON OXIDES (CI 77491), SILICA, CETYL PEG/PPG-10/1 DIMETHICONE, MICROCRYSTALLINE WAX, SORBITAN ISOSTEARATE, VP/HEXADECENE COPOLYMER, ADANSONIA DIGITATA FRUIT EXTRACT, SILICA SILYLATE, METHICONE, DIISOSTEARYL MALATE, TRIETHOXYCAPRYLYLSILANE, CAPRYLYL GLYCOL, WATER, HDI/TRIMETHYLOL HEXYLLACTONE CROSSPOLYMER, POLYMETHYL METHACRYLATE, BUTYLENE GLYCOL, ETHYLHEXYLGLYCERIN, TIN OXIDE (CI 77861), PHENOXYETHANOL, IRON OXIDES (CI 77499)

Blend Green
POLYBUTENE, TRIMETHYLOLPROPANE TRIETHYLHEXANOATE, TITANIUM DIOXIDE (CI 77891), MICA (CI 77019), ETHYLHEXYL PALMITATE, CERESIN, BIS-DIGLYCERYL POLYACYLADIPATE-2, TALC, POLYGLYCERYL-2 TRIISOSTEARATE, POLYETHYLENE, IRON OXIDES (CI 77492), METHYL METHACRYLATE CROSSPOLYMER, SILICA, CETYL PEG/PPG-10/1 DIMETHICONE, MICROCRYSTALLINE WAX, SORBITAN ISOSTEARATE, VP/HEXADECENE COPOLYMER, ADANSONIA DIGITATA FRUIT EXTRACT, DIISOSTEARYL MALATE, SILICA SILYLATE, METHICONE, TRIETHOXYCAPRYLYLSILANE, CAPRYLYL GLYCOL, WATER, HDI/TRIMETHYLOL HEXYLLACTONE CROSSPOLYMER, POLYMETHYL METHACRYLATE, BUTYLENE GLYCOL, ETHYLHEXYLGLYCERIN, TIN OXIDE (CI 77861), PHENOXYETHANOL, IRON OXIDES (CI 77499), IRON OXIDES (CI 77491), BLUE 1 LAKE (CI 42090)

Blend Lavender
POLYBUTENE, TRIMETHYLOLPROPANE TRIETHYLHEXANOATE, TITANIUM DIOXIDE (CI 77891), MICA (CI 77019), ETHYLHEXYL PALMITATE, CERESIN, BIS-DIGLYCERYL POLYACYLADIPATE-2, TALC, POLYETHYLENE, METHYL METHACRYLATE CROSSPOLYMER, SILICA, CETYL PEG/PPG-10/1 DIMETHICONE, MICROCRYSTALLINE WAX, SORBITAN ISOSTEARATE, VP/HEXADECENE COPOLYMER, ADANSONIA DIGITATA FRUIT EXTRACT, POLYGLYCERYL-2 TRIISOSTEARATE, SILICA SILYLATE, METHICONE, DIISOSTEARYL MALATE, TRIETHOXYCAPRYLYLSILANE, CAPRYLYL GLYCOL, POLYGLYCERYL-2 DIISOSTEARATE, WATER, HDI/TRIMETHYLOL HEXYLLACTONE CROSSPOLYMER, POLYMETHYL METHACRYLATE, BUTYLENE GLYCOL, ETHYLHEXYLGLYCERIN, TIN OXIDE (CI 77861), PHENOXYETHANOL, BLUE 1 LAKE (CI 42090), IRON OXIDES (CI 77492), IRON OXIDES (CI 77491), RED 7 (CI 15850:1), IRON OXIDES (CI 77499)

Blend Yellow
POLYBUTENE, TRIMETHYLOLPROPANE TRIETHYLHEXANOATE, TITANIUM DIOXIDE (CI 77891), MICA (CI 77019), ETHYLHEXYL PALMITATE, CERESIN, BIS-DIGLYCERYL POLYACYLADIPATE-2, TALC, POLYETHYLENE, POLYGLYCERYL-2 TRIISOSTEARATE, METHYL METHACRYLATE CROSSPOLYMER, IRON OXIDES (CI 77492), SILICA, CETYL PEG/PPG-10/1 DIMETHICONE, MICROCRYSTALLINE WAX, SORBITAN ISOSTEARATE, VP/HEXADECENE COPOLYMER, ADANSONIA DIGITATA FRUIT EXTRACT, DIISOSTEARYL MALATE, SILICA SILYLATE, METHICONE, TRIETHOXYCAPRYLYLSILANE, CAPRYLYL GLYCOL, WATER, HDI/TRIMETHYLOL HEXYLLACTONE CROSSPOLYMER, POLYMETHYL METHACRYLATE, BUTYLENE GLYCOL, ETHYLHEXYLGLYCERIN, TIN OXIDE (CI 77861), PHENOXYETHANOL, IRON OXIDES (CI 77491)

Correctors - Largest pans 1.6 g // Mid-sized pans 1.1 g // Smallest pans 0.6 g

JSM Beauty (Korean retail): ₩35,000
JSM Beauty (USA retail): USD $44.06
Peach & Lily: USD $45.00

lavlilacs Review JUNGSAEMMOOL Artist Concealer Palette - Blend opened & brand new

lavlilacs Review JUNGSAEMMOOL Artist Concealer Palette - Blend back label

Packaging

Six colors of correctors in various sized pans, housed in a thin lightweight plastic palette with a generously sized mirror and dual-ended concealer brush. The lid closes shut with a click-lock mechanism.

lavlilacs Review JUNGSAEMMOOL Artist Concealer Palette - Blend inside closeup

Color usage recommendations

Blend White
Highlighting, Tone-up blending. (For covering dark spot or expressing soft color. Can be blended with other colors.)

Blend Orange
For covering brown dark circle and using as blush.

Blend Pink
For covering deep brown dark circle and using as blush.

Blend Green
For correcting the redness of dark circle and blemish, and correcting flush.

Blend Lavender
For correcting the yellowish skin tone and reddish blemish.

Blend Yellow
For covering bluish dark circle and correcting the redness and discoloration.

lavlilacs Review JUNGSAEMMOOL Artist Concealer Palette - Blend swatches

Color, Texture, Finish, & Scent

At first touch, the correctors feel quite dry. Give it a few seconds with some body heat and it becomes a whole lot creamier. But the correctors have a tacky/balmy quality to them, especially when applying via fingertips. Instead of being creamy in the sense that it'll slip and smooth easily, the JUNGSAEMMOOL correctors apply better when tapped onto the skin or swiped on with short and light brush strokes.

The colors in the palette are very pigmented. None of the correctors are thick in texture; all of them blend and adhere thinly as if it was like second-skin. Coverage, therefore, is light to medium at best. However, since it applies on in such a light layer the concealers are all highly buildable for more coverage—just never full.

Once blended, the concealers don't feel wet or tacky. It has a satin-like finish and in my opinion, doesn't require setting powder or a very minimal dusting. Fragrance isn't listed in any of the ingredients lists nor do the correctors have any scent to them.

How I Apply

Fingers // Using either my ring or middle finger, I warm up and soften the correctors before dabbing and tapping the colored concealers all throughout my face. Offers the smoothest and most natural application.

Concealer brush // Use a flat concealer brush or flat/paddle-shaped foundation brush to dab and tap the concealers onto my face. Offers higher coverage with fewer layers but is more difficult to blend.

lavlilacs Review JUNGSAEMMOOL Artist Concealer Palette - Blend coverage closeup

lavlilacs Review JUNGSAEMMOOL Artist Concealer Palette - Blend dryness closeup

lavlilacs Review JUNGSAEMMOOL Artist Concealer Palette - Blend applied comparison

Thoughts & Recommendations

Why I was initially unsure. Of all the concealers I have tried so far, this palette has the most unique texture. It is creamy with body heat but blends into something incredibly thin and dry. The product is the most natural-looking concealer type product I have ever used. Once the creaminess is blended in, all I am left with is the pigmentation of the correctors. While the finish is skin-like and transparent, it means coverage is also on the sheer side. I guess I expected it to work too much like a concealer instead of thinking it as a corrector.

Why I almost regretted. Due to the drier nature of the formulation, it clings onto dry patches and flaky dead skin like no other. I made the mistake of patting on the corrections over top poorly exfoliated areas and many pimples that were in the midst of recovery (i.e. shriveled and flaky). I also over powdered my face just a tad with translucent powder since the weather was warm at the time. The combination of all three led to arid makeup and scaliness.

Why I have grown to love. Mattifying powders, begone. Highly hydrating moisturizers, welcome! Once I had my skin balanced and textural issues fixed, the correctors apply so beautifully. They still have high adhesion and longevity despite the lack of setting powder. While the coverage is lacking, my skin tone is well balanced, not cakey, and still looks skin-like just with splotches of absurd colors—allowing me to go over with a lighter layer of foundation or cushion for the needed coverage. I love that my dark circles look brighter and livelier. The redness on my cheeks and around my nose isn't completely counteracted but it seems less severe.

The pigment is highly concentrated and shows up very evidently on light to medium skin. I only use Blend Orange and Blend Pink alone for the under eye area if I apply foundation or cushion overtop. Otherwise, I prefer to mix a bit of Blend Orange/Pink with Blend White for a pastel-peachy/salmon shade. Blend Green is my most used color and a favorite in terms of green correctors, in general, —it leans quite warm and has a muted-yellow undertone, which is quite rare in the realm of green correcting products (that all tend to have a white base). I reach for Blend Lavender and Blend Yellow the least. When I do they, typically go in areas that need a bit of brightening: corners of the mouth, corners of the eyes, and other highlight points.

What I would like differently. I have finally gotten used to the formulation and figured out the specific conditions my skin has to be in for the correctors to work well: well moisturized and well exfoliated. Now all I wish for is if JUNGSAEMMOOL made all the pan sizes more balanced or possibly release the green shade separately. I barely reach for the purple and yellow shades. Contrastingly, I use Blend Green just as much as, if not more than the two dark circle correctors, yet it has the smallest pan in the palette. It has only been a few months since I have incorporated it into my makeup routine and the bottom pan is already peeking through. I would gladly hoard Blend Green if she sold it individually. Refill pan maybe?

The palette would work great for those interested in color correctors but hate the thick and cakey makeup look. I am currently torn on whether I would repurchase the palette in the immediate future. There is still a ton of Blend White, Orange, Pink, Lavender, and Yellow left. The only color I see running out soon would be Blend Green but it isn't quite worth the $40+ dollars for the entire palette when I only want the one specific color. With that said, however, if I were to see more pan for a few of the colors I would 100% repurchase the Artist Concealer Palette in Blend.

0 comments:

November Hauls - add.

10:02:00 PM mandy 0 Comments

lavlilacs November 2017 haul - DIY Hairpin legs 2-rod 16inch high 0.5inch thick white powder-coated legs

lavlilacs November 2017 haul - DIY Hairpin legs packaging

It will be a long while before I tackle my next DIY furniture project; the cold and unpredictable weather doesn't help speed up any prospective plans either. In fact, unlike my last DIY where I had thought about and drew up plans for years earlier, this future project is as of right now completely unplanned for. Practically impulsive if I do say so myself...I saw the amazing price the set hairpin legs were selling for during the Black Friday/Cyber Monday sale at DIY Hairpin Legs Co. and I couldn't help myself.

I had toyed with the idea of making a bench-like piece after I completed the desk. A bench would be 100% a want instead of fulfilling any sort of need. It would be nice to have something that will match my desk in terms of aesthetics. It would be nice to have something more spacious to place bags I frequently reach for. It would be convenient to have a lighter "table" I could move around for taking photos for the blog. Yet the main thing that held me back was the cost of all the materials just couldn't justify any of those wants.

When the after-Thanksgiving sales began, the company I previously bought my hairpin legs from had a deal I just couldn't pass up on. Instead of paying nearly $80 dollars (pre-shipping) for a set of 4 2-Rod, 16" high, 1/2" thick, and pre-painted (powder-coated) white hairpin legs, I was able to get the set for just $30 (pre-shipping). That is more than a 50% difference! Plus all the time I would save because I don't have to personally paint the legs white this time around, hallelujah.

The package from DIY Hairpin Legs Co. came in a much better condition. There was only a small hole on one of the sides and the box, in general, was intact. Instead of kraft paper, each individual leg was wrapped in a foam sheet that was further wrapped with stretchy plastic cling film. Everything was bundled up with so much more care! I don't know if this is because the company recently changed their packing style or if the painted hairpin legs just generally receive more attention than the raw steel ones. Either option could be possible but I think the latter makes more sense since it would be terrible if the pre-painted legs arrived chipped.

Compared to the hairpin legs that I painted myself, the pre-painted version feels so smooth and looks much glossier. I don't think it is noticeable from afar but the glossiness is definitely apparent the closer I get to the legs. Good thing these little guys are half the height of my table legs; no one will ever really stoop that low to take such a close comparison view of both together anyways. I can't wait to think more about what to actually do with these legs now. I have a good half year before the weather starts to get warm again...

0 comments:

November Hauls

12:16:00 AM mandy 0 Comments

lavlilacs November 2017 haul - CeraVe, Sephora, and Peach & Lily

There hasn't been this much variety in my month-to-month beauty purchases in a while. The only thing all of these products have in common is they were bought on sale and/or with coupons. With all the stuff I already have that is basically the only sane reason I use to justify myself at this point.

lavlilacs November 2017 haul - CeraVe PM facial Moisturizing Lotions

CeraVe PM Facial Moisturizing Lotion is making its routine appearance. I have yet to share my written thoughts on it because I want to try the lotion in the drier, colder weather first. But I think actions are speaking a thousand words for me already. As per usual, I stacked a bunch of coupons and deals to buy both for ~USD $6-7 each.

(Of the 6 bottles total now that I have bought in the last year, I have seen at least 3-4 variations of packaging...what's up with that?)

lavlilacs November 2017 haul - Sephora VIB Rouge

While everyone (including my usual self) seems to lose all control during the annual Sephora VIB Rouge sale, I tried to be a tad more sensible this year. It felt wasteful to not use that 20% discount after all that money I dumped at Sephora last year to gain the VIB status. Plus, I had some gift cards to spend with the brand. So why not?

My self-control was reigned in well right? My actual purchase included both the Neogen Bio-Peel Gauze Peeling Lemon and Green Tea plus a Farmacy cleansing balm. Despite waiting for 2+ weeks before receiving any further progress updates on my VIB order, Sephora e-mailed to say the cleansing balm had in fact been sold-out. I'm glad the entire order wasn't canceled but I had my hopes up patiently waiting for 3 items... To think Sephora's website and inventory would be better connected than that.

lavlilacs November 2017 haul - Peach & Lily Black Friday Cyber Monday deals

While I was being disappointed by Sephora's lack of progress, Peach & Lily's Black Friday through Cyber Monday sale had me jumping up and down in my seat. 30% off everything, including their newly curated brands?! Score! Since I had swiped up some of their newer skincare brands, Olivarrier and abib, at their sample sale, I was most interested in finally getting my hands on more of the JUNGSAEMMOOL makeup.

The prices are higher than Korean retail on Peach and Lily but with the 30% discount, and EMS costs via Global Lotte/Hyundai in consideration, Peach & Lily was clearly the cost winner at that moment. I originally wanted to only get the JSM Refining Color Bony Brow pencil to replace my current brow product. But I was quickly reminded of their USD $50 free shipping minimum (that is currently waived for USA orders until the end of December). By that point, I got a little irrational and added the Artist Contour Palette in Shape and Shade, Essential Star-cealer Foundation in Medium-Deep, and High Color Lipstick in High Matte Burgundy. When else would I get to buy JSM on sale in the USA?? Mizon Snail Repair Eye Cream found its way into the mix when Peach & Lily promised a freebie sheet mask and their sheet mask travel bag for orders over USD $100, after discounts.

Apparently, all the control I had during the Sephora sale was meant to save for this massive dump at Peach & Lily instead. My order ultimately didn't come with that sheet mask, but I am too excited for the stuff I actually paid for to be upset by it. The important products are in my hands and that is all that matters! Christmas is here early for me~


0 comments:

shu uemura brow:sword eyebrow pencil - seal brown

12:25:00 AM mandy 0 Comments

lavlilacs shu uemura brow sword eyebrow pencil Review

Brows were never a priority when I ventured into all things beauty. I was more willing to figure out eyeliner before I went near the tiny strands of hairs above my lids. The thought of plucking one too many hairs or wrongly shaving a portion was too stressful. At least with other areas of makeup, I could remove it if anything went wrong. Brows? That requires a wait for it to regrow. Now that I mustered up enough trust in myself to tackle my eyebrows, I am slowly getting the hang of all things eyebrow related.

When I had the chance to shop shu uemura in person during one of the many layover stops in Hong Kong, I couldn't pass on the chance to try their brow products. The brand is best known for their cleansing oils and brow products (more precisely the hard formula pencil). While I love to try coveted items, I hated the idea of having to manual shave the tip with a knife—which led me to the shu uemura's brow:sword .

I would be lying if I said this was my first eyebrow product, this was actually number 2. First place went to Anatasia Beverly Hills Brow Wiz. I don't remember what shade I purchased or if it was even a good match or not. I walked into Sephora and trusted the experts to help me with my first brow item. After a few months of sparing usage, I thought the product itself was just ok; the pencil and spoolie broke off a little too easily and the tip was too thin for my liking. The main feature I liked was its retractability.

brow:sword is the complete opposite of Brow Wiz. One is thick, the other is thin. One has a slanted edge, the other a fine point. One is very sturdy, the other quite flimsy. All that I didn't like about Anatasia's bestseller, I found were fixed with shu uemura's underdog star.

lavlilacs shu uemura brow sword eyebrow pencil seal brown label

lavlilacs lavlilacs shu uemura brow sword eyebrow pencil seal brown packaging

shu uemura's description:

1st pre-shaped naginata brow pencil. easy and soft, yet precise and defined. the beautiful smooth texture allows for easy drawing and with a pre-set sharpener precision that comes naturally. the convenient brush tip also helps blending for a beautiful, perfectly finish brow look.

Directions
how to use brush
pull the bottom cap off to reveal the brush. hold the brush flat against the brow and brush outwards to comb brow hair.

how to use sharpener
twist the bottom cap to reveal the sharpener. hold the sharpener on notch at the bottom, twist the pencil to reveal 7 mm lead and gently slide the pencil along the groove at a 30 degree angle.

Ingredients
STEARIC ACID, RHUS SUCCEDANEA FRUIT CERA, HYDROGENATED CASTOR OIL, SUCROSE TETRASTEARATE TRIACETATE, C1-30 CHOLESTEROL/LANOSTEROL ESTERS, TRIETHYLHEXANOIN, SORBITAN SESQUIOLEATE, TOCOPHEROL, [+/- MICA CI77499, CI 77492, CI 77491, CI 77891]

Pencil catridge 0.3 g
shu uemura (Japanese retail): ¥ 4,000
shu uemura - refill cartridge (Japanese retail): ¥ 2,000
shu uemura (American retail): USD $35
shu uemura - refill cartridge (American retail): USD $25

lavlilacs shu uemura brow sword eyebrow pencil components
lavlilacs shu uemura brow sword eyebrow pencil sword closeuplavlilacs shu uemura brow sword eyebrow pencil sharpener

Packaging

A double-ended eyebrow product with a replaceable retractable pencil on one end and a spoolie/sharpener combo on the other. The pencil cartridge is easily removed with a gentle tug. Twisting the spoolie end will reveal the sharpener to help achieve the unique sword shape.

I love the design of this. The tube is thick and long enough to hold comfortably while not straining my hands. The spoolie is on the stubbier side but it is sturdy, none of that thin and flimsy stuff. I have never used the sharpener despite it coming with the pencil. I don't find myself ever needing the tip to be blade sharp.

lavlilacs shu uemura brow sword eyebrow pencil seal brown swatch

Color, Texture, Finish, & Scent

Seal brown is a very cool-toned ashy brown. This is the shade the sales associate in Hong Kong recommended me. Again, I made up my mind to trust her; c'mon it is Hong Kong! They help loads of people with dark black hair and with my similar skin tone. Seal brown seems to be a good match. The brown helps give a softer look and the cool undertones make my brows look more filled-in/shadowy versus drawn on.

The pencil seems waxy in its formulation and gives a matte finish. There isn't any scent. I love that it is is a harder type eyebrow pencil. I've used it for almost 2 years (albeit it was nearly untouched for the first year) with varying degrees of pressure and it never broke or crumbled on me. A light swipe only gives a faint line—but that is just the way I like my eyebrow pencils. Put a tad more pressure and the line gets exponentially deeper. This lets me build up the intensity to however I want. If a pencil is too soft and creamy I would over apply way too quickly.

lavlilacs shu uemura brow sword eyebrow pencil seal brown swatch on brows

How I Apply

On most days I draw an outline around my existing brows, giving it a sharper shape, and proceed to fill in the gaps. Then I take the spoolie, brush out my hairs, and blend away at the harsh edges I drew in for natural-softer brows.

Thoughts & Recommendations

Once the product is on my face it is very easy to blend with a spoolie; therefore, it is just as easy to rub off. With that said, my filled-in brows stay on for a long time on combination skin. The only time it is disturbed is if I scratch an itch or rub it accidentally (say against clothes or a hat).

Other than loving the color and formulation of the brow:sword, I didn't know how much I prefer the thicker slanted brow pencil tips until I started to use this product. The diagonal shape helps speed up the brow process a ton. I don't have to worry about whether my hand will draw a straight line with a tiny precision pencil or have to stroke individual hairs. If I did want to make hair-like strokes I could easily use the tippy-end of the sword to make the same defined lines as a precision pointed pencil would.

I almost forgot how expensive the shu uemura brow:sword is. Even compared to similarly shaped brow pencils available at Sephora, it is on the pricier end. Granted, one cartridge of the pencil is lasting me a very long time and I would give the brand bonus points for selling refill cartridges. Unfortunately, it seems like most shades of the brow:sword and refills are regularly out of stock (or never restocked) and shu uemura only officially sells via their website in the USA.

My experience with brow pencils is limited. But I wouldn't hesitate to recommend this product and shade to anyone else with darker hair, especially those with naturally black locks. Ashy browns aren't as harsh nor as strong as gray or black could be (unless that is the preferred look). Having a retractable slanted tip also makes this great for eyebrow newbies and lower-maintenance types since application is quick and pencil maintenance is virtually non-existent. For now, this will go on my wishlist for whenever I, or any family or close friends, touch-down in Asian airports or even visit Canada.

0 comments:

23 Years Old C-Tragel Modeling Mask

12:06:00 PM mandy 0 Comments

lavlilacs 23 Years Old C-Tragel Modeling Mask

I am not usually one to splurge on masks. Affordable, huge-packs of sheet masks have been my jam ever since I joined the skincare game. Yet I always felt they lacked something. Despite all the claims of brightening, pore-reducing, oil-control, age-defying, and so on...it was always just another moisturizing and calming product for me.

For the price, I cannot complain. But there are some things that have always bothered me. I am essentially forced to lie down for 20-30 minutes so the sheet and essence wouldn't fall off. If I am particularly tired and fall asleep with it on, the cotton supposedly reabsorbs all the moisture back + whatever is in my skin. Finding a brand with a mask that fits well is also a hit or miss.

I have tried clay masks and peel-off charcoal masks; I hated the clean-up and the pain. When the modeling masks became crazily popular on Instagram, it seemed to promise sheet masks' hydration, peel-off masks' satisfaction, and being pain-free. I couldn't believe my eyes and was intrigued. 23 Years Old C-Tragel Modeling Mask encapsulates everything that is trending in Western and Korean skincare right now: masking, vitamin-C, niacinamide, Centella Asiatica extract, and Coptis Japonica root extract. What more could I ask for?

lavlilacs 23 Years Old C-Tragel Modeling Mask description

lavlilacs 23 Years Old C-Tragel Modeling Mask directions

WishTrend's Description:

The C-Tragel Modeling Mask captures in the moisture while giving your skin a tone up effect with a unique C-tragel and Vitamin powder blend to help your skin energize to seize the day. Tone up, moisturize, replenish, and energize easier and better with the C-Tragel Modeling Mask!

C-Tragel is the perfection solution to improve your skin with an innovative combination of seabuckthorn oil and four seed oil to relieve, moisturize, calm, soften, soothe, strengthen, and energize to give you the extra boost you need to push through your day flawlessly.

Directions
1. Combine the C-Tragel with Vitamin powder in the mixing bowl.
2. Use the spatula to mix the solution in one direction.
3. Using the spatula, spread an even layer of the mask onto the entire face.
4. After about 20 minutes, remove the mask peeling from the bottom in an upward direction once the mask becomes firm.
5. Use the heat of your palms to help absorption of the remaining essence of your face for about 15 seconds. The heat enhances the effects of vitamin C.

Ingredients
Gel packet
AQUA, GLYCERIN, GLUCOSE, PEG-75, ALGIN, BUTYLENE GLYCOL, POTASSIUM CHLORIDE GLYCYRRHIZA GLABRA(LICORICE) ROOT EXTRACT, CENTELLA ASIATICA EXTRACT, BUTYLENE GLYCOL, GLYCERIN, ZINGIBER OFFICINALE (GINGER) ROOT EXTRACT, SCHIZANDRA CHINENSIS FRUIT EXTRACT, COPTIS JAPONICA ROOT EXTRACT, CAMELLIA SINENSIS LEAF EXTRACT, PROPOLIS WAX, CAPRYLYL GLYCOL 1,2-HEXANEDIOL, PEG-60 HYDROGENATED CASTOR OIL, PEG-60 HYDROGENATED CASTOR OIL, TRISODIUM PHOSPHATE, TETRASODIUM PYROPHOSPHATE, CELLULOSE GUM, NIACINAMIDE, SIMMONDSIA CHINENSIS (JOJOBA) SEED OIL, HIPPOPHAE RHAMNOIDES OIL, HAMAMELIS VIRGINIANA (WITCH HAZEL) EXTRACT, BACILLUS/SOYBEAN FERMENT EXTRACT, MELALEUCA ALTERNIFOLIA (TEA TREE) LEAF EXTRACT, ACTINIDIA CHINENSIS (KIWI) FRUIT EXTRACT, MALPIGHIA EMARGINATA (ACEROLA) FRUIT EXTRACT, MANGIFERA INDICA (MANGO) FRUIT EXTRACT, ROSMARINUS OFFICINALIS (ROSEMARY) LEAF EXTRACT, CHAMOMILLA RECUTITA (MATRICARIA) FLOWER EXTRACT, PLANTAGO ASIATICA EXTRACT, THUJA ORIENTALIS EXTRACT, HOUTTUYNIA CORDATA EXTRACT, ALLANTOIN, DISODIUM EDTA, CITRUS LIMON (LEMON) PEEL OIL

Powder packet
GLUCOSE, CALCIUM SULFATE, CHAMOMILLA RECUTITA (MATRICARIA) FLOWER POWDER, ASCORBIC ACID, ALLANTOIN, NIACINAMIDE, MALPIGHIA GLABRA (ACEROLA) FRUIT EXTRACT, CAPSICUM ANNUUM FRUIT POWDER, ALOE BARBADENSIS LEAF POWDER, ZEA MAYS (CORN) STARCH

23pack (Korean e-commerce): ₩29,500
Wishtrend: USD $29.90
oo35mm: USD $25.99
Sasa: USD $29.50 (price varies sometimes)

lavlilacs 23 Years Old C-Tragel Modeling Mask security sticker

Packaging

The modeling mask contents come housed in a sturdy plastic jar with a twist on lid. 23 Years Old seals it to ensure authenticity and it looks like they even include a barcode for those who want further confirmation via their 23YO mobile app. I chose not to double check mine since I have trust in oo35mm (where I bought mine from) and didn't want to bother with an app download.

lavlilacs 23 Years Old C-Tragel Modeling Mask components

Each container comes with 4 sets of the gel, powder, and wooden sticks. The bigger oval-ish packet contains the gel portion of the modeling mask; the smaller rectangular packet has the powdery stuff. I like that everything is pre-portioned. There is no room for error on my part since I don't have to measure anything out myself. It is a headache for those who are eco-friendly because it is a lot of extra waste.

lavlilacs 23 Years Old C-Tragel Modeling Mask contents

Color, Texture, Finish, & Scent

The gel portion of the modeling mask, straight out of the packaging, is bright translucent yellow in color. It has a very noticeable citrus, specifically orange, scent.

The powder is mostly white with some brown speckles pre-mixing.

In case it isn't clear, I empty out the plastic container and use it as a mixing bowl. After I combine the wet and dry ingredients together the goop turns into a bright orange color with pulp-like bits suspended throughout. If the gel, pre-mixing, smelled a bit like citrus, the combined mixture smells just like cutting open a juicy orange. The gel becomes slightly runnier after it is blended yet still holds some shape.

There is an initial cooling sensation and tingliness immediately following application—as if you didn't know you had a cut and got some fresh orange juice on the wound while peeling its skin. The tingle doesn't last very long, maybe a few minutes max? I assume it is because of the ascorbic acid. It might also be the ascorbic acid + niacinamide pairing.

The goop is very easy to spread in the sense that it will not start drying and seizing up mid-application. It is much more forgiving application wise than the Lindsay clay modeling mask (that one starts drying within a few minutes after mixing the powder with water).

How I Apply

Tip #1
23 Year Old's gel modeling mask isn't overly drippy but the force of gravity is strong. I like to place more at the top (of forehead/highest point of cheeks) and let it naturally travel down while helping it along with the wooden stick. I do have to say that it was difficult the first few times I used the C-Tragel Modeling Mask because I was trying to stare at the mirror while scoop stuff out of the jar and applying it on my face, on top of trying to make sure nothing gets caught in my hair or drips onto the floor. But practices makes perfect, yeah?

Tip #2
Tied hair is a must. But a headband of some sort is also a necessity, a clip just won't do. Every little strand of hair must be pulled back and held down taut. It doesn't hurt at all to remove hair from the dried mask; it is still a pain in the butt to have to pick tiny pieces of gel out without a wash.

lavlilacs 23 Years Old C-Tragel Modeling Mask rubber gel mask

Thoughts & Recommendations

It takes around 30 minutes for the gel to completely set.  Even after the gel sets, it doesn't ever feel dry. You know like how jello can solidify but still have a damp/wet feel to the touch? I like that I can freely move my mouth, eyes, and nose if need be. Depending on how evenly the modeling mask is applied, it could come off in one piece. I found that the whole mask slides right off once I start lifting up some of the outer edges. Cleaning the mixing bowl is also a breeze—wipe with a tissue, rinse with water, and air dry.

Maybe my skin was pretty dry pre-masking or is it just the characteristic of modeling masks? Unlike sheet masks, there isn't much extra essence to pat in with the C-Tragel Modeling Mask—my face still looks very well moisturized and plump though! I could immediately move onto the next step in my routine and seal the essence in with a moisturizer. The mask seems to have helped with my pores throughout the next day since the pesky holes did seem less noticeable (without having done anything else new in my routine).

Even though modeling masks are pricier and require more effort when compared to sheet variety, I am beginning to prefer the gel mask more. The big factor is I could actually move my face and sit up without worrying about the sheet mask sliding off. Plus the act of mixing a mask and applying it to my skin with a spatula feels pretty relaxing...after I overcame the learning curve. Since I use these style of masks more sparingly it also feels more pampering rather than being just an extra step in a multi-stage routine whilst trying to conquer a neverending hoard of sheet masks.

0 comments:

October Haul

12:28:00 AM mandy 0 Comments

lavlilacs October 2017 haul - drugstore sales and coupons

You would think that after the massive skincare haul I made last month at Peach & Lily's sample sale I would not buy anything else for a while. Funny. There's always something to accumulate...apparently. At least the few items I picked up in October were all bought on sale, with discounts, or given to me as a gift/souvenir. Once CVS hooked and reeled me in with their discounts, I lost all control. I can see why there are people in the world who take coupon-ing very seriously. The satisfaction is unreal. I comfort myself by saying I paid $10 or less for each item.

When Neutrogena released their Light Therapy Acne Spot Treatment I was skeptical but intrigued. Price kept me from getting one to call my own; at it's cheapest I've seen it retail around USD $17, at it's priciest I've seen close to USD $23. If the dinky looking light wand didn't work, $23 would have been a nice filling meal out with friends! As my face was erupting during that time of the month, I coincidentally found a $10 off manufactures coupon for the Neutrogena Light Therapy range and CVS also sent me a 25% off coupon...I beelined right to the store. After coupons and taxes, I ended up only paying $8.77 for the light therapy stick. Score!

After falling in love with the CeraVe PM Facial Moisturizing Lotion, I couldn't help but get another backup since I had coupons a plenty (40% off + $2 manufacturer's coupon...$16.49 to $8.77). I am not in dire need of another moisturizer right now but it is more reassuring to know I have a backup on hand just in case one of the newer products doesn't work out. Plus, when I do use the PM lotion, one bottle only lasts me around a month. The bottles in reserve wouldn't sit and rot in my stash drawer, ever.

My wallet is in a dangerous place after I rediscovered Liah Yoo, who also introduced me to the Gothamist on YouTube. Their skincare philosophies and expertise can be pretty convincing. Renée recently raved about the CeraVe Hydrating Cleanser for the cooler drier weather and, what else is new, I found myself swimming in coupons and sales again. The entire CeraVe line was on a 25% off sale that week, I had a $2 off $10 CeraVe purchase coupon at CVS, and I remembered the $2 coupon on CeraVe's website. To top of all off, I also had $3 CVS ExtraBucks. A $13.99 purchase became a $3.80 steal.

Maybe acne patches will make a yearly appearance in my haul posts? As with last year, my Aunt stocked up on the dressings when she visited China. I honestly still haven't gone through the stash from her last trip but it never hurts to have these on hand. When the sticker work, it works so well.

0 comments:

Papa Recipe Bombee Honey Pudding Set

12:04:00 AM mandy 0 Comments

lavlilacs Review Papa Recipe Bombee Honeyed Pudding Set

Impulsive online purchases are a huge gamble with luck. Cheap prices and cute packaging draw me in and the next thing I know it arrives on my doorsteps and greets me in reality. My expectations weren't high since Papa Recipe is a new brand to me. Both products in the Papa Recipe Bombee Honey Pudding Set far exceeded any minuscule expectations in their own respects.

lavlilacs Review Papa Recipe Bombee Honeyed Pudding Set packaging

oo35mm 's Description:

Made with all-natural ingredients with honey and propolis as key ingredients directly from mother nature. This pudding type peel off pack removes skin impurities, leaving skin glowy and nourished. The cream is full of nutrients that replenish and hydrate the skin to build a barrier against possible irritants for stronger, healthier skin. Experience the rich nourishment directly from nature with a burst of intense hydration without the heaviness or stickiness!

Directions
Mask
After cleansing, apply over desired areas evenly. Leave on 10-15 minutes, then remove from bottom to top gently. Rinse off any leftover mask and proceed with skincare routine.

Cream
After skin/toner or after using the peel off mask, put a small amount of cream into your hand and apply it around your face. If your skin is especially dry, apply another thin layer of cream.

Ingredients
Mask
WATER, POLYVINYL ALCOHOL, ALCOHOL, 1,2-HEXANEDIOL, HONEY EXACT (10,000PPM), CARICA PAPAYA (PAPAYA) FRUIT EXTRACT, PROPOLIS EXTRACT, BUTYLENE GLYCOL, PENTYLENE GLYCOL, ALLANTOIN, DIPOTASSIUM GLYCYRRHIZATE, MICA, FRAGRANCE, TITANIUM DIOXIDE, CI 77491, TIN OXIDE, GOLD

Cream
WATER, GLYCERETH-26, BUTYLENE GLYCOL, PEG-240/HDI COPOLYMER BIS-DECYLTETRADECETH-20 ETHER, 1,2-HEXANEDIOL, HONEY EXTRACT (10,000PPM), PHELLINUS LINTEUS EXTRACT, CARICA PAPAYA (PAPAYA) FRUIT EXTRACT, PROPOLIS EXTRACT, HYDROLYZED COLLAGEN, HYDROXYETHYL UREA, POLYSORBATE 80, ARGININE, AMMONIUM LACTATE, USNEA BARBATA (LICHEN) EXTRACT, UREA, ZANTHOXYLUM PIPERITUM FRUIT EXTRACT, CARBOMER, PULSATILLA KOREANA EXTRACT, SODIUM HYALURONATE, FRAGRANCE

Mask 60 ml // Cream 25 ml

Papa Recipe (Korean retail): ₩30,000
BeautyBoxKorea: USD $21.48
BBCosmetic: USD $14.99
Amazon: ~USD $13.00
Sasa: ~USD $12.00

lavlilacs Review Papa Recipe Bombee Honeyed Pudding Set products

Honey extract. An effective antibacterial ingredient and wound healer. Raw honey is a source of minerals, vitamins, antioxidants, and enzymes.

Propolis extract. Has antibiotic and anti-inflammatory qualities. Good for wounds and irritations.

Papaya extract. Contains Vitamin A & C and enzymes for exfoliation and antioxidants. Can help clear dead skin and lightening discoloration.

lavlilacs Review Papa Recipe Bombee Honeyed Pudding Set products opened

Packaging

Mask // Comes in a highly flexible plastic tube with a screw on cap. I like the cute designs on the packaging and appreciate the fact that there is negative space to let the transparent tube peak through. I would prefer if the cap was a flip-top one instead.

Cream // Comes in a clear plastic jar. I won't comment too much on it since it is just a sample. It is what it is and serves its job.

The peeling mask only comes in this set, in one size. The cream is available in a larger size.

lavlilacs Review Papa Recipe Bombee Honeyed Pudding Set swatch

Color, Texture, Finish, & Scent

Mask // Clear with some specks of gold-like particles. It is super sticky and tacky. it feels and smells exactly like honey. Thus, the formulation is difficult to spread.

Cream // Transparent gel with a tinge of yellow-orange color. It has an interesting texture: jello-like and keeps its shape after it is scooped out of the jar. But after a while, the indent in the jar will flatten out by itself and the glob that is in your hands will start to become runnier. Just like the mask, it smells just like honey. Unlike the mask, it is neither sticky nor difficult to spread.

lavlilacs Review Papa Recipe Bombee Honeyed Pudding Peel Off Facial Mask after

How I Apply

Mask // Spread an even layer across my entire face (avoid eyebrows and hairlines) after cleansing. Thin layer dries in 10-15 mins. Thick layer dries in 25-30+ mins. I found that I waste a tad less if I directly squeezing the product onto my face and spread versus putting it on my finger and then applying.

Cream // Generously scoop some onto my palms. Rub it between my hands to liquify. Gently smooth throughout face and pat cream in.

lavlilacs Review Papa Recipe Bombee Honeyed Pudding Peel Off Facial Mask after full face closeup

Thoughts & Recommendations

Mask // Compared to all the other peel-off masks (charcoal, egg, Japanese, Korean, etc.) I have tried, this Honeyed Pudding Peel Off Facial Mask is unbelievably easy to remove. It is the first peel-off product that my pain intolerant skin can handle. The mask comes off in one piece as long as I wait patiently for the entire thing to dry. I didn't experience any pain as the dried mask is very elastic and soft. My skin isn't red or irritated afterward either.

However! I am not sure if it did much for removing deep-rooted impurities. It seems to pick up the most superficial layer on my face. But the most stubborn dry patches, especially around my mouth, always remain. My pores also don't look less clogged. While my skin feels softer after the mask, it definitely doesn't feel "nourished" like the product promised...a moisturizer is needed as a followup.

Cream // For something that is formulated with honey, I thought it would be pretty tacky and heavy. Kudos to the brand for formulating and accurately describing the Honey Pudding Cream as something that leaves no heaviness or stickiness. The cream sinks into my skin quickly and leaves it feeling plump, moisturized, hydrated, nourish, etc. You name it, I felt it at one point! I think the cream set a new mark in the moisturizing game for me.

Albeit, I did try the small jar of cream out mostly in the humid and hot summery NYC days...I wonder how it would fair in the cooler and drier weather? Even with the humidity, the cream does tend to lose its magical touch throughout the day on the driest areas of my face (i.e. chin and surrounding lower jaw area).

I would very highly consider repurchasing this if I am looking for a peel-off mask in my routine or want a highly nourishing cream. BUT I am not sure if it is worth paying the original retail prices (₩30,000 - close to USD $30) for the set. I would have a serious mental debate even if the set was ~USD $20. The mask was nice but not that nice. Although I really enjoyed using the cream a lot more than the mask, a regular full-sized jar of it costs ₩56,000 - close to USD $56...with that tag it is a pretty luxe product. If I never find a better performing & more affordable moisturizer or I find that specific cream available for a lower price (~USD $30, plus or minus) I would come running back at full speed to this moisturizer.

0 comments: