Customized | Hairpin Desk

Two years ago, I rearranged my desk to refresh my room. Two years later, I switched it with a custom-made desk instead. Extra? You can say that. Necessary? I would like to think so.

lavlilacs Custom Hairpin Desk

lavlilacs Custom Hairpin Desk 2

I was originally hesitant to have a non-painted, original wood colored, tabletop because every other piece of furniture in my room is pitch dark. The birch wood is also out of place given how yellow my flooring is. This is partly why I went through all the troubles to have white hairpin legs instead of the industrial metallic look, at least then something will tie in with the rest of the room.

It might not be the prettiest desk nor the most refined piece of furniture, but it fits the space and crosses out all the issues I previously had with my old IKEA Malm desk. As far as desks go, it was generously spacious...especially when I had a smaller computer setup (i.e. laptop). As I sat in it for a while, I quickly developed a few small issues. But I generally loved the position the table is in so I set to find a happy medium.

Issues with old setup

1. My iMac monitor was too large for the depth of the desk—headaches and eye strain galore.
2. The corner of my room has a weird protrusion to cover pipes—table can't be pushed against both walls at once leaving large gaps and wasted space.
3. The original desk had support along the backside—hits against the radiator and blocks electrical outlets.
4. The table legs were closed off—difficult to see the trash can (which I leave next to the desk & out in the open).

lavlilacs Ikea Malm Desk abovelavlilacs Custom Hairpin Desk above
lavlilacs Ikea Malm Desk sidelavlilacs Custom Hairpin Desk side
Before
After

Of the problems I had, the only thing I could change was the placement of my computer and the desk itself. I tried to solve the depth issue by:

1. placing the monitor on the window sill and moving the table slightly away from the wall. However, the screen became a little too far and high for my sitting height.
2. placing the monitor on the furthest edge of the desk and moving the table closer to the wall. I would either find my face very close to the screen but my arms were comfortable or I sit so far back that my arms have no table space to rest on.

The perfect solutions seemed to be a combination of both; the iMac should sit as close to the window as possible and the desk should have a deeper tabletop.

Why didn't I just set out to purchase a table the size I needed? Apparently, the standard desk depth is around 25-26 inches. The depth I needed in order to forcibly sit far enough away from the monitor is closer to 32 inches or above. The extra 6 inches makes a huge difference! Solid wood butcher blocks could have been an option if I wasn't trying to keep costs low; plus, I had to cut a corner out which would have been a waste of a beautiful piece of kitchen-grade finished wood.

lavlilacs Custom Hairpin Desk planning

I drew the first sketch in 2016. It was just an unfeasible wish at the time. Every room in the house that needed a desk already had one. If I made one then, it would have been very unnecessary in many people's eyes. When my brother recently switched over from a laptop to a Windows desktop computer with the works (monitor, tower, keyboard, mouse, speakers, mic, etc.) his small desk (about 2/3 the size of the IKEA Malm) became overcrowded. My perfect excuse finally came!

The thought that DIY projects would be affordable is dangerous. It might be in some scenarios, just not quite so in mine. I wanted the most affordable version of a simple desk as I could get. Simple in the sense that it is minimalistic and easy to put together. Even still, a huge chunk of the cost went into the hairpin legs, then the plywood, then the paints & clear coat for the table legs, and other miscellaneous materials. Since my uncle generously helped me out, I saved money on a good deal on screws, clear coating for the tabletop, and machinery & equipment rentals.

What I Bought; $213.68 (including NY sales tax)

Set of 4, 3-Rod 28" High 1/2" Thick Raw Steel Hairpin Legs $98.30
1 sheet of 3/4" 4'x8' Birch Plywood $54.41
3 cans of Rustoleum Painter's Touch 2x Ultra Cover Paint + Primer in Flat White $12.99
2 cans of Minwax Water-Based Polycrylic Protected Finish in Clear Satin $29.98
Vinegar ~$4
Paintbrush ~$1-4
Paint tray ~$1
Set of 4, The Hairpin Leg Co. Hairpin Leg Protector Feet in White $10.00

What Uncle Spared Me; unquantifiable

3M Paint Sanding Respirator Mask $7.97/pack of 2
3M Blue tape ~$7-9
Lots of 1-1/4" screws ~$7-10/box of 100
Wood glue ~$5-7/bottle
1 Quart of Benjamin Moore Benwood Stays Clear Acrylic Polyurethane in Low Lustre ~$21.79

Table saw
Jigsaw
Miter saw
Clamps
T-square
Sander + sandpaper
Electric screwdriver
Vacuum with blower (for sand dust)

lavlilacs Custom Hairpin Desk process

In order to have the table length I had in mind, bowing (sagging) could have been a potential issue. It could have been exacerbated because the radiator would have sat right in the middle as well. The two possibilities were to have a thick tabletop by gluing two 3/4" boards together OR having a fake 2-layer top by creating framing around the edges and adding support in the middle. I chose the latter to keep costs low—an extra plywood would have been another $54.41!

Home Depot can cut boards. The one I went to did not make cuts less than 12". We needed our 48"x96" board to be cut into one 68.5"x34" (table size), three 68.5"x3.5"(4 edges), one 68.5"x3" (middle support), and scrap 27.5"x48" (leg support & extra). Since the store couldn't do make the smaller cuts, we left with 3 pieces (68.5"x34", 68.5"x14", and 27.5"x48") and my uncle made the rest of the cuts himself.

The worst part about Home Depot cutting a lower-quality plywood board is the chances of the cut edge splintering is very high, especially when going against the grain. Their machine is powerful and mainly used for rough cuts. It isn't ideal for furniture but what can ya do? The best we did was place the severely damaged sides where it couldn't be seen or felt.

My uncle chose to cut 45-degree triangles off the corners of the support beams to improve the aesthetics. He attached it with a light layer of wood glue and many many screws. This isn't a foolproof method, not all edges were completely stuck together...as long as the gaps aren't terribly large.

Sanding wasn't the most time-consuming since he had a mechanical sander. With that being said, there is still a lot of sanding to be done. Straight back from the store, sand. After anything else is cut a little bit, sand. Before anything is attached together, sand. After it is attached together, sand it again. After every layer of primer/paint/clear coat, sand sand sand!

The step that took the most time was unsurprisingly painting. I chose to forgo sanding in-between coats for this project. Even still, I found myself applying clear coats for multiple days because I had to cover both the top and bottom of the tabletop and giving sufficient time for one side to dry before flipping it over. The quart of clear coat gave me 2-3 very light coats on the underside and 6-7 very light coats on the top surface. Each coat needed 30 minutes of drying time before the next one could be applied and ~24 hours before it dried through.

While I waited for the clear coating to cure, I ordered feet protectors off Amazon since I did not plan on using a rug to protect the hardwood floor. The week wait was long yet completely worth it. The feet protectors I found were from a UK brand called The Hairpin Leg Co. and they luckily offered a white version. It isn't a true white, more like a creamy off-white. Once on and the table is right-side-up, the shadows help mask the color difference.

lavlilacs Custom Hairpin Desk underside

A better view of the table situation. How the top was framed. How the edges can finally reach the walls. How open the hairpin legs make the area feel. How all the outlets are fully accessible and with extras to spare.

lavlilacs Custom Hairpin Desk detailslavlilacs Custom Hairpin Desk details 2

My desktop monitor is now finally the perfect distance away. I no longer have to zoom in 2x, 3x times to look at websites. I do not have to arch my neck way back to look at the screen. I also don't have to go blind because the monitor is only a foot away from my eyes. My elbows get plenty of resting space while all my other junk can be sprawled all over. Glorious!

I will admit though, reaching for things across the table is much harder now unless I physically move my butt out of my seat. I guess this is a good thing for my body in the long run?

lavlilacs Custom Hairpin Desk cable organizationlavlilacs Custom Hairpin Desk details 2

Another nice perk to come out of the custom desk. No matter how accurately things are measured, it is probably impossible for tables to stick to walls without any gaps whatsoever. The benefit from the tiny gaps I have are the natural cable organizers. I did not have to cut a hole for the computer cable to pass through nor did I have to buy cord management systems to stick onto the desk. Huzzah!

And so that is the story of how my custom hairpin desk came to be. Hopefully, it will last a while without too much paint wearing down or splinters catching into my skin. That is the only fear I have with wooden furniture.

Deciem The Ordinary 100% Organic Cold-Pressed Rose Hip Seed Oil

lavlilacs Deciem The Ordinary 100% Organic Cold-Pressed Rose Hip Seed Oil Review

Brands seem like they are dropping oils left, right, and center in the skincare world. Western brands are especially invested in cleansing oils, finally. But I think the big stars to come out of it are the facial oils. Just about everyone in the beauty world seems to be raving over Sunday Riley's oil concoctions and  Drunk Elephants' marula oil. At $40s-70s price point, however, those are products I haven't gotten on board with. The Ordinary's 100% Organic Cold-Pressed Rose Hip Seed Oil is a one-ingredient star with a low price and many potential benefits, what's to lose from trying it?

lavlilacs Deciem The Ordinary 100% Organic Cold-Pressed Rose Hip Seed Oil packaging

Deciem's description:

Water-free, alcohol-free, silicone-free, nut-free, vegan, & cruelty-free

This formulation uses 100% pure Rosehip Seed Oil that is both cold-pressed and organic. Rosehip Seed Oil is rich in linoleic acid, linolenic acid and pro-vitamin A, all of which degrade when the oil extraction process involves heat. While cold-pressed extraction is complex, it preserves all of the quality of this important oil which has been shown to reduce signs of photo-ageing and many other skin conditions.

Note: Supplied in UV-protective packaging.

Directions
Apply once a day to the face, ideally at bedtime after application of water-based treatments.

Ingredients
ROSA CANINA SEED OIL

Oil 30 ml

Deciem: USD $9.80

lavlilacs Deciem The Ordinary 100% Organic Cold-Pressed Rose Hip Seed Oil flat lay

This is only my second time using a facial oil, the first being Josie Maran's Argan Oil many years ago. It isn't that I actively try to avoid using oils; I love using cleansing oils for double cleansing. The non-wash off oils never caught my attention again after the big argan oil hype.

After researching about The Ordinary, I found a ton of people also sang praises for the rose hip seed oil. They said it is fast absorbing and helps with their acne scarring. Plus, oils are generally great for combating flakiness which I do have a ton of despite my cleansing and moisturizing routine. So I inevitably became intrigued.

Benefits of topical rose hip seed oil

"Dry" oil
→More linolenic acid than oleic acid
→Lighter in its consistency
→Sinks into skin better without oily residue

Anti-inflammatory
→Good for sensitive skin, wounds, & burns

Has tons of vitamins & antioxidants
→Helps decrease environmental damage
→Protects against sun damage

Have essential fatty acids
→Hydrates skin
→Stimulates cell regeneration (repairs skin)
→Reduces scars and fine lines
→Improves skin tone and texture
→Restores elasticity

lavlilacs Deciem The Ordinary 100% Organic Cold-Pressed Rose Hip Seed Oil pipette

Packaging

Some of The Ordinary's products come in amber-tinted UV-protective bottles. I think the darker bottles help to slow the degradation of certain ingredients when it is exposed to sunlight and heat. Since this is 100% oil (free of preservatives), it probably needs to be in this type of packaging to better preserve the integrity of the product for a longer period of time. Rose hip oil is also supposedly more perishable of the facial oils.

Like other The Ordinary bottles, the pipette does not reach the bottom. Completely finishing the oil will be impossible. At least I won't be losing much in terms of cost?

lavlilacs Deciem The Ordinary 100% Organic Cold-Pressed Rose Hip Seed Oil swatch

Color, Texture, Finish, & Scent

Rose hip seed oil is bright yellow in color. The tinge doesn't show after my skin absorbs it all in. There is a scent but nothing overly floral. It also isn't very pleasant yet doesn't linger long.

I cannot even technically say the "formulation is runny" since this is 100% pure oil. But yes, rose hip seed oil is very runny. It will leak right out of the pipette without having to actually press to dispense the product. Because I don't always use a full dropper of oil every time I reach for this bottle, I have wasted many drops as I brought the pipette to my hand and as I tried to put the pipette back into the bottle. I have learned to have my hand, dropper, and bottle all very close together and speed is definitely key. Is there a better way to store and dispense oil products?

Since the oil is so thin in consistency, my skin soaks this up fairly quickly. Patting and pressing the oil in helps it absorb way better than to just lightly rub it in. After the rose hip seed oil does sink in there isn't a heavy or slick feel at all. It is slightly tacky but it doesn't translate to oiliness when I touch it or press a tissue against my face.

How I Apply

Mix // My preferred method. I'll add a few drops to moisturizer, sleeping mask, foundations, etc. Anything to shave off some waiting time between products is always a plus.

Direct application // I rub a few drops of oil between my hands and proceed to pat and press it onto my face. If I want to only target specific areas (patches of flakes or burns), then I will dab a drop of oil, spread it a little, then let it sit and adsorb on its own. Sometimes I use it after a moisturizer, sometimes I use it in place of one—it depends on how many product I have already applied.

Mask - Treatment // On rare occasions, I have used this as an overnight treatment for my scalp. I pump a whole pipette of the oil into my hands and run it right straight through the roots of my hair. With that amount of oil and the dirtiness of my scalp, the rose hip seed oil never sinks in. Washing after is a must.

lavlilacs Deciem The Ordinary 100% Organic Cold-Pressed Rose Hip Seed Oil specks

Thoughts & Recommendations

I thought a lot about whether to wait until I finished the entire bottle before sharing my thoughts. I have been using the rose hip seed oil for 5+ months now, so I feel like I have an okay understanding of how I like the product (even if I may not have seen the longer-term effects...yet. Fingers crossed).

The oil seems to help soften flakes and rough patches. Using it as a hair mask worked well for my dry flaking scalp too. It is important to note that this isn't a magical product in the sense the flakes will automatically be gone after one use. Flakes need to be exfoliated off and regularly!

As far as hydration and elasticity-wise, my skin has felt softer and more plump while using, but it is difficult to say if it is solely due to the oil or other new products I have introduced into my routine.

It is probably too early to see results for any reduction of scars, fine lines, and sun damage production. Those type of skin concerns usually is the most stubborn to tackle. As long as the rose hip seed oil doesn't break me out, which it didn't, I won't count slow-producing effects as a negative.

With that said...I have used the oil on burns (from hair tools and kitchen incidents) and it seems to help alleviate some of the pain and blisters quicker than when I don't.

One of the only things that bother me about this bottle of rose hip seed oil is the fact that weird plastic-like pills start to form around the opening and pipette pump after a while. I assume it is just the dried oil but why is it turning into something plastic-y? It is hard to clean off all the residue and the pills could fall into the bottle, increasing contamination if any.

Oils are good for all skin types. I can see people with oily skin liking rose hip seed oil more since it is so lightweight and sinks into the skin well. When I finish this, I wouldn't repurchase this exact item from The Ordinary. It isn't because I don't like using rose hip seed oil; I want to try some of the other oils they carry (marula and/or squalene to be exact). All the oils are supposed to help the skin in different ways but for me, they're all rich hydrators. Unless one completely blows my mind in terms of results I will try a few different varieties in the near future rather than stick to one. I like having a bottle of facial oil around nowadays just in case my skin needs the extra oomph or say if a new cream isn't as moisturizing as originally thought.

DIY Painted Hairpin Legs

Pinpointing exactly when I discovered hairpin legs is difficult. Sometime last year I became very invested in the idea of getting a custom desk done; I measured dimensions and even drew sketches. I liked the idea of having four posted legs instead of a layer of closed-off wood since my original IKEA desk had legs and table support which blocked off many of my electrical outlets.

The opportunity came to finally make this desk happen recently. Being the extra person that I am, sometimes often times, I became enamored with the idea of having white table legs instead of the raw metal look. The company I bought my hairpin legs from (DIY Hairpin Legs Co. not sponsored, but I wish...) does offer powder coated colored legs; it cost around $60 more to have it pre-colored. I was on a budget and an extra $60 seemed too pricey. Granted I am sure the quality of their paint job is eons better than what I could do and it would have saved a lot of waiting time.

lavlilacs DIY painted raw steel hairpin legs

Before I made the decision to DIY the painting, I tried to find as many tips as I could on blogs and forums. It was surprisingly difficult to find detailed How-Tos. Most posts I found just shared the photo of their beautifully painted hairpin/metal legs and just briefly mentions it was painted in so-and-so color. What prep is necessary? Sand or not sand? Prime or not prime? Paint with a brush or spray paint? I had too many questions!

Luckily, I was able to live chat with someone at the company I bought the hairpin legs from. He suggested that I first clean their raw steel legs with a degreaser because the raw steel variety comes with a light rust-resistant coating straight from the shop. Paint will not stick if not removed. He also said to scuff the cleaned metal with the included green side of the Scotchbrite pad. A non-smooth surface allows the paint to stick better as well. Apparently, past customers of theirs had great experiences with Rustoleum brand primers and paints. I was nervous about not using the right materials to prevent rust since the legs are raw steel.

lavlilacs DIY painted raw steel hairpin legs materials

Necessary Materials

Hairpin legs. Vinegar. Paper towels. Scrotchbrite pad. Maybe sandpaper. Spray primer. Spray paint in the desired color and finish. Spray clear coat in the desired finish. Respirator mask (not pictured but a must).

Recommended Materials

Googles or a not-important pair of old glasses for eyeglass wearers like myself.
Hat/hoodie to cover hair, gloves for hands, and long sleeves for excess skin (spray paint gets everywhere).

lavlilacs DIY painted raw steel hairpin legs cleaned

Since I am a very occasional DIYer, I was hesitant to buy a whole bottle of degreaser. My uncle, who is far more knowledgeable in construction-related things, told me regular vinegar should work just as well to remove the rust-resistant layer.

It took a lot of paper towels and manual polishing but vinegar got the job done: oily residue be gone. However! Despite going over the hairpin legs multiple times with fresh napkins, the paper towels always seemed to pick up a tiny bit more grease. At some point, I felt the rods with my bare hands and self-declared it clean enough.

lavlilacs DIY painted raw steel hairpin legs scuffed

The hairpin legs I used were raw steel, untreated in any sort of way and therefore could possibly rust. DIY Hairpin Legs Co. sends a kit with a bit of wax to coat the legs for the industrial metallic look. Painting the legs would theoretically also seal the legs in a sense that the raw metal isn't directly exposed to the elements.

If the legs are new and raw like mine was, only scuffing (lightly marking) is necessary after the cleaning process.

If the legs have been treated before with any kind of clear coating or paint, sanding with heavy grit sandpaper is a must prior to a wipe down of the dust.

lavlilacs DIY painted raw steel hairpin legs in progress 1

Rust is possible if any part of the raw steel is exposed. This meant that I had to paint every nook and cranny of the hairpin legs. Making sure every part of each rod was evenly covered in spray paint was a struggle—the rods are obviously rounded but they also have a small surface area and many tight spots.

Tip 1// Painting under direct sunlight helped shine a light on bald spots where any silver might be peeking through.

Tip 2// Paint in sections. I preferred to start with the top side of the L plate first (with paint and clear coat then let it fully dry for a few hours). Reason being? That is the side which will face the table top and be unnoticeable after it is secured screwed in. Therefore that face requires fewer coats of primer/paint/clear coat and equals less total drying time. After that side fully dried, I stood the legs up and painted and clear-coated all the rods.

Tip 3// Start your day early and reserve a good 2 to 3 nice-weather days to tackle this painting job. Spraying light layers of anything requires at least 30 minutes in between coats. I gave my legs a minimum of 3-4 coats of white paint and 3-4 coats of clear coating: 4 hours of just "in-between layers" waiting time just for the rod portion. It takes another 24+ hours after the final coat so everything can fully dry through (meaning accidentally scratches with your nail won't leave any marks in the paint). The spray paint is dry to the touch within 20-30 minutes after a layer but not resistant to nicks. Leaving extra waiting time for the paint to cure doesn't hurt.

**If touch-ups are needed, the total project time would be at least 5+ days. The spray cans I used suggests waiting a full 72 hours before reapplying once the shorter 30-90 minutes window has elapsed. Forums seem to say this is because the paint has a curing/drying period that chemicals inside will clash with. It is possible for new paint sprayed after 90 minutes but before the 72 hours passes to cause cracks and/or bubbles on the previous paint. If this makes any sense...

lavlilacs DIY painted raw steel hairpin legs in progress - importance of waiting

The above photo is the prime example of what happens when I didn't let the paint and clear coat fully dry through. I mistakenly assumed the paint was dried because I could run my fingers over it without smudging the paint or getting my hands dirty. I left that tester leg horizontally overnight and found it stuck to the kraft paper I laid it down on. By the time I removed the two, some of the paper was stuck on the leg and some of the paint ripped off as well.

Little nicks might not seem like much but it isn't just about aesthetics. I could have easily used this in a corner that faced a wall and never had to think about it twice. However! The thought of any exposed metal being prone to possible rusting had me worried. In the end, I chose to touch-up the bare spots with a little paint and clear coat.

lavlilacs DIY painted raw steel hairpin legs in progress 2

Painting the hairpin legs is just a small part of the mission. Sure it is difficult to get a hang of the spray cans and it overworks obscure muscles. The fumes from the spraying are also overwhelming. But the biggest challenge is the huge chunk of the time needed towards the waiting game. Once that part is over, I get some darn great looking table legs in return and $60 more in my wallet.

Here's to hoping I protected them well enough! No surface rust on my nice white hairpin legs pretty please.

23 Years Old Black Paint Rubar

lavlilacs 23 Years Old Black Paint Rubar review

Finding a product that helps with black- and whiteheads while being gentle sounds counterintuitive. Everything that targets those issues on the market is meant to either physically rip the clogged pores clear or chemically melt the oilies—no matter how effective both could be, they can still be harsh in their own ways.

23 Years Old's Black Paint Rubar claims to be just that with what is essentially their charcoal cleansing stick. The product promises to help with many common skin concerns but I have come to like it for reasons almost unrelated.

lavlilacs 23 Years Old Black Paint Rubar seal

WishTrend & 23Year Old's Description:

Made with an innovative, eco-friendly charcoal formula, the Black Paint Rubar is designed to eliminate blackheads and whiteheads by clearing dirt, oil, & impurities from the pores in just 30 seconds!

The Black Paint Rubar is a multi-stick designed with an eco-friendly gentle formula, effective in deep cleansing with a pore treatment to top it all off. Safe and gentle enough to use every day for a daily exfoliation and deep cleanse in just 30 seconds.

Good for
Blackhead & whitehead removal, dead skin removal, sebum control, & improving skin texture and bumpiness

Directions
1. Open the lid and twist the bottom to the right.
2. Apply the Black Paint Rubar directly onto wet skin and gently massage in a rolling motion.
*Tip: Massage with the cleansing stick. Leave on for 30 seconds.
3. Rinse well with lukewarm water.
4. After using, rinse off the excess serum on the stick with running water.

Ingredients
SODIUM MYRISTATE, SODIUM LAURATE, SODIUM PALMITATE, SODIUM STEARATE, GLYCERIN, DIPROPYLENE GLYCOL, BUTYLENE GLYCOL, CHARCOAL POWDER, LEMON FRAGRANCE OIL

*Some English infographics by 23 Years Old says the product has 2% charcoal content.

Cleanser 45 g

23pack (Brand's Korean e-commerce): ₩19,500
Wishtrend: USD $19.90
StyleKorean: USD $14.57
Sasa: USD $13.50-16.50 (price varies)
RoseRoseShop: USD $17.57

lavlilacs 23 Years Old Black Paint Rubar opened

Packaging

There isn't much to it. The charcoal stick comes in a twist-up plastic tube, which is housed in a (not very securely stuck on) sticker-sealed cardboard box.

Solid type cleansers (i.e. bars) have gained a little popularity recently but their lack of packaging often is the reason that keeps me from trying them. Thought 1: I need to free up a separate soap dish to hold and dry it. Thought 2: I have to remember to keep it well protected since it will most likely sit in the bathroom.

With stick type soaps though, the product is already protected in its own tube so the whole soap isn't wet until revealed. The included cap keeps the bad bacteria and germs that fly around the bathroom away from the exposed areas. It is also good for traveling since it isn't liquidy.

Color, Texture, & Scent

For those used to charcoal products, the Black Paint Rubar is no different in the sense that it swatches and lathers very gray and dark. Messy face washers may have to be more careful or else black soapy marks will be very often be all over the sink, counter, floor, and light-colored clothing.

Even though 23 Years Old describes it as an exfoliator of sorts, there are no abrasive particles in the stick. It is a smooth solid soap. The smell of the product took some time to adjust to; it smells very much like a bathroom cleaner/dishwashing liquid because of the lemony scent.

lavlilacs 23 Years Old Black Paint Rubar closeup

lavlilacs 23 Years Old Black Paint Rubar lather

How I Apply

Wet face with water. Swipe the Black Paint Rubar all over my face. (Sometimes leave it on for 30 seconds as recommended.) Lather and massage with hands to cleanse. Rinse with water.

Thoughts & Recommendations

To be honest, I was confused when I first discovered this product. The infographics describe it as an exfoliator/mask—apply, leave on, and rinse off to rid blackheads, whiteheads, sebum, and dead skin. Yet it looks so similar in packaging to cleansing sticks that are on the market (i.e. su:m37 and Neogen). It is even applied the same way—wet skin is necessary to spread the product around, plus it lathers.

Even the ingredients list suggests it is very much a bar soap with some charcoal mixed in. The list is short: just 9 ingredients; but 7 of the 9 are all bases found in typical soaps. CosDNA doesn't flag any of the product's components but I still prefer not use the Black Paint Rubar as a "mask" very often since soapy products tend to veer toward the drying side.

With that said...as a cleanser, I cannot believe how gentle and non-drying it is. I love to use this in the mornings particularly because my skin feels clean without being overly tight afterward. As an exfoliator (in the sense that it is supposed to be deep cleaning), I can't say if this is the item alone that gave me clearer skin. I have seen an improved skin texture and less black- and whiteheads, but I have also started using my Clarisonic regularly again. The cleanser doesn't physically feel as deep cleansing because of how gentle it is. I don't prefer to use this at night (especially if I wore makeup that day) because it doesn't remove cleansing oil residue and stray makeup too well.

pH levels in cleansers are a huge thing at the moment. I haven't found any info for this product nor do I have litmus paper to test it myself. Just from my own observations, I will just assume the Black Paint Rubar has a low pH since it isn't drying and I have never gotten the squeaky clean feeling from using this product.

Finding a cleanser that doesn't leave my skin parched but is still foamy is difficult. Now that I have found one, I am tempted to say I can't live without it. But knowing me it just makes me more curious to try other cleansing sticks. The gentleness of the cleanser would probably work even better as my skin adapts to the cooler and drier weather in New York. All skin types could benefit from a non-drying cleanser, but normal, oily, and combo skin types may like this more. Drier skin folks might need something with more hydrating ingredients (this has none). Then again cleanser is only on the face for a few minutes so that doesn't really matter too much. If the Black Paint Rubar did really help with my skin imperfections, wonderful and hallelujah!...It is just that my fondness for it right now isn't directly correlated to it.

August Haul

lavlilacs August 2017 haul - DIY Hairpin Legs

Here's something unusual for a haul post coming from me; it is not beauty related! Instead of the typical skincare and makeup items, I saved my money this month to purchase these pricey hairpin legs instead. I read a few blogs and compared a bunch of prices but ultimately decided to go with DIY Hairpin Legs purely for their customer service, speedy delivery record, and available promotional code.

Putting together a simple DIY desk has been on my wishlist for over a year, and still counting. It looks more promising now that I have the table legs on hand. I am a home DIY newbie and my dad isn't a great with wood, so the desk needs to be simple and easy to put together. What could be easier than attaching pre-made ready to use table legs to some plywood?

Once I really sat down to think about how I would use this desk and where it would sit in my room, I had a long list of questions that needed answering: leg strength, table top strength, table top warping, raw steel or painted, 2-rod or 3-rod legs, 3/8" or 1/2", etc. This is where DIY Hairpin Legs' customer service came in. I love e-commerce sites with Live Chat functions. When the representative was available, I received responses immediately. My concerns were all addressed and I received a lot of advice in return. Plus, they didn't try to upsell me at all. They do sell pricier, powder coated (pre-painted) hairpin legs yet I was consulting them on the best practice for DIY painting via spray can.

Finding out that past customers received their orders quickly and discovering a 10% off blog referral code were just icing on the cake with a cherry on top for the quality service. Sure, I may have been able to get cheaper legs off eBay or Amazon but I wouldn't have anyone to consult my possible project with. Once my questions were well answered, I felt a slight obligation/commitment to buy from them.

After a few days of thinking, I finalized on the 3-Rod hairpin legs at 28" tall and 1/2" rod width 4 piece set in the raw steel (un)finish. It was the cheapest choice for the sturdiest option since I plan to use it for a slightly larger than an average desk. It cost me $89.95 + shipping + 10% discount for the set of 4 legs.

lavlilacs August 2017 haul - DIY Hairpin Legs box tear

lavlilacs August 2017 haul - DIY Hairpin Legs box

True to the reviews, the box of hairpin legs arrived before the week was over. It was only in transit for about 2 business days where it traveled from Florida to New York. I am not sure where it went wrong but my box came completely battered and corners ripped. The legs burst their way through the tape like it was non-existent after I placed the box down inside. The steel rods must have been too heavy for the flimsy cardboard to handle. Luckily the small box of screws, wax, and Scotch-Brite pad wasn't lost and it wasn't raining much on the East coast the days the package traveled. Otherwise, premature rust could have been a real issue.

I haven't gotten to building the desk yet, as of today. I got verbal confirmation from my uncle (the actual handyman in my family) saying he would help me or do most of the work when his schedule frees up. Hopefully, that is sometime soon. I will try to photograph as much of the process as possible but it might not be very interesting since I only plan to place the legs on a piece of plywood.

Peachy Days

lavlilacs Middlefield, Connecticut Lyman Orchards peach tree

One area of food that I lack the most knowledge in is with fruits. Yes, the sweet and juicy, vitamin packed produce that mostly grows on trees. Why? Because I grew up eating a very limited variety of them all-year round. Thanks, uncommon allergies! Fruit seasons might as well not exist for me; otherwise, I would miss out on the chance to fill my daily sugar allowance with preferably natural ones.

This doesn't mean that the opportunity to go fruit picking doesn't still excite me. As long as it isn't pollination season and not departing for the farm at 6:30 AM on a hot summery day, I am far more willing to be outside in nature and farmland than just a few years earlier.  I might not be able to consume the fresh fruits but my allergies aren't so bad so I could still touch them and be fine.

lavlilacs Middlefield, Connecticut Lyman Orchards peach picking lavlilacs Middlefield, Connecticut Lyman Orchards nectarine closeup

Mid to late summer is, apparently, the perfect time for peaches and nectarines. I saw them more often in our fruit basket throughout July and August but didn't know if my mom had sudden cravings or sales were too good to resist, usually meaning it's their season and time to shine. It only clicked after the parentals said we were going on a peach picking day-trip. We joined a bus tour that brought everyone from New York City to Lyman Orchards in Middlefield, Connecticut.

lavlilacs Middlefield, Lyman Orchards peach trees

The orchard must be doing something right since they are celebrating their 276th year anniversary this year, 2017. Even though we went with a tour group, there were many families who drove to enjoy the day outdoors as well. It seems to be quite popular amongst the local state residents nearby.

Seeing the rows and rows, acres upon acres of the orchard is just breathtaking. Our bus only allotted enough time for peach picking, but the orchard had PYO peach, apple, and pears the day we went. Lyman's also has a nearby marketplace that sells fruits, baked goods, pantry items as well as BBQ sandwiches. For those looking for activities, the orchard has a golf course and sunflower/corn maze nearby. The maze seemed fun but the day we visited was a little too cloudless to bear the thought of potentially getting lost inside.

lavlilacs Middlefield, Connecticut Lyman Orchards white and yellow peaches lavlilacs Middlefield, Connecticut Lyman Orchards nectarine closeup 2

The director said that all picked fruit should be paid for first but I would say a majority of visitors had very generous samplings as they went on their picking frenzy. Staff weighs everyone's loot by the entrance/exit and the bags are paid per pound. I believe all peaches were ~$1.50/lb. (give or take) when we visited.

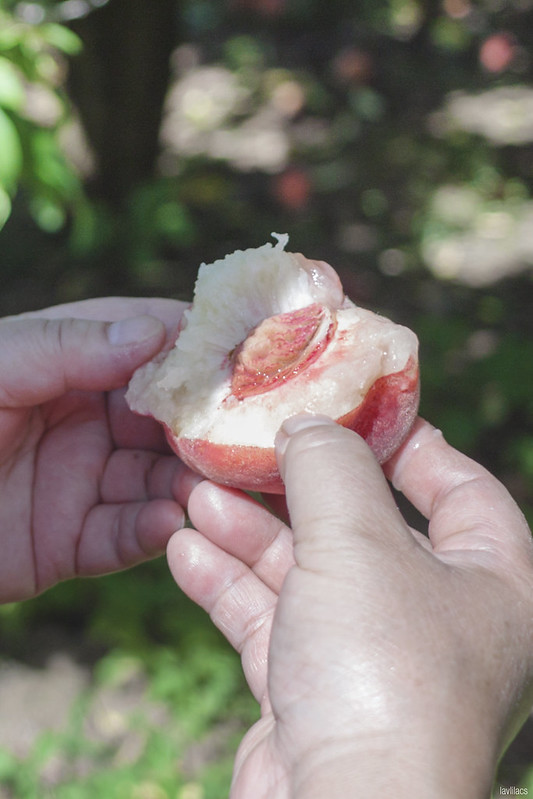
Lyman's has both white- and yellow-flesh peaches (furry) and the same for nectarines (smooth). Since I couldn't eat them, the differences between the variations that I knew were all superficial. Wiki does say the white ones are less acidic and sweeter. My mom recommended us to only pick and purchase firmer ones since these fruits ripen and soften even after picking. It is also wise to keep the peaches and nectarines well protected in the car ride home as any sudden thrashes will surely cause it to bruise.

My biggest regret is not purchasing one of their apple pies and peach crisps/cobblers. It is supposedly an award winning recipe. I got to taste their peach crisp a la mode at the marketplace and it was delish! If only I didn't buy it at the last minute and the bus wasn't on a schedule to leave. Bummer... Perhaps next time?

the SAEM Dear My Foot Power Peeling

lavlilacs the SAEM Dear My Foot Power Peeling Review

I may have unintentionally started a foot peeling mask series, well it was unintentional until the RoseRoseShop haul. The quest was never to try every version available on the market; my target was just to buy the most affordable yet effective version. It just so happened that I would find cheaper ones that were from a different brand. Even though they should theoretically all work the same, there is always the possibility that it might not...right?

the SAEM's Dear My Foot Power Peeling mask looks exactly like The Face Shop's and Etude House's peeling products: from where it is made, to the way everything is packaged, down to the directions. The only variance is in the ingredients list, yet even that is extremely similar. I had high expectations since I've seen success with something that is practically identical to it.

lavlilacs the SAEM Dear My Foot Power Peeling packaging - Korean and English ingredients, description, and directions

the SAEM's description:

A foot peeling mask infused with hero exfoliants like Salicylic Acid and cell turnover catalyst Lactic Acid. This foot mask powerfully peels away all your dead skin cells, revealing baby soft feet. Its citrus ingredients relax and rejuvenate your tired, stressed feet, while Olive and Argan oils moisturize ’til your soles are silky smooth.

Directions
1. Wear the foot sheet.
2. Cut the pouch along the dotted line and pour the contents (20 ml) along the lateral side of each foot sheet.
3. Tie the ankle area, fix the top of the ankle with the enclosed sticker, and wait until the contents are absorbed into the soles of the feet. (Recommended Time: 60~90 minutes.)
4. After the recommended time, take off the sheet, wash off any residue with water, and towel-dry the feet.
5. After 4~6 days of use, dead skin cells will naturally start to fall off. For softer, smoother feet, wait for the dead skin cells to peel off naturally.

Ingredients
SD ALCOHOL 40-B, WATER, LACTIC ACID, GLYCOLIC ACID, GLYCERIN, BUTYLENE GLYCOL, BETAINE, UREA, PEG-60 HYDROGENATED CASTOR OIL, SALICYLIC ACID, DISODIUM EDTA, ARGININE, CITRUS PARADISI (GRAPEFRUIT) FRUIT EXTRACT, ARGANIA SPINOSA KERNEL OIL, CHAMAECYPARIS OBTUSA WATER, OLEA EUROPAEA (OLIVE) FRUIT OIL, CITRUS AURANTIFOLIA (LIME) FRUIT EXTRACT, CITRUS AURANTIUM DULCIS (ORANGE) FRUIT EXTRACT, TOCOPHERYL ACETATE, CITRUS LIMON (LEMON) FRUIT EXTRACT, FRAGRANCE

the SAEM (USA): USD $11.49
the SAEM (Korean retail): ₩7,000
YesStyle: USD $8.90
Jolse: USD $10.48

lavlilacs the SAEM Dear My Foot Power Peeling - Before and After

With this kind of a result, a foot peeling mask series might be very redundant...At least I can gladly say the Dear My Foot Power Peeling works! (I saw that there were some Amazon reviewers who saw no results. I wonder what that could have been due to?)

lavlilacs the SAEM Dear My Foot Power Peeling box contents

Packaging

Like I mentioned earlier, the SAEM's version looks identical to the other road shop brands. The mask is sold with a pair of serum-filled pouches and two plastic booties packaged in a box.

the SAEM, unlike the TFS and Etude House, includes an extra pair of stickers to help tape down excess plastic bag. I found it to be very weak. Since I know the booties without a sticker works fine for me, I didn't bother to fix it. I would suggest using regular tape if your feet are on the smaller side.

lavlilacs the SAEM Dear My Foot Power Peeling socks

Ingredients

Again, the ingredients in this formulation are very very similar to the previous foot peels I have written about. The only things that are different are the order of ingredients and plus or minus some essential oils and extracts.

Color & Scent

The serum is colorless and relatively odorless (maybe slightly artificially fruity). I didn't experience any sensitivity to all the acids.

lavlilacs the SAEM Dear My Foot Power Peeling progression of peeling

Before

Soaked my feet for 30 minutes in water prior to soaking it for 90 minutes in the peeling serum.

Day 1-3

Saw no changes. Didn't do any extra soaking.

Day 4-6

Still did not do extra feet soaking. Started to see some peeling around the toes, then the balls of my feet.

Day 7-8

Started to get a little impatient and took extended showers (a night of shaving, a night of exfoliating, and a night or two of extra hair washes, etc.) to keep my feet wet a little longer—the skin peeling process sped up a lot as a result.

Day 9

Was pressed for time (had to go on an overnight trip with friends the next day). Soaked my feet for about an hour. When the peeling layer of skin got very soft, I pushed the tip of my nails to scrape/shovel the skin off. Most of it came off without any issues, but then there were stubborn patches and flakey bits that were very much still attached to my soles despite everything.

lavlilacs the SAEM Dear My Foot Power Peeling forced peeling

Thoughts & Recommendations

I can't remember the last time I did a foot peel without having (accidentally) heavily soaking and rubbing my feet with water shortly after beginning the exfoliation process. I forgot how slow it was for the skin to naturally detach itself just from daily showers alone. While the box says dead skin falls off naturally in 4-6 days, it took about 6-7 for the skin to very noticeably flake. When the skin is constantly soaked for a long time, dead skin starts to fall off around the earlier predicted date. It also completely finishes peeling a lot sooner. The whole process takes can take about 9-11 days depending on how much extra help is given, whether intentional or not.

Even though shoveling the skin off with my nails sped up the process, it definitely wasn't a definitive solution. Not everything wanted to come off. What was underneath the scraped areas wasn't as clean and smooth as places where the skin fell off on its own. But hey, it works in a pinch. I would only recommend doing this towards the end of the peeling cycle.

The most important conclusion is this stuff works. It isn't a miracle in the sense that ALL callouses and thicker skin are removed, but it gets pretty darn close! (HG status worthy. Is HG still a thing in the beauty blogging world?)

If bought in Korea, it costs the same as other brands so there is no debating or guessing—just get whatever is on sale or whatever shop you first see it in. If bought outside of Korea, pick whatever is cheapest.

Solar Eclipse

lavlilacs Solar Eclipse NYC 2017 peak, lens flare

It is difficult to not try and experience it myself when everyone hypes up the solar eclipse. New York City might not have been graced with the marvel of totality, but seeing what was the moon covering 70% of the sun was plenty spectacular. Standing outside while being surrounded by a large group of people all trying to catch a glimpse of something we normally cannot see and stare at an extraterrestrial object which we typically wouldn't dare look at—it was surreal.

lavlilacs Solar Eclipse NYC 2017 lens flares

I hadn't planned the actual viewing part of the solar eclipse. Even though I knew it would be extremely dangerous to look at with my bare eyeballs, I did not pre-purchase eclipse glasses or make a DIY contraption. I mostly went outside with the hope that some nice person could let me borrow their viewing device for a hot second.

lavlilacs Solar Eclipse NYC 2017 10 min past peak clouds

Thankfully, the phone's camera could catch the lens flares from the bright sunlight to give an indirect view of the eclipse. I heard someone say that even pointing the camera straight at the sun could potentially be harmful to both the phone and human eyes; whether I see any side effects remains unknown. It was still incredibly difficult to view through the mobile camera, let alone take a clear photo of it. (This involved max zooming, constant focus tapping, and speedy picture taking.)

lavlilacs Solar Eclipse NYC 2017 through eclipse glasses

Wonders of nature tends to bring humankind together—it isn't about you, me, him, or her specifically for that short period of time—just the sky, the clouds, the sun, and the moon. Complete strangers gather together. Selflessness and sharing spread in the air as a few pair of eclipse glasses passed around a sizeable group of people. Jaws dropped and admirable wows escaped, no matter young or old, as soon as the solar filters covered the eyes.

It felt completely different from the time I saw the super blood moon/lunar eclipse; I was not alone, it was not dark, and there was no chance of not being able to witness this natural event. I hear the next total solar eclipse viewable in the USA will be in 2024 (April 8th to be exact). I also hear parts of New York (far upstate) will get a chance to witness totality. Perhaps I should consider it as a bucket list item?